
Main Idea Anchor Chart: 4 Steps to Build One Today
Main Idea Anchor Chart: 4 Steps to Build One Today

Article by
Milo
ESL Content Coordinator & Educator
ESL Content Coordinator & Educator
All Posts
Why do your students still mix up the main idea with the theme? You taught the difference. They nodded along. Then the assessment came back and half the class identified the character's journey as the main idea again. A main idea anchor chart built the right way fixes this. But only if you move beyond definitions and get into the mechanics of how readers actually find the big picture.
You have seen the Pinterest-perfect charts with too many fonts and not enough strategy. Those look great for Open House. But they do not help a struggling reader working through a nonfiction paragraph about tornadoes or ancient civilizations. The chart you need lives in the sweet spot between reference tool and teaching method. It should guide students through the process, not just define the term.
This post walks through four concrete steps. You will choose the right graphic organizer for your grade level. You will pick mentor texts that actually clarify the concept. You will build the chart alongside your students using gradual release. You will use color coding to lock in the relationship between main ideas and supporting details. You will leave with a plan you can use during tomorrow's reading block. No artistic skills required.
Still grading everything by hand?
EMStudio is a free teaching management app — manage your classes, students, lessons, and more!
Learn More

Still grading everything by hand?
EMStudio is a free teaching management app — manage your classes, students, lessons, and more!
Learn More
Table of Contents
Before You Begin: Distinguishing Main Idea from Theme and Topic
Teachers often conflate these three concepts when teaching main idea. Your main idea anchor chart won't help if kids cannot tell the difference between what the story is about and what it means. Before you start, you need to know exactly what you are targeting. Use The Three Little Pigs as your baseline mentor text. It is familiar, short, and makes the distinctions obvious. You will return to this example when students get stuck later.
Concept | Definition | Three Little Pigs Example | How Students Confuse Them |
|---|---|---|---|
Topic | The subject, stated in 1-2 words | pigs building houses | Students write "The Big Bad Wolf" instead of the subject matter |
Main Idea | The specific message about the topic | planning carefully prevents disaster | Students list plot details like "The wolf keeps trying to trick the pigs" rather than the central message |
Theme | Universal life lesson applicable beyond the text | hard work leads to success | Students name the topic ("pigs") or a specific event instead of the broader truth |
Notice the specificity in the main idea. It mentions planning, which happens only in this story. The theme could apply to a biography of Michael Jordan or a science unit on plant growth. That transferability is the test. If a student suggests "The Big Bad Wolf" as the main idea, they are naming a character, not a message. If they say "The wolf keeps trying to trick the pigs," they are summarizing plot, not stating the central message. Both errors require different corrections.
If you suspect confusion, use the sentence stem test. Ask a student what the text is about. If they answer "It's about [topic]," they have the topic. If they say "The author wants us to know that [main idea]," they grasp the main idea. If they offer "The lesson is always [theme]," they found the theme. This diagnostic takes thirty seconds. It prevents you from reteaching what they already know. It also reveals whether they are mixing up key details with the central message. Watch for kids who describe the wolf's actions when you asked for the lesson.
Match your target to developmental readiness. Kindergarteners and first graders need topic only. Identifying "pigs" or "houses" builds early reading comprehension without overwhelming them. Second and third graders can handle main idea with explicit texts. Wait until fourth grade or higher for theme. Abstract thinking requires cognitive maturity that seven-year-olds rarely possess. Never teach all three simultaneously to struggling readers. It overloads working memory and kills confidence. Build these foundational reading comprehension strategies through gradual release, one layer at a time. When you move to graphic organizers in the next step, this foundation determines whether the tool helps or becomes busywork.
Step 1 — Select the Appropriate Graphic Organizer Format for Your Students
Don't pick graphic organizers because they look cute on Pinterest. Match the format to how your students actually think. Visual learners need spatial organization. Analytical thinkers need categories. Sequential processors need flow logic.
You have three options. The Bubble Map works for grades 2-3 and takes 15 minutes—perfect for single texts. The Table Method suits grades 3-5, needs 20 minutes, and handles text comparisons. The Flow Chart fits grades 4-6, runs 25 minutes, and preps kids for standardized tests. Choose based on processing style first, grade level second.
The Bubble Map Method for Visual Learners
Grab chart paper and a blue marker. Draw a 12-inch circle in the center labeled "What the author wants us to know." This is your main idea anchor chart centerpiece. Sketch 4 to 6 smaller bubbles around it, each 4 inches across. Connect them with lines to show relationships.
I used this last October with "The Giving Tree." The center bubble read "Generosity brings mixed rewards" in blue. Surrounding yellow bubbles held specific gifts: apples, shade, trunk, and stump. The spatial layout mirrors how visual processors store information in clusters rather than lists.
Add a small umbrella icon in the center and raindrops in the detail bubbles. This reinforces that details fall under the main idea's protection. Visual learning techniques for the classroom help 2nd graders see relationships they completely miss when scanning linear text. When I introduced the umbrella metaphor, three students who had struggled all week suddenly nodded. They needed to see the coverage, not just hear about it.
The Table Method for Analytical Thinkers
Draw a two-column chart on whiteboard or paper. Label the left "Main Idea Statement" and the right "Proof from the Text." Create four rows. This structure forces analytical thinkers to categorize evidence against claims.
Use this when comparing two articles about honeybees in grades 3-5. Left column entries must follow the formula: [Topic] + [What the author says about it]. Right columns need direct quotes with page numbers. One column teaches paraphrasing. The other teaches exact quotation.
Students see the difference immediately. The rigid structure supports reading comprehension by making abstract concepts concrete and sortable. When a student writes just "Honeybees" in the left column, you point to the formula reminder. They quickly revise to "Honeybees face danger from pesticides." Kids who love sorting baseball cards excel at sorting facts here. Last spring, my analytical thinkers finally stopped confusing topic with theme when they had separate bins for each. The table gave them permission to organize instead of memorize.
The Flow Chart for Sequential Processing
Draw a vertical flow chart with diamond-shaped decision boxes. First diamond asks: "Is this the big idea or a small detail?" If it's a detail, draw an arrow to an "Evidence Box." If it's the big idea, arrow to "Main Idea Statement." This logic flow matches how sequential processors think.
This format works best for grades 4-6 during standardized test prep. Add the "5-Word Rule" at the bottom. Tell students: "If you can cross out 5 words and still understand the sentence, it's probably a detail, not the main idea."
Write an example sentence in red marker. Cross out five words to demonstrate. I use: "The large brown dog ran quickly across the street" becomes "The dog ran across the street." This strategy for teaching main idea works particularly well for standardized test prep when students need step-by-step protocols. The gradual release starts with you modeling the first diamond, then guiding pairs through the second, finally releasing them to work independently. Sequential processors finally have a roadmap for distinguishing central message from noise.

Step 2 — How Do You Choose Mentor Texts That Clarify Main Idea?
Choose mentor texts with Lexile levels 100-150 points below independent reading level, explicit main ideas in the first or last paragraph, and familiar topics like animals or school. Avoid ambiguous texts with multiple valid interpretations during initial instruction. Select from leveled series like National Geographic Kids or Step Into Reading.
You cannot teach main idea with confusing books. Start with texts that state the point plainly. Your students need to find the central message without wrestling with abstract themes.
When teaching main idea and details, cognitive load matters. Select mentor texts measuring 100 to 150 Lexile points below students' independent reading level. This gap improves reading comprehension by ensuring they decode words automatically while focusing mental energy on identifying the central message.
Match your selections to grade-level bands. Second graders need texts between 150L and 400L. Third grade spans 300L to 500L. Fourth graders handle 500L to 700L, while fifth graders manage 600L to 800L. Verify fit using the 5-Finger Rule on a 100-word sample. Students should miss no more than one word.
Fiction Texts with Explicit Main Ideas
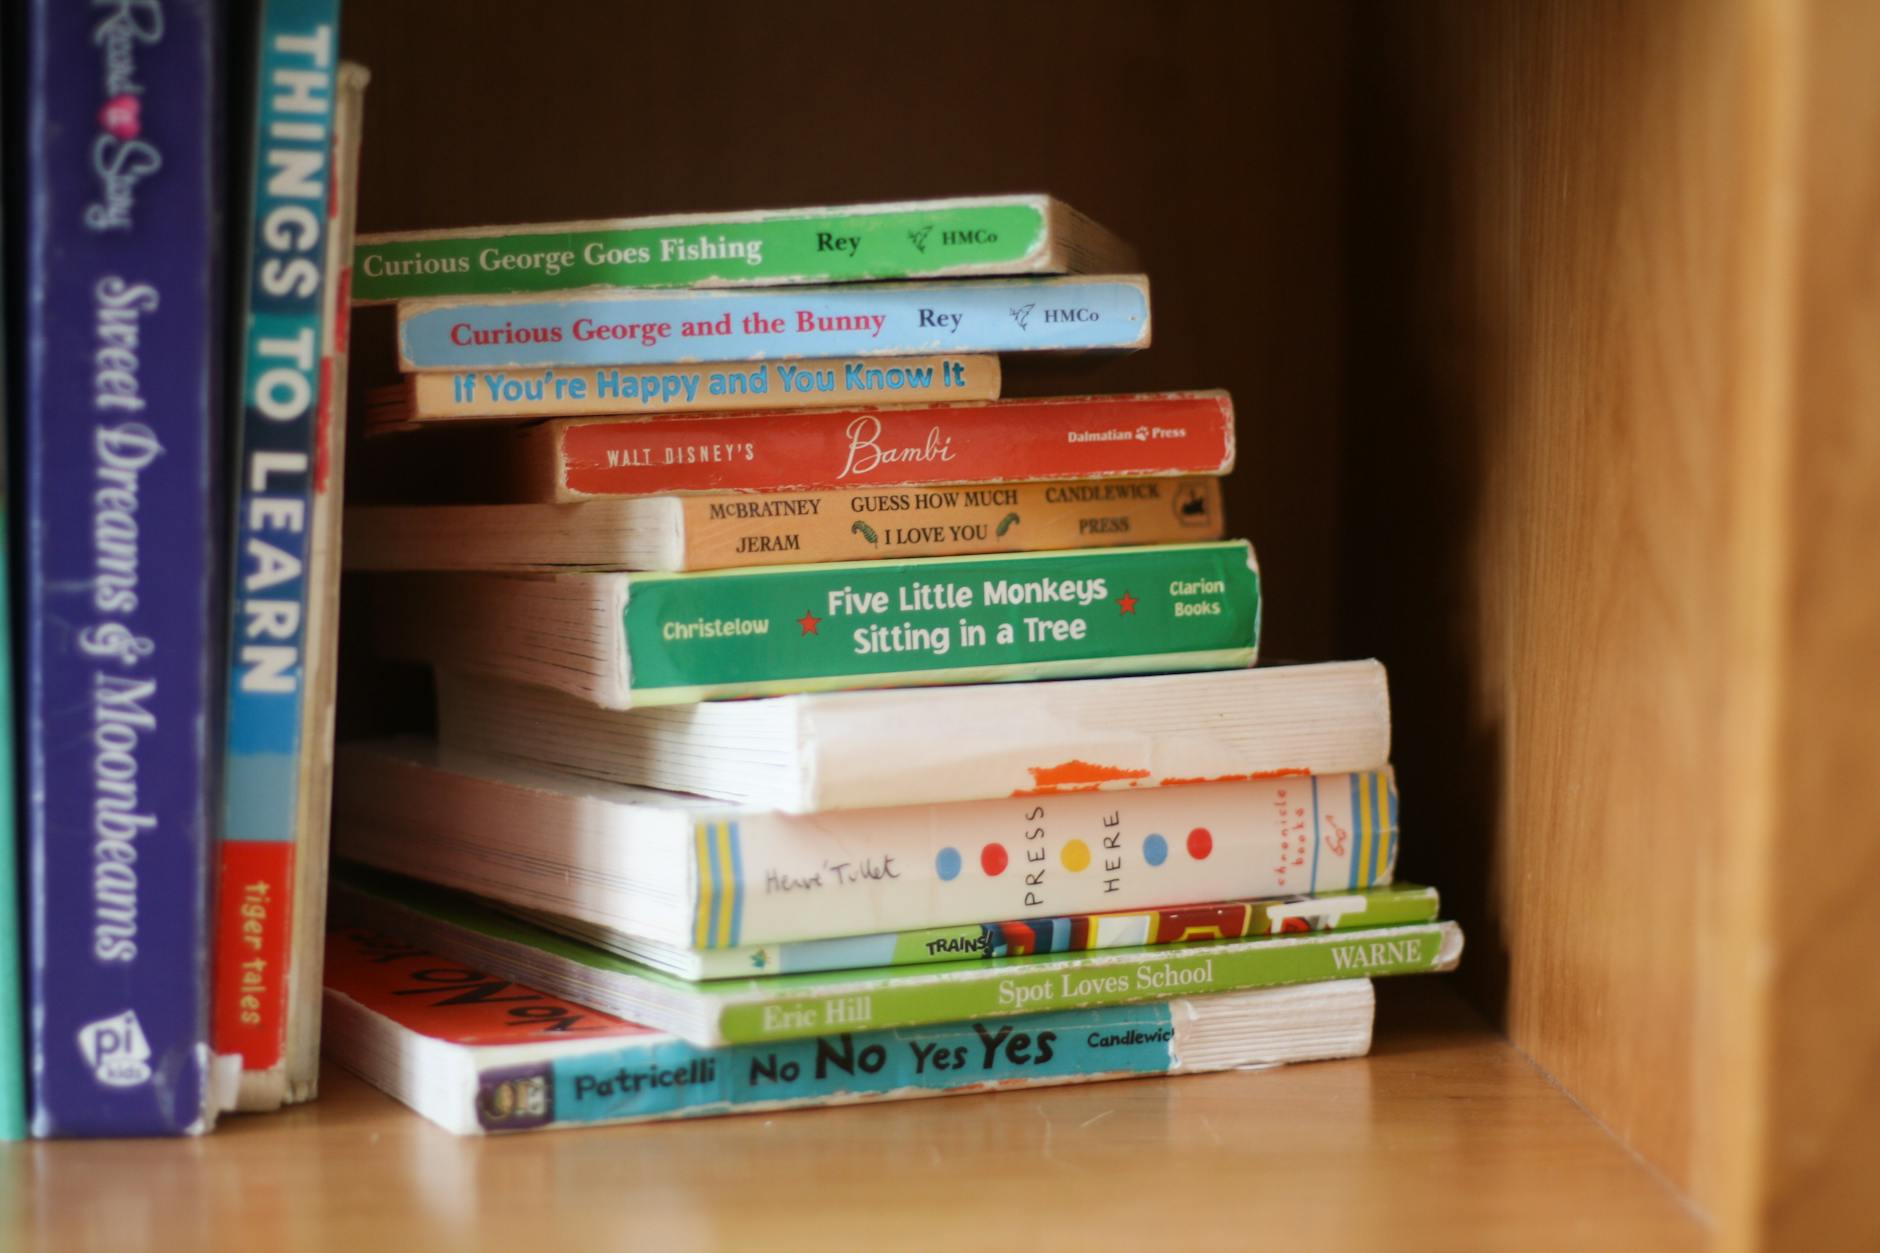
Crow Boy by Taro Yashima (600L) works perfectly for your collection of high-quality picture books for classroom libraries. The central message appears explicitly: a quiet boy possesses special talents others overlook until someone recognizes them. The Giving Tree by Shel Silverstein (530L) offers similar clarity.
Skip Where the Wild Things Are for now. The main idea remains too abstract for initial instruction. Students struggle to articulate that imagination helps process anger. Instead, use A Chair for My Mother by Vera B. Williams (650L). The text states the message directly: the family saves money to buy a comfortable chair after a fire. You can point to the exact sentence.
Informational Texts with Clear Topic Sentences
National Geographic Kids readers like Swing Sloth! (400L) provide ideal structure for teaching main idea and details. The topic sentence appears explicitly in the first two sentences or the final sentence. Avoid articles burying the central message in the middle paragraphs.
Time for Kids articles under 300 words work well for grades three through five. They follow predictable patterns: general statement first, specific details second. Students recognize the blueprint quickly.
Try Owls by Gail Gibbons (580L). The opening sentence states: "Owls are birds of prey that hunt at night." This is your main idea. Supporting details follow about feathers, eyes, and nesting. Have students highlight that first sentence in blue immediately. It becomes the foundation sentence for your main idea anchor chart. When students see how the author placed the key concept right at the start, they learn to scan strategically.
Differentiating Text Complexity by Grade Level
For readers below the 50th percentile, use texts with one-to-one picture-to-text correlation. Keep total word count between 100 and 150 words. Look for repetitive sentence structures like "Bees are insects. Bees can fly. Bees make honey." The Rookie Read-About Science series fits this mold perfectly. These books build confidence while clarifying the concept of key details supporting a central topic.
For advanced readers above the 80th percentile, shift to implicit main ideas requiring inference. The Tree Lady by H. Joseph Hopkins (710L) works well here. The text never states directly that Kate Sessions transformed San Diego. Students must infer this from details about her planting trees in a dry city. Reserve these texts for later in your unit, after students grasp explicit identification. Start with the concrete before moving to abstract interpretation.
Step 3 — Co-Construct the Chart Using the Gradual Release of Responsibility
The I Do Phase: Modeling Your Thinking Aloud
Spread this work across three days. You cannot rush gradual release. Block ten to fifteen minutes for I Do, fifteen to twenty for We Do, and ten to fifteen for You Do. Stand to the left of the chart so students track your eyes left-to-right. Write three think-aloud stems in red marker down the side margin: "I notice the character keeps..." "This makes me think the author wants us to know..." "This detail connects to the title because..." Red signals "teacher talk" and keeps your modeling tight.
Start with the header formula: [Book Title] + Main Idea + Details. For Crow Boy, write: "Crow Boy: What is the author telling us about being different?" Leave the center empty. That space is reserved for the central message. Open the book and think aloud: "I see Chibi is walking to school alone every day." Write that detail on the chart. "The author might be showing us that Chibi is persistent. I'll write that as a possible main idea in the center." Circle the word possible. After you confirm with text evidence, cross it out. This shows revision in real time.
The We Do Phase: Collaborative Annotation
This happens on day two. Hand out 3x3 sticky notes—blue for main idea, yellow for key details. Place five students at the chart to place notes while others work at desks. Use the "Give One, Get One" protocol: a student places a detail note, reads it aloud, and the class chorally responds, "That proves the main idea because..." This keeps every voice active, not just the five at the front leaning on the whiteboard tray.
Follow the co-construction rule: do not write the main idea statement until three or four students have placed yellow detail notes. Point to the cluster and ask, "Do all these yellow notes fit under one blue umbrella? What is that umbrella called?" When they say the main idea, pick up the blue marker. You write the final statement while they watch. This mimics explicit direct instruction models—teacher control fades only after students show readiness.
The You Do Phase: Independent Application
Finish on day three with ten to fifteen minutes of quiet work. Slide a 4x6 index card to each student with a four-step checklist: read the title and headings, ask "What is the author teaching me about [topic]?", write the main idea in blue on a personal sticky note, find three details that match and write them in yellow. These cards travel to their book boxes for the week. They need these graphic organizers in hand, not on a screen, when they apply this to new mentor texts.
Students place their sticky notes on a blank main idea anchor chart at the back of the room. Set a timer for ten minutes and circulate. Success criteria is strict: the main idea uses ten words or fewer, all three details explicitly support it, and no plot summary sentences appear. If you see "Chibi walked to school," cross it out. That is what happened. You want why it matters. This final check ensures teaching main idea sticks before you move on.

Step 4 — Connect Main Idea to Supporting Details Using Color Coding
Color turns abstract concepts into concrete anchors. Assign blue to the main idea—the umbrella that covers everything. Use yellow for key details, the raindrops that fall under that umbrella. For fourth grade and up, add green for direct evidence quotes pulled straight from the text. Grab Crayola Super Tips markers or gentle highlighters for this work. Skip the neon shades; they fatigue young eyes and make the chart hard to read from the back row.
This three-color system transforms your main idea anchor chart into a visual argument. Students learn that blue statements must be defended by yellow details, which in turn rest on green evidence. When Maria points to the blue strip reading "Owls are nocturnal hunters" and matches it to the yellow detail "They hunt at night," she sees the logic chain. The colors do the teaching.
Introduce the Prove It strategy as a physical routine. Step one: point to the main idea on the chart. Step two: point to the matching sentence in the book. Step three: say "This proves it because..." and explain the connection. This protocol bridges the gap between recognizing details and using evidence to back up arguments in their own writing.
Teaching the Prove It Evidence Strategy
Give students the exact words to articulate their thinking. Write this sentence stem across the bottom third of your chart using green marker: "The text says [quote], which proves [main idea] because [explanation]." This formula lives permanently on the anchor chart, giving hesitant speakers a script and advanced writers a structure to exceed.
Model the strategy with a familiar mentor text about owls. Write the main idea in blue: "Owls are nocturnal hunters." Below it, place the green evidence: "On page 3, it says, 'Owls hunt at night when it is dark.'" Verbalize the connection using the stem: "This proves owls hunt at night because it states the exact time they look for food." Watch students nod when they see the text words mirrored in your explanation.
Practice this routine daily during your first week teaching main idea and details. Call three students to the chart during morning meeting. Each child points to the blue umbrella, finds the matching yellow raindrop in their book, and completes the stem. By Friday, they will complete the phrase without your prompting. The gradual release ends with them working independently while you observe.
Creating Interactive Sticky Note Extensions
Static charts die on the wall. Attach 3x3 sticky notes to your chart using looped masking tape or Velcro dots. Create a Parking Lot section at the bottom where students add new examples during literacy centers. When Javier finds a detail about owl feathers in his independent reading book, he writes it on a yellow sticky and parks it in the lot. Replace these examples weekly to keep the content current and connected to your latest mentor texts.
This approach builds reading comprehension through peer contribution. Students hunt for evidence knowing their find might make the chart. The Parking Lot becomes a competitive gallery where kids try to stump each other with obscure details from their leveled readers. You will see them checking the central message display during writing workshop, stealing sentence structures for their own graphic organizers.
Protect your work without killing the interactivity. Laminate the chart after initial construction, but leave the Parking Lot section unlaminated. Use wet-erase markers on the laminated portions for the permanent umbrella and raindrops; they wipe clean for reuse year after year. The unlaminated bottom remains porous for sticky notes. This hybrid approach saves you from rebuilding the key details display every August while preserving the hands-on element that makes the chart memorable.
Troubleshooting: Why Your Main Idea Anchor Chart Isnt Improving Comprehension
When Students Confuse Main Idea with Summary
If your students hand you chronological retellings—"First the pig built a straw house, then the wolf came"—they are summarizing, not identifying the main idea. They are tracking plot, not the author's point. Cover your main idea anchor chart and ask: "If you had ten seconds to tell a friend what this book is about, what would you say?" The answer reveals whether they grasp the central message or just remember sequence.
Main idea is one sentence about the author's point. A summary is three to five sentences covering beginning, middle, and end. Draw a T-Chart on your troubleshooting paper showing both side by side using the same mentor text. On the left, write the summary using "Somebody Wanted But So Then." On the right, write "Topic + Author's Point." Never teach both formulas on the same day; it overloads working memory and kills reading comprehension gains.
Check fluency before deploying these strategies for teaching main idea. If students decode below ninety words per minute, they cannot spare the cognitive load for identifying key details. Focus on fluency first. Once they hit the Hasbrouck and Tindal norms, return to these higher order thinking skills.
Fixing Charts That Become Wall Decor Instead of Tools
If no student has touched your chart in three days, it is failing. It has become wallpaper. Conduct a "Chart Autopsy." Ask your class: "When did you last use this? What confused you?" Rewrite the main idea statement together using simpler vocabulary. Add an "Anchor Chart Use Log" beside it where students sign their names when they reference the tool, and introduce hand signals: thumbs up means "I found the main idea."
Physical placement determines whether graphic organizers become tools or decorations. Charts must sit within twenty-four inches of students' seated eye level for grades two through three, and never more than ten feet from the classroom library. If you mounted it above the whiteboard or across the room, move it now. Measure from the floor to the bottom edge of the paper.
Revive the tool with effective classroom procedures. When students gesture toward the chart during discussions or reference the log during independent reading, you know your gradual release is finally working.

Put Main Idea Anchor Chart to Work Tomorrow
You have the steps. You know the difference between topic and theme. Now pick one graphic organizer that fits your current unit and draw it on chart paper before you leave school today. Do not wait for the perfect mentor text or the perfect markers. A messy chart built with your students beats a pristine poster you bought online every time.
Remember that reading comprehension improves when kids see their own thinking made visible. The color coding, the crossed-out false main ideas, the sticky notes stacked in the margin—those marks show the struggle. They prove that finding the central message takes work, not magic.
Open your plan book right now. Find tomorrow's read-aloud. Draw a simple T-chart with "Main Idea" on the left and "Key Details" on the right. Leave the rest blank. That empty space is where the learning happens.
Before You Begin: Distinguishing Main Idea from Theme and Topic
Teachers often conflate these three concepts when teaching main idea. Your main idea anchor chart won't help if kids cannot tell the difference between what the story is about and what it means. Before you start, you need to know exactly what you are targeting. Use The Three Little Pigs as your baseline mentor text. It is familiar, short, and makes the distinctions obvious. You will return to this example when students get stuck later.
Concept | Definition | Three Little Pigs Example | How Students Confuse Them |
|---|---|---|---|
Topic | The subject, stated in 1-2 words | pigs building houses | Students write "The Big Bad Wolf" instead of the subject matter |
Main Idea | The specific message about the topic | planning carefully prevents disaster | Students list plot details like "The wolf keeps trying to trick the pigs" rather than the central message |
Theme | Universal life lesson applicable beyond the text | hard work leads to success | Students name the topic ("pigs") or a specific event instead of the broader truth |
Notice the specificity in the main idea. It mentions planning, which happens only in this story. The theme could apply to a biography of Michael Jordan or a science unit on plant growth. That transferability is the test. If a student suggests "The Big Bad Wolf" as the main idea, they are naming a character, not a message. If they say "The wolf keeps trying to trick the pigs," they are summarizing plot, not stating the central message. Both errors require different corrections.
If you suspect confusion, use the sentence stem test. Ask a student what the text is about. If they answer "It's about [topic]," they have the topic. If they say "The author wants us to know that [main idea]," they grasp the main idea. If they offer "The lesson is always [theme]," they found the theme. This diagnostic takes thirty seconds. It prevents you from reteaching what they already know. It also reveals whether they are mixing up key details with the central message. Watch for kids who describe the wolf's actions when you asked for the lesson.
Match your target to developmental readiness. Kindergarteners and first graders need topic only. Identifying "pigs" or "houses" builds early reading comprehension without overwhelming them. Second and third graders can handle main idea with explicit texts. Wait until fourth grade or higher for theme. Abstract thinking requires cognitive maturity that seven-year-olds rarely possess. Never teach all three simultaneously to struggling readers. It overloads working memory and kills confidence. Build these foundational reading comprehension strategies through gradual release, one layer at a time. When you move to graphic organizers in the next step, this foundation determines whether the tool helps or becomes busywork.
Step 1 — Select the Appropriate Graphic Organizer Format for Your Students
Don't pick graphic organizers because they look cute on Pinterest. Match the format to how your students actually think. Visual learners need spatial organization. Analytical thinkers need categories. Sequential processors need flow logic.
You have three options. The Bubble Map works for grades 2-3 and takes 15 minutes—perfect for single texts. The Table Method suits grades 3-5, needs 20 minutes, and handles text comparisons. The Flow Chart fits grades 4-6, runs 25 minutes, and preps kids for standardized tests. Choose based on processing style first, grade level second.
The Bubble Map Method for Visual Learners
Grab chart paper and a blue marker. Draw a 12-inch circle in the center labeled "What the author wants us to know." This is your main idea anchor chart centerpiece. Sketch 4 to 6 smaller bubbles around it, each 4 inches across. Connect them with lines to show relationships.
I used this last October with "The Giving Tree." The center bubble read "Generosity brings mixed rewards" in blue. Surrounding yellow bubbles held specific gifts: apples, shade, trunk, and stump. The spatial layout mirrors how visual processors store information in clusters rather than lists.
Add a small umbrella icon in the center and raindrops in the detail bubbles. This reinforces that details fall under the main idea's protection. Visual learning techniques for the classroom help 2nd graders see relationships they completely miss when scanning linear text. When I introduced the umbrella metaphor, three students who had struggled all week suddenly nodded. They needed to see the coverage, not just hear about it.
The Table Method for Analytical Thinkers
Draw a two-column chart on whiteboard or paper. Label the left "Main Idea Statement" and the right "Proof from the Text." Create four rows. This structure forces analytical thinkers to categorize evidence against claims.
Use this when comparing two articles about honeybees in grades 3-5. Left column entries must follow the formula: [Topic] + [What the author says about it]. Right columns need direct quotes with page numbers. One column teaches paraphrasing. The other teaches exact quotation.
Students see the difference immediately. The rigid structure supports reading comprehension by making abstract concepts concrete and sortable. When a student writes just "Honeybees" in the left column, you point to the formula reminder. They quickly revise to "Honeybees face danger from pesticides." Kids who love sorting baseball cards excel at sorting facts here. Last spring, my analytical thinkers finally stopped confusing topic with theme when they had separate bins for each. The table gave them permission to organize instead of memorize.
The Flow Chart for Sequential Processing
Draw a vertical flow chart with diamond-shaped decision boxes. First diamond asks: "Is this the big idea or a small detail?" If it's a detail, draw an arrow to an "Evidence Box." If it's the big idea, arrow to "Main Idea Statement." This logic flow matches how sequential processors think.
This format works best for grades 4-6 during standardized test prep. Add the "5-Word Rule" at the bottom. Tell students: "If you can cross out 5 words and still understand the sentence, it's probably a detail, not the main idea."
Write an example sentence in red marker. Cross out five words to demonstrate. I use: "The large brown dog ran quickly across the street" becomes "The dog ran across the street." This strategy for teaching main idea works particularly well for standardized test prep when students need step-by-step protocols. The gradual release starts with you modeling the first diamond, then guiding pairs through the second, finally releasing them to work independently. Sequential processors finally have a roadmap for distinguishing central message from noise.
Step 2 — How Do You Choose Mentor Texts That Clarify Main Idea?
Choose mentor texts with Lexile levels 100-150 points below independent reading level, explicit main ideas in the first or last paragraph, and familiar topics like animals or school. Avoid ambiguous texts with multiple valid interpretations during initial instruction. Select from leveled series like National Geographic Kids or Step Into Reading.
You cannot teach main idea with confusing books. Start with texts that state the point plainly. Your students need to find the central message without wrestling with abstract themes.
When teaching main idea and details, cognitive load matters. Select mentor texts measuring 100 to 150 Lexile points below students' independent reading level. This gap improves reading comprehension by ensuring they decode words automatically while focusing mental energy on identifying the central message.
Match your selections to grade-level bands. Second graders need texts between 150L and 400L. Third grade spans 300L to 500L. Fourth graders handle 500L to 700L, while fifth graders manage 600L to 800L. Verify fit using the 5-Finger Rule on a 100-word sample. Students should miss no more than one word.
Fiction Texts with Explicit Main Ideas
Crow Boy by Taro Yashima (600L) works perfectly for your collection of high-quality picture books for classroom libraries. The central message appears explicitly: a quiet boy possesses special talents others overlook until someone recognizes them. The Giving Tree by Shel Silverstein (530L) offers similar clarity.
Skip Where the Wild Things Are for now. The main idea remains too abstract for initial instruction. Students struggle to articulate that imagination helps process anger. Instead, use A Chair for My Mother by Vera B. Williams (650L). The text states the message directly: the family saves money to buy a comfortable chair after a fire. You can point to the exact sentence.
Informational Texts with Clear Topic Sentences
National Geographic Kids readers like Swing Sloth! (400L) provide ideal structure for teaching main idea and details. The topic sentence appears explicitly in the first two sentences or the final sentence. Avoid articles burying the central message in the middle paragraphs.
Time for Kids articles under 300 words work well for grades three through five. They follow predictable patterns: general statement first, specific details second. Students recognize the blueprint quickly.
Try Owls by Gail Gibbons (580L). The opening sentence states: "Owls are birds of prey that hunt at night." This is your main idea. Supporting details follow about feathers, eyes, and nesting. Have students highlight that first sentence in blue immediately. It becomes the foundation sentence for your main idea anchor chart. When students see how the author placed the key concept right at the start, they learn to scan strategically.
Differentiating Text Complexity by Grade Level
For readers below the 50th percentile, use texts with one-to-one picture-to-text correlation. Keep total word count between 100 and 150 words. Look for repetitive sentence structures like "Bees are insects. Bees can fly. Bees make honey." The Rookie Read-About Science series fits this mold perfectly. These books build confidence while clarifying the concept of key details supporting a central topic.
For advanced readers above the 80th percentile, shift to implicit main ideas requiring inference. The Tree Lady by H. Joseph Hopkins (710L) works well here. The text never states directly that Kate Sessions transformed San Diego. Students must infer this from details about her planting trees in a dry city. Reserve these texts for later in your unit, after students grasp explicit identification. Start with the concrete before moving to abstract interpretation.
Step 3 — Co-Construct the Chart Using the Gradual Release of Responsibility
The I Do Phase: Modeling Your Thinking Aloud
Spread this work across three days. You cannot rush gradual release. Block ten to fifteen minutes for I Do, fifteen to twenty for We Do, and ten to fifteen for You Do. Stand to the left of the chart so students track your eyes left-to-right. Write three think-aloud stems in red marker down the side margin: "I notice the character keeps..." "This makes me think the author wants us to know..." "This detail connects to the title because..." Red signals "teacher talk" and keeps your modeling tight.
Start with the header formula: [Book Title] + Main Idea + Details. For Crow Boy, write: "Crow Boy: What is the author telling us about being different?" Leave the center empty. That space is reserved for the central message. Open the book and think aloud: "I see Chibi is walking to school alone every day." Write that detail on the chart. "The author might be showing us that Chibi is persistent. I'll write that as a possible main idea in the center." Circle the word possible. After you confirm with text evidence, cross it out. This shows revision in real time.
The We Do Phase: Collaborative Annotation
This happens on day two. Hand out 3x3 sticky notes—blue for main idea, yellow for key details. Place five students at the chart to place notes while others work at desks. Use the "Give One, Get One" protocol: a student places a detail note, reads it aloud, and the class chorally responds, "That proves the main idea because..." This keeps every voice active, not just the five at the front leaning on the whiteboard tray.
Follow the co-construction rule: do not write the main idea statement until three or four students have placed yellow detail notes. Point to the cluster and ask, "Do all these yellow notes fit under one blue umbrella? What is that umbrella called?" When they say the main idea, pick up the blue marker. You write the final statement while they watch. This mimics explicit direct instruction models—teacher control fades only after students show readiness.
The You Do Phase: Independent Application
Finish on day three with ten to fifteen minutes of quiet work. Slide a 4x6 index card to each student with a four-step checklist: read the title and headings, ask "What is the author teaching me about [topic]?", write the main idea in blue on a personal sticky note, find three details that match and write them in yellow. These cards travel to their book boxes for the week. They need these graphic organizers in hand, not on a screen, when they apply this to new mentor texts.
Students place their sticky notes on a blank main idea anchor chart at the back of the room. Set a timer for ten minutes and circulate. Success criteria is strict: the main idea uses ten words or fewer, all three details explicitly support it, and no plot summary sentences appear. If you see "Chibi walked to school," cross it out. That is what happened. You want why it matters. This final check ensures teaching main idea sticks before you move on.
Step 4 — Connect Main Idea to Supporting Details Using Color Coding
Color turns abstract concepts into concrete anchors. Assign blue to the main idea—the umbrella that covers everything. Use yellow for key details, the raindrops that fall under that umbrella. For fourth grade and up, add green for direct evidence quotes pulled straight from the text. Grab Crayola Super Tips markers or gentle highlighters for this work. Skip the neon shades; they fatigue young eyes and make the chart hard to read from the back row.
This three-color system transforms your main idea anchor chart into a visual argument. Students learn that blue statements must be defended by yellow details, which in turn rest on green evidence. When Maria points to the blue strip reading "Owls are nocturnal hunters" and matches it to the yellow detail "They hunt at night," she sees the logic chain. The colors do the teaching.
Introduce the Prove It strategy as a physical routine. Step one: point to the main idea on the chart. Step two: point to the matching sentence in the book. Step three: say "This proves it because..." and explain the connection. This protocol bridges the gap between recognizing details and using evidence to back up arguments in their own writing.
Teaching the Prove It Evidence Strategy
Give students the exact words to articulate their thinking. Write this sentence stem across the bottom third of your chart using green marker: "The text says [quote], which proves [main idea] because [explanation]." This formula lives permanently on the anchor chart, giving hesitant speakers a script and advanced writers a structure to exceed.
Model the strategy with a familiar mentor text about owls. Write the main idea in blue: "Owls are nocturnal hunters." Below it, place the green evidence: "On page 3, it says, 'Owls hunt at night when it is dark.'" Verbalize the connection using the stem: "This proves owls hunt at night because it states the exact time they look for food." Watch students nod when they see the text words mirrored in your explanation.
Practice this routine daily during your first week teaching main idea and details. Call three students to the chart during morning meeting. Each child points to the blue umbrella, finds the matching yellow raindrop in their book, and completes the stem. By Friday, they will complete the phrase without your prompting. The gradual release ends with them working independently while you observe.
Creating Interactive Sticky Note Extensions
Static charts die on the wall. Attach 3x3 sticky notes to your chart using looped masking tape or Velcro dots. Create a Parking Lot section at the bottom where students add new examples during literacy centers. When Javier finds a detail about owl feathers in his independent reading book, he writes it on a yellow sticky and parks it in the lot. Replace these examples weekly to keep the content current and connected to your latest mentor texts.
This approach builds reading comprehension through peer contribution. Students hunt for evidence knowing their find might make the chart. The Parking Lot becomes a competitive gallery where kids try to stump each other with obscure details from their leveled readers. You will see them checking the central message display during writing workshop, stealing sentence structures for their own graphic organizers.
Protect your work without killing the interactivity. Laminate the chart after initial construction, but leave the Parking Lot section unlaminated. Use wet-erase markers on the laminated portions for the permanent umbrella and raindrops; they wipe clean for reuse year after year. The unlaminated bottom remains porous for sticky notes. This hybrid approach saves you from rebuilding the key details display every August while preserving the hands-on element that makes the chart memorable.
Troubleshooting: Why Your Main Idea Anchor Chart Isnt Improving Comprehension
When Students Confuse Main Idea with Summary
If your students hand you chronological retellings—"First the pig built a straw house, then the wolf came"—they are summarizing, not identifying the main idea. They are tracking plot, not the author's point. Cover your main idea anchor chart and ask: "If you had ten seconds to tell a friend what this book is about, what would you say?" The answer reveals whether they grasp the central message or just remember sequence.
Main idea is one sentence about the author's point. A summary is three to five sentences covering beginning, middle, and end. Draw a T-Chart on your troubleshooting paper showing both side by side using the same mentor text. On the left, write the summary using "Somebody Wanted But So Then." On the right, write "Topic + Author's Point." Never teach both formulas on the same day; it overloads working memory and kills reading comprehension gains.
Check fluency before deploying these strategies for teaching main idea. If students decode below ninety words per minute, they cannot spare the cognitive load for identifying key details. Focus on fluency first. Once they hit the Hasbrouck and Tindal norms, return to these higher order thinking skills.
Fixing Charts That Become Wall Decor Instead of Tools
If no student has touched your chart in three days, it is failing. It has become wallpaper. Conduct a "Chart Autopsy." Ask your class: "When did you last use this? What confused you?" Rewrite the main idea statement together using simpler vocabulary. Add an "Anchor Chart Use Log" beside it where students sign their names when they reference the tool, and introduce hand signals: thumbs up means "I found the main idea."
Physical placement determines whether graphic organizers become tools or decorations. Charts must sit within twenty-four inches of students' seated eye level for grades two through three, and never more than ten feet from the classroom library. If you mounted it above the whiteboard or across the room, move it now. Measure from the floor to the bottom edge of the paper.
Revive the tool with effective classroom procedures. When students gesture toward the chart during discussions or reference the log during independent reading, you know your gradual release is finally working.
Put Main Idea Anchor Chart to Work Tomorrow
You have the steps. You know the difference between topic and theme. Now pick one graphic organizer that fits your current unit and draw it on chart paper before you leave school today. Do not wait for the perfect mentor text or the perfect markers. A messy chart built with your students beats a pristine poster you bought online every time.
Remember that reading comprehension improves when kids see their own thinking made visible. The color coding, the crossed-out false main ideas, the sticky notes stacked in the margin—those marks show the struggle. They prove that finding the central message takes work, not magic.
Open your plan book right now. Find tomorrow's read-aloud. Draw a simple T-chart with "Main Idea" on the left and "Key Details" on the right. Leave the rest blank. That empty space is where the learning happens.
Still grading everything by hand?
EMStudio is a free teaching management app — manage your classes, students, lessons, and more!
Learn More
Still grading everything by hand?
EMStudio is a free teaching management app — manage your classes, students, lessons, and more!
Learn More


Notion4Teachers
Notion templates to simplify administrative tasks and enhance your teaching experience.


2026 Notion4Teachers. All Rights Reserved.
Notion4Teachers
Notion templates to simplify administrative tasks and enhance your teaching experience.
2026 Notion4Teachers. All Rights Reserved.
Notion4Teachers
Notion templates to simplify administrative tasks and enhance your teaching experience.
2026 Notion4Teachers. All Rights Reserved.