
Learning Space Essentials: 12 Components for Classrooms
Learning Space Essentials: 12 Components for Classrooms

Article by
Milo
ESL Content Coordinator & Educator
ESL Content Coordinator & Educator
All Posts
You walked into your classroom in August and realized the desks were still in rows from 1998. Or worse, you tried flexible furniture last year and watched third graders turn wobble stools into catapults. Building a learning space that actually supports teaching isn't about Pinterest boards or buying beanbags. It's about intentional choices—how the classroom layout moves kids through a lesson without chaos, where acoustic design keeps group work from drowning out quiet reading, and which educational technology deserves counter space versus closet space.
I've taught in rooms with 40 desks and windows that wouldn't open, and I've helped rebuild spaces from scratch. The difference between a room that drains you and one that fuels student engagement comes down to specific components, not vibes. This post breaks down 12 essentials—from learning zones that manage traffic flow to sensory design tricks that calm anxious kids. You'll get the nuts and bolts: what to buy, where to put it, and how to pay for it without blowing your stipend.
Still grading everything by hand?
EMStudio is a free teaching management app — manage your classes, students, lessons, and more!
Learn More

Still grading everything by hand?
EMStudio is a free teaching management app — manage your classes, students, lessons, and more!
Learn More
Table of Contents
What Are the Most Effective Classroom Arrangements?
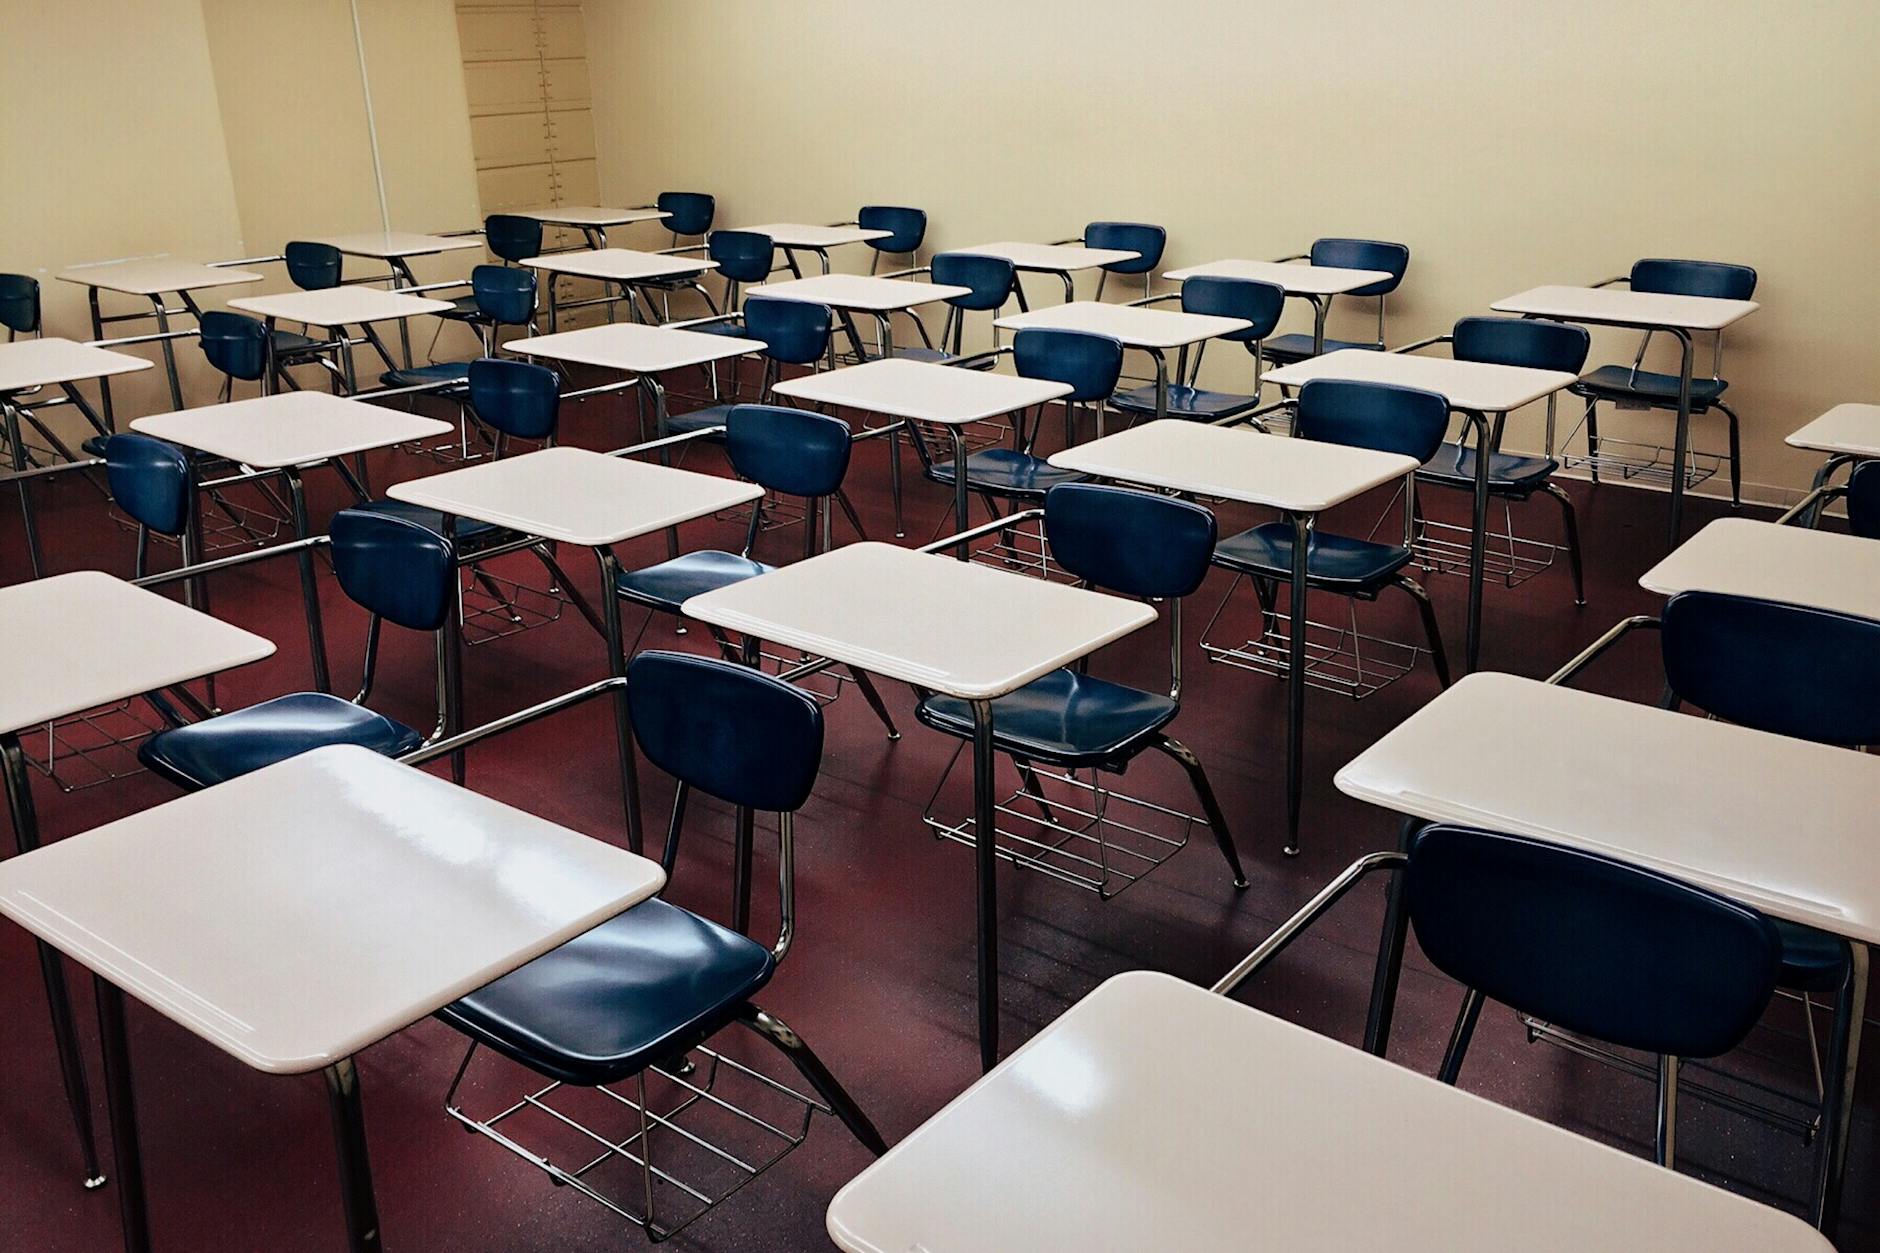
U-shaped arrangements work best for discussion-based learning with 15-25 students, station rotation supports differentiated instruction with clear 36-inch pathways between zones, and modified row configurations (herringbone or chevron) optimize visibility for direct instruction and test preparation.
Research suggests physical classroom arrangement significantly impacts student participation rates, with collaborative layouts showing measurable increases in peer-to-peer discussion. You notice it the moment students walk in. A learning space set in a circle invites argument; rows invite compliance. The classroom setup you choose telegraphs your priorities before you say a word.
Here's how the three effective classroom arrangement models compare:
Criteria | U-Shaped | Station Rotation | Modified Rows |
Best Use Case | Seminars, debates | Differentiated groups | Direct instruction, testing |
Ideal Class Size | 16-24 students | 20-30 students | 20-32 students |
Square Footage | 30-35 sq ft per student | 28-32 sq ft per student | 22-25 sq ft per student |
Setup Time | 20-25 minutes | 30-40 minutes | 10-15 minutes |
Furniture Cost | High (tables) | Medium (flexible) | Low (standard desks) |
U-Shaped Collaborative Layouts
You need 24 inches of table width per student along the arms of the U. I measure this with a tape measure every August because 22 inches leads to elbow wars over personal space by October. The open center requires a 6-foot diameter minimum so you can circulate without backing into the whiteboard or tripping over backpacks.
The spatial demands are non-negotiable:
24 inches of table width per student along the U arms
6-foot diameter clear center for instructor circulation
20-by-24-foot minimum room size for 20 students
30% more floor space than traditional rows
This configuration shines in grades 9-12 during Socratic seminars, debate preparation, and literature circles. I've seen AP Lang students who wouldn't make eye contact in rows suddenly lean across the gap to challenge a textual interpretation. The student engagement spike is immediate. You stand in that open center and become a facilitator rather than a broadcaster.
But don't force it. If your roster hits 28, the U becomes a crowded subway car. The acoustic design suffers too—sound bounces off hard surfaces and creates a buzz that makes it hard for corners to hear. Save this for your smaller, discussion-heavy sections.
Station Rotation Zones with Clear Pathways
Design four to six distinct learning zones:
Teacher-Led: Small group instruction
Independent Practice: Silent work zone
Technology: Digital assignments
Collaboration: Peer discussion tables
Hands-On: Manipulatives and labs
Each zone occupies an 8-by-8-foot footprint and accommodates a maximum of six students. The critical detail is the 36-inch clear pathway between every zone. This isn't just ADA compliance; it's your sightline. You need to see all stations simultaneously without craning your neck.
Management makes or breaks this best classroom arrangement. I use 15-minute rotation timers projected on the board—when the buzzer sounds, everyone moves. Color-coded station cards tell students exactly where to go next, and designated materials bins at each spot prevent the four-minute transition chaos that eats instructional time. For more on mapping these zones, see our guide on effective classroom design and layout planning.
This setup demands flexible furniture—tables on wheels, stools that tuck under surfaces, nothing bolted to the floor. The upfront cost sits between cheap rows and expensive U-shaped tables, but the differentiated instruction payoff justifies it.
Modified Row Arrangements for Direct Instruction
Configure desks in herringbone or chevron patterns at 30-degree angles. Each row needs 42 inches of spacing to meet wheelchair accessibility standards and to let you walk the aisle without turning sideways. Every desk points toward the whiteboard; no one hides in the back corner.
Reserve this classroom layout for:
Standardized test preparation periods
AP courses with heavy note-taking demands
Subjects requiring visibility to demonstration tables
Final exam weeks requiring rapid reconfiguration
The educational technology integration works smoothly here because every screen faces the same direction, and you can monitor for off-task browsing with a single glance down the angled aisles. In my AP Gov class, this means I can see 32 Chromebook screens at once from the front left corner.
The real test comes during fire drills or state testing. Your modified rows must convert to traditional testing configurations within five minutes. I practice this with my juniors in September. If desks don't slide easily or if the angles are too sharp, you'll fail the audit. Keep it simple: 30 degrees, clear aisles, and quick-release seating.
Sensory Design Elements That Improve Focus
The 60-30-10 rule keeps your learning environment from looking like a carnival threw up in it. Paint 60% of visible surfaces in warm white or soft beige—your neutral base that recedes from awareness. Add 30% in calming blue-green tones to lower heart rates without sedating anyone into a nap. Reserve 10% for energizing yellow-orange accents that wake up the brain during transitions or heavy writing blocks. The Illuminating Engineering Society recommends 500 lux for general classroom tasks and 750 lux for detailed work like handwriting or art. Set your correlated color temperature between 4000K and 5000K to maintain alertness without the harshness of 6000K+ hospital lighting that makes everyone feel observed.
Watch for the failure mode. When you notice heads down on desks, excessive fidgeting, or three students asking to visit the nurse with headaches by 10 AM, check your sensory inputs. Excessive red or orange hues increase off-task behavior and cortisol spikes. Visual clutter does the same. If your classroom feels chaotic, repaint that fire-engine accent wall immediately. Strip the bulletin boards to 20% coverage. Remove the ten competing posters. The environmental impact on student learning is immediate—calm rooms produce calm kids who can attend to instruction.
For acoustic design, plan before you hang that first anchor chart. Install PET felt panels with 0.85 NRC (Noise Reduction Coefficient) rating at first reflection points, covering 30-40% of wall surface. Sound bounces off cinder block like a superball in a closet. Without treatment, you are teaching in an echo chamber that forces you to raise your voice by lunch and sends students home vibrating.
Blue and Green Color Schemes for Calming Effects
Sherwin-Williams Halcyon Green (SW 6213) or Benjamin Moore Palladian Blue (HC-144) work perfectly for your 30% accent wall. These sit in the blue-green spectrum proven to reduce blood pressure and mental chatter. Apply them to a single focus wall covering roughly 30% of the visual field—usually the wall behind your teaching station, reading nook, or main display board. Never wrap the entire room in these shades unless you want students to feel like they are underwater.
Grades 3-12: Full blue-green schemes work best; older students handle the slight sedation effect without dozing off during independent work.
Grades K-2: Warm the palette with coral or soft yellow to match natural energy levels; pure cool tones suppress creative play.
Never apply cool colors to all four walls; this creates an institutional "clinical" atmosphere associated with medical facilities.
The common error? Painting every surface blue or covering bulletin boards in cool paper. You create a clinical atmosphere associated with medical facilities. Students feel monitored rather than nurtured. Keep three walls neutral and warm. Let the fourth carry your color. If you have already made this mistake, break it up with large cork boards, fabric banners, or removable wallpaper in warm terracotta to balance the temperature of the room.
Natural Lighting Solutions and Task Lighting
North-facing windows provide the most consistent daylight without the punishing glare that destroys concentration. Install sheer shades to cut glare below 10 degrees from horizontal sight lines while maintaining that 500 lux minimum across desk surfaces. South-facing rooms need heavier management—use adjustable blinds to prevent the afternoon bake-out that has everyone squinting at their papers.
For task lighting, place LED gooseneck lamps (V-Light or similar) at each workstation or at least at your small group table. Specify 4500K CCT and minimum 400 lumens at the desk surface. This fills shadows cast by overhead fluorescents during close work like decoding or circuit building. Check your bulbs for flicker rates above 100Hz. Cheap LEDs pulse below that threshold, causing eye strain and headaches during sustained reading. If students rub their eyes constantly or complain the lights are "buzzing," swap the bulbs for higher quality sources immediately.
Remember that dark corners kill student engagement. If your classroom layout includes a back corner far from windows, boost the ambient light there specifically. Dim spaces become off-task spaces. Use your sensory-friendly classroom setup guide to map light levels across different learning zones, ensuring no one works in shadow while others squint.
Acoustic Panels and Sound Masking Systems
Sound bounces off cinder block like a superball. Install SonoFlat 2x2-foot PET felt panels ($45 each) or equivalent with minimum 0.85 NRC rating. Mount them at first reflection points—ear height on side walls—covering 30-40% of the surface area. I place them in a checkerboard pattern rather than solid blocks; it looks intentional and design-forward, not like you are running a recording studio. Position them where your voice hits the wall first when you stand at the board.
Add a white noise generator (Marpac Dohm Classic or similar) to maintain 45-50 dB ambient level. This masks HVAC cycling and hallway disruptions without adding music that divides attention. Follow ANSI S12.60 standards: keep background noise below NC-35 for optimal speech intelligibility. If you strain to hear students across a small group table, or if they ask "what?" after every direction, your room is too loud. The panels absorb the bounce; the white noise covers the hum.
Test your acoustic design by standing in the back corner while a colleague speaks at normal volume up front. If you catch every word with crystal clarity, you have too much reflection. If it sounds like they are speaking through a pillow, you have gone too far. Aim for comfortable intelligibility that lets students focus on their own work without overhearing the neighboring table's debate about weekend plans.

Which Flexible Seating Options Maximize Student Engagement?
Wobble stools ($45-65 each) offer controlled movement for grades 3-8, standing desks with anti-fatigue mats suit high school project-based learning, and floor seating with lap desks ($25) creates effective elementary reading zones when limited to 6-8 students.
Your learning space needs to match the tool to the task. Here is how the three primary flexible furniture categories compare across real classroom setup ideas:
Wobble stools: $45–65 per student; grades 3–8; 250-pound limit; minimal footprint; ideal for direct instruction.
Standing desks: $150–450 per student; grades 6–12; requires 36-inch wall clearance; ideal for active learning stations.
Floor seating: $25–65 per student; grades K–5; requires 25 sq ft per cluster; ideal for reading learning zones.
Safety determines success. Maintain 36-inch clearance from walls for all active seating to prevent tipping injuries. District data shows 40% of flexible seating implementation strategies fail due to cramped classroom layout rather than the furniture itself.
Start small. Pilot with 6–8 pieces for targeted students—those with ADHD or kinesthetic needs—rather than replacing every seat. This preserves your budget and lets you assess fit before committing to a full classroom needs overhaul. I always begin with my movers and shakers; if the furniture works for them, it works for everyone.
Wobble Stools and Active Seating Solutions
The Kore Patented Wobble Chair remains the standard for good reason. Choose the 14-inch height for grades 3–4 and the 18-inch version for grades 5–8. Each unit runs $45–65, supports up to 250 pounds, and includes an anti-tip ring base that prevents the backward spills you inevitably see with cheap knockoffs. I've watched a fourth grader tip a generic brand onto the tile; the Kore base catches them every time.
Introduce them with structured "wobble breaks" every 20 minutes rather than letting students bounce all period. Pair them with standard desks initially instead of removing traditional chairs entirely. This hybrid approach maintains student engagement without sacrificing stability for written work. When I piloted these, I kept three traditional chairs per table and added two wobbles. The kids who needed them gravitated there immediately.
Check the base before you buy. Verify the rubberized bottom prevents floor damage. Avoid models with hard plastic bottoms; they scratch vinyl and wood within a week, and your custodian will start giving you side-eye every morning. If you hear scraping during transitions, you picked the wrong brand.
Standing Desks with Height-Adjustable Features
You have three realistic price tiers. The Luxor pneumatic desk ($450) adjusts with a lever in seconds. Manual crank models ($280) work fine but annoy students during transitions when they have to spin the handle ten times. Desktop converters ($150) turn existing tables into stand-up options but eat surface space. Whichever you choose, ensure the height range spans 22–48 inches to accommodate 5th graders through seniors.
Ergonomics are non-negotiable. Elbows must maintain a 90-degree angle, monitors sit at eye level, and you need a mandatory anti-fatigue mat. The WellnessMats 3x2-foot model ($80) prevents joint strain. Skip the mat, and students will lean on desks within ten minutes, defeating the purpose and creating posture problems worse than sitting.
Limit standing intervals to 20 minutes maximum. Provide bar-height stools for intermittent sitting. Without the option to sit, high schoolers will drag standard chairs over, creating a tripping hazard and ruining your classroom layout flow. I learned this the hard way during a biology lab; three stools solved the problem instantly.
Floor Seating with Portable Lap Desks
For elementary learning zones, pair the LapGear MyDesk ($25) with Foamnasium Wedge cushions ($40). The lap desk creates a hard writing surface for notebooks or tablets; the wedge supports backs better than bean bags that swallow kids whole and ruin their posture. I've used this combo in 3rd grade reading groups for three years.
Storage requires planning. Target cube organizers (13-inch) hold four units per cube, keeping your acoustic design intact by preventing clutter from absorbing sound panels. Restrict usage to 6–8 students simultaneously in a designated "cozy corner." More than that, and you lose sight lines and management descends into chaos. I tried ten once; two kids hid behind bean bags and stopped working entirely.
Establish a weekly cleaning schedule. Disinfectant wipes on the lap desks and removable cushion covers prevent the germ transmission that spikes every February. This educational technology—yes, furniture counts—only works when it doesn't make half your class sick. Label each cushion with student numbers to track who last cleaned what.
Digital Classroom Setup Components
Interactive Display Boards and Document Cameras
You can't build a modern learning space around a projector that washes out every time someone opens the blinds. You need an interactive display that actually responds to touch without the cursor ghosting three inches from your finger.
Compare the three main contenders:
Smart Board GX Series ($2,800): 20-point touch, $120/year software after year one, 5-year warranty
Promethean ActivPanel Nickel ($3,200): 15-point touch, lifetime licensing included
Clevertouch Impact ($2,900): 20-point touch, free over-the-air updates, 3-year warranty
For demonstrating manipulatives or showcasing student work in real time, skip the overhead projector gathering dust in storage. The IPEVO VZ-R ($270) connects via HDMI or USB and streams at 8MP resolution. I've used it to project fraction tiles live onto the board while kids follow along at their desks, and the lag is minimal enough that you can actually write notes over the image in real time.
Mount the screen center at 48-inch height for elementary students—any higher and 3rd graders lose the bottom third of the display. For middle and high school, 54 inches keeps sight lines clear without forcing neck strain. When integrating interactive whiteboards, placement matters more than pixel count. I learned this the hard way when I mounted one too high and watched my 5th graders crane their necks for forty-five minutes straight.
Device Charging Stations and Cable Management
Nothing kills a lesson like twenty tablets hitting 5% battery simultaneously. You need a charging strategy that doesn't trip the breaker every afternoon or create a snake pit of cords across your classroom floor.
The Bretford Cube Cart mini holds ten devices and costs around $600—perfect for a single class set if you rotate station groups. If you're running true 1:1, the Tripp Lite 32-port station ($1,200) handles full classroom deployment but requires a 20-amp dedicated circuit. Standard 15-amp outlets will trip when thirty Chromebooks draw power simultaneously during that narrow window between lunch and math. Have your facilities team verify amperage before the cart arrives, not after.
Prevent cable disasters with proper hardware:
Tripp Lite cable raceways ($12 per 5-foot section) along baseboards eliminate trip hazards
Color-coded Velcro ties and labeled charging cables—red for group 1, blue for group 2
20-amp dedicated circuits for charging carts to prevent breaker trips
Security and safety aren't optional. Carts must feature locking mechanisms and meet UL 1678 tip-resistance standards. A third-grader climbing to reach the top shelf shouldn't send thirty iPads crashing onto the tile. Check the casters before you buy—if they don't lock independently, the cart becomes a projectile during a fire drill.
Digital Collaboration Zones with Screen Sharing
Once displays are mounted and devices charged, you need distinct learning zones where students can project their work without hijacking your main teaching board.
Choose screen mirroring hardware that matches your ecosystem:
Apple TV 4K ($130) for iOS environments—enable AirPlay permissions through MDM Solution
Google Chromecast ($30) for Google Workspace schools
Microsoft Wireless Display Adapters for Windows Miracast compatibility without extra apps
Reserve 10-by-10-foot zones with secondary displays visible from 20 feet. Arrange paired seating or flexible furniture so two students can program together or peer-edit essays while casting to the shared screen. I position these near my daily digital dashboard setup so groups can reference the agenda while working without turning their backs to the main instructional area.
Here's what nobody tells you during planning: digital collaboration zones run loud. The combination of screen sharing, verbal processing, and paired discussion generates 10–15 dB more ambient noise than individual headphone work. Position these zones away from quiet reading nooks, or provide Bluetooth headsets for the collaboration groups to contain the audio. And upgrade your network infrastructure before the devices arrive—each simultaneous screen-sharing device requires 25 Mbps. A classroom of eight mirroring students will saturate a standard 100 Mbps connection. Plan those upgrades now, or your digital classroom setup becomes a laggy, buffering frustration that kills student engagement.

How Do You Budget for a Complete Learning Space Transformation?
Plan $15-25 per square foot for a complete learning space transformation, spreading costs across 12 months so you don't blow your entire stipend before winter break. That works out to roughly $500 for a basic refresh covering paint and DIY rearrangement. $2000-3000 buys enough flexible furniture for 30 kids to choose their seats. $5000-8000 funds the full package: charging stations, interactive displays, and the infrastructure to support real educational technology integration instead of just hooking up an old projector.
Start by auditing your classroom things with a teacher supply checklist and inventory tracker. You can't budget for gaps until you know what you already own.
Budget Tier | Amount | What It Covers |
|---|---|---|
Shoestring | $500 | Paint, DIY rearrangement, 6 wobble stools |
Standard | $3000 | Flexible seating, acoustic panels, task lighting |
Premium | $8000 | Standing desks, interactive board, charging cart, complete acoustic treatment |
The Shoestring tier works if you focus on classroom layout over new purchases. Move your teacher desk to the corner, paint one accent wall, and buy six wobble stools for your highest-energy kids. I taught 5th grade in a room that looked brand new after a weekend of painting and rearranging—total cost $340. The student engagement jumped immediately because kids could actually see the board from their new spots.
Where to Find the Money
DonorsChoose projects average six weeks to fund when you keep requests under $1000. Post in September and you're usually cleared by October break.
AdoptAClassroom.org offers immediate $500-2000 grants without the crowdfunding wait, though competition is stiff.
Local education foundations typically award $1000-5000 for innovative spaces, but they want details: sketch your learning zones and explain how they'll boost attention.
Smart Cuts That Don't Hurt
Repaint existing furniture instead of replacing it. A $50 can of chalk paint transforms a metal bookshelf that would cost $400 new. Contact high schools or event venues about used stadium cushions from closed venues—$10-20 each versus $80 retail for floor seating. Run your current devices into the ground before buying new ones; acoustic design matters more than another Chromebook cart when half your class can't hear the video because of echo.

Implementing Your New Learning Space Without Disrupting Instruction
Don't flip the switch overnight. Roll out your classroom layout changes in phases so you can spot problems before they become disasters. I learned this the hard way after spending a weekend rearranging every desk and bookshelf, only to spend Monday chasing kids who treated the new setup like a playground.
Use this phased calendar with built-in go/no-go decision gates:
Week 1: Move the desks. That's it. Just change the footprint. Watch how traffic flows during transitions. If kids trip over each other getting to the pencil sharpener, fix the flow before you add flexible furniture.
Week 3: Introduce six wobble stools. Not twenty. Six. Place them in your most visible spot and teach the protocol: you sit here when you can work without tipping. If those six stools work—if they don't become weapons or distraction devices—proceed. If not, stop.
Week 5: Activate the educational technology zone. Unplug the Chromebook cart in its new home. Practice device retrieval and return until it runs silent.
Week 8: Add full sensory elements—headphones, fidgets, acoustic design panels—completing your learning zones.
Here's what destroys student engagement faster than a fire drill: changing every piece of classroom stuff over summer break without asking the kids who use it. I've seen teachers return in August to find flexible seating flipped upside down, cushions torn, and standing desks used as fort walls. Educator reports suggest simultaneous overhauls create misuse rates near 40%. Instead, co-create expectations. Show students the plan. Let them vote on which learning space rules make sense. Ownership beats compliance every time.
Invest three full days in teaching procedures before touching academic content. Day one covers movement protocols: how to walk without bumping, how to carry a chair safely. Day two practices material retrieval from new storage spots. Day three rehearses seating choice procedures—how to pick a spot, how to switch if it's not working, how the teacher reserves the right to move anyone instantly. These aren't wasted days. They're the foundation.
Measure success with hard data. Track off-task behavior for three weeks after each phase. If incidents drop by 25%, green light the next rollout. If behavior increases—even by 10%—revert immediately to your previous configuration. Pride has no place here. A failed layout taught me more than research-based classroom organization strategies ever could, but only because I admitted the layout failed and moved the desks back.
Where Learning Space Is Heading
You can buy every flexible seating option on the market and still have a room where kids stare at the clock. The physical space matters, but your response to it matters more. Start with one change that solves a specific problem you noticed last week—the glare on the whiteboard at 2 p.m., the traffic jam by the pencil sharpener, or the fact that four kids always hide in the back row during discussions. Fix that first. Watch how it changes the energy in the room.
Then ask your students. They know exactly where they focus best and which corners feel safe or stressful. Give them two choices for where to work tomorrow, even if it's just "desk or floor by the bookshelf." That shift costs nothing and builds the trust you'll need if you ever do get that grant for new flexible furniture.
Stop waiting for the perfect budget or the summer renovation. Pick one wall, one bin, or one seating routine. Change it before Friday.
What Are the Most Effective Classroom Arrangements?
U-shaped arrangements work best for discussion-based learning with 15-25 students, station rotation supports differentiated instruction with clear 36-inch pathways between zones, and modified row configurations (herringbone or chevron) optimize visibility for direct instruction and test preparation.
Research suggests physical classroom arrangement significantly impacts student participation rates, with collaborative layouts showing measurable increases in peer-to-peer discussion. You notice it the moment students walk in. A learning space set in a circle invites argument; rows invite compliance. The classroom setup you choose telegraphs your priorities before you say a word.
Here's how the three effective classroom arrangement models compare:
Criteria | U-Shaped | Station Rotation | Modified Rows |
Best Use Case | Seminars, debates | Differentiated groups | Direct instruction, testing |
Ideal Class Size | 16-24 students | 20-30 students | 20-32 students |
Square Footage | 30-35 sq ft per student | 28-32 sq ft per student | 22-25 sq ft per student |
Setup Time | 20-25 minutes | 30-40 minutes | 10-15 minutes |
Furniture Cost | High (tables) | Medium (flexible) | Low (standard desks) |
U-Shaped Collaborative Layouts
You need 24 inches of table width per student along the arms of the U. I measure this with a tape measure every August because 22 inches leads to elbow wars over personal space by October. The open center requires a 6-foot diameter minimum so you can circulate without backing into the whiteboard or tripping over backpacks.
The spatial demands are non-negotiable:
24 inches of table width per student along the U arms
6-foot diameter clear center for instructor circulation
20-by-24-foot minimum room size for 20 students
30% more floor space than traditional rows
This configuration shines in grades 9-12 during Socratic seminars, debate preparation, and literature circles. I've seen AP Lang students who wouldn't make eye contact in rows suddenly lean across the gap to challenge a textual interpretation. The student engagement spike is immediate. You stand in that open center and become a facilitator rather than a broadcaster.
But don't force it. If your roster hits 28, the U becomes a crowded subway car. The acoustic design suffers too—sound bounces off hard surfaces and creates a buzz that makes it hard for corners to hear. Save this for your smaller, discussion-heavy sections.
Station Rotation Zones with Clear Pathways
Design four to six distinct learning zones:
Teacher-Led: Small group instruction
Independent Practice: Silent work zone
Technology: Digital assignments
Collaboration: Peer discussion tables
Hands-On: Manipulatives and labs
Each zone occupies an 8-by-8-foot footprint and accommodates a maximum of six students. The critical detail is the 36-inch clear pathway between every zone. This isn't just ADA compliance; it's your sightline. You need to see all stations simultaneously without craning your neck.
Management makes or breaks this best classroom arrangement. I use 15-minute rotation timers projected on the board—when the buzzer sounds, everyone moves. Color-coded station cards tell students exactly where to go next, and designated materials bins at each spot prevent the four-minute transition chaos that eats instructional time. For more on mapping these zones, see our guide on effective classroom design and layout planning.
This setup demands flexible furniture—tables on wheels, stools that tuck under surfaces, nothing bolted to the floor. The upfront cost sits between cheap rows and expensive U-shaped tables, but the differentiated instruction payoff justifies it.
Modified Row Arrangements for Direct Instruction
Configure desks in herringbone or chevron patterns at 30-degree angles. Each row needs 42 inches of spacing to meet wheelchair accessibility standards and to let you walk the aisle without turning sideways. Every desk points toward the whiteboard; no one hides in the back corner.
Reserve this classroom layout for:
Standardized test preparation periods
AP courses with heavy note-taking demands
Subjects requiring visibility to demonstration tables
Final exam weeks requiring rapid reconfiguration
The educational technology integration works smoothly here because every screen faces the same direction, and you can monitor for off-task browsing with a single glance down the angled aisles. In my AP Gov class, this means I can see 32 Chromebook screens at once from the front left corner.
The real test comes during fire drills or state testing. Your modified rows must convert to traditional testing configurations within five minutes. I practice this with my juniors in September. If desks don't slide easily or if the angles are too sharp, you'll fail the audit. Keep it simple: 30 degrees, clear aisles, and quick-release seating.
Sensory Design Elements That Improve Focus
The 60-30-10 rule keeps your learning environment from looking like a carnival threw up in it. Paint 60% of visible surfaces in warm white or soft beige—your neutral base that recedes from awareness. Add 30% in calming blue-green tones to lower heart rates without sedating anyone into a nap. Reserve 10% for energizing yellow-orange accents that wake up the brain during transitions or heavy writing blocks. The Illuminating Engineering Society recommends 500 lux for general classroom tasks and 750 lux for detailed work like handwriting or art. Set your correlated color temperature between 4000K and 5000K to maintain alertness without the harshness of 6000K+ hospital lighting that makes everyone feel observed.
Watch for the failure mode. When you notice heads down on desks, excessive fidgeting, or three students asking to visit the nurse with headaches by 10 AM, check your sensory inputs. Excessive red or orange hues increase off-task behavior and cortisol spikes. Visual clutter does the same. If your classroom feels chaotic, repaint that fire-engine accent wall immediately. Strip the bulletin boards to 20% coverage. Remove the ten competing posters. The environmental impact on student learning is immediate—calm rooms produce calm kids who can attend to instruction.
For acoustic design, plan before you hang that first anchor chart. Install PET felt panels with 0.85 NRC (Noise Reduction Coefficient) rating at first reflection points, covering 30-40% of wall surface. Sound bounces off cinder block like a superball in a closet. Without treatment, you are teaching in an echo chamber that forces you to raise your voice by lunch and sends students home vibrating.
Blue and Green Color Schemes for Calming Effects
Sherwin-Williams Halcyon Green (SW 6213) or Benjamin Moore Palladian Blue (HC-144) work perfectly for your 30% accent wall. These sit in the blue-green spectrum proven to reduce blood pressure and mental chatter. Apply them to a single focus wall covering roughly 30% of the visual field—usually the wall behind your teaching station, reading nook, or main display board. Never wrap the entire room in these shades unless you want students to feel like they are underwater.
Grades 3-12: Full blue-green schemes work best; older students handle the slight sedation effect without dozing off during independent work.
Grades K-2: Warm the palette with coral or soft yellow to match natural energy levels; pure cool tones suppress creative play.
Never apply cool colors to all four walls; this creates an institutional "clinical" atmosphere associated with medical facilities.
The common error? Painting every surface blue or covering bulletin boards in cool paper. You create a clinical atmosphere associated with medical facilities. Students feel monitored rather than nurtured. Keep three walls neutral and warm. Let the fourth carry your color. If you have already made this mistake, break it up with large cork boards, fabric banners, or removable wallpaper in warm terracotta to balance the temperature of the room.
Natural Lighting Solutions and Task Lighting
North-facing windows provide the most consistent daylight without the punishing glare that destroys concentration. Install sheer shades to cut glare below 10 degrees from horizontal sight lines while maintaining that 500 lux minimum across desk surfaces. South-facing rooms need heavier management—use adjustable blinds to prevent the afternoon bake-out that has everyone squinting at their papers.
For task lighting, place LED gooseneck lamps (V-Light or similar) at each workstation or at least at your small group table. Specify 4500K CCT and minimum 400 lumens at the desk surface. This fills shadows cast by overhead fluorescents during close work like decoding or circuit building. Check your bulbs for flicker rates above 100Hz. Cheap LEDs pulse below that threshold, causing eye strain and headaches during sustained reading. If students rub their eyes constantly or complain the lights are "buzzing," swap the bulbs for higher quality sources immediately.
Remember that dark corners kill student engagement. If your classroom layout includes a back corner far from windows, boost the ambient light there specifically. Dim spaces become off-task spaces. Use your sensory-friendly classroom setup guide to map light levels across different learning zones, ensuring no one works in shadow while others squint.
Acoustic Panels and Sound Masking Systems
Sound bounces off cinder block like a superball. Install SonoFlat 2x2-foot PET felt panels ($45 each) or equivalent with minimum 0.85 NRC rating. Mount them at first reflection points—ear height on side walls—covering 30-40% of the surface area. I place them in a checkerboard pattern rather than solid blocks; it looks intentional and design-forward, not like you are running a recording studio. Position them where your voice hits the wall first when you stand at the board.
Add a white noise generator (Marpac Dohm Classic or similar) to maintain 45-50 dB ambient level. This masks HVAC cycling and hallway disruptions without adding music that divides attention. Follow ANSI S12.60 standards: keep background noise below NC-35 for optimal speech intelligibility. If you strain to hear students across a small group table, or if they ask "what?" after every direction, your room is too loud. The panels absorb the bounce; the white noise covers the hum.
Test your acoustic design by standing in the back corner while a colleague speaks at normal volume up front. If you catch every word with crystal clarity, you have too much reflection. If it sounds like they are speaking through a pillow, you have gone too far. Aim for comfortable intelligibility that lets students focus on their own work without overhearing the neighboring table's debate about weekend plans.
Which Flexible Seating Options Maximize Student Engagement?
Wobble stools ($45-65 each) offer controlled movement for grades 3-8, standing desks with anti-fatigue mats suit high school project-based learning, and floor seating with lap desks ($25) creates effective elementary reading zones when limited to 6-8 students.
Your learning space needs to match the tool to the task. Here is how the three primary flexible furniture categories compare across real classroom setup ideas:
Wobble stools: $45–65 per student; grades 3–8; 250-pound limit; minimal footprint; ideal for direct instruction.
Standing desks: $150–450 per student; grades 6–12; requires 36-inch wall clearance; ideal for active learning stations.
Floor seating: $25–65 per student; grades K–5; requires 25 sq ft per cluster; ideal for reading learning zones.
Safety determines success. Maintain 36-inch clearance from walls for all active seating to prevent tipping injuries. District data shows 40% of flexible seating implementation strategies fail due to cramped classroom layout rather than the furniture itself.
Start small. Pilot with 6–8 pieces for targeted students—those with ADHD or kinesthetic needs—rather than replacing every seat. This preserves your budget and lets you assess fit before committing to a full classroom needs overhaul. I always begin with my movers and shakers; if the furniture works for them, it works for everyone.
Wobble Stools and Active Seating Solutions
The Kore Patented Wobble Chair remains the standard for good reason. Choose the 14-inch height for grades 3–4 and the 18-inch version for grades 5–8. Each unit runs $45–65, supports up to 250 pounds, and includes an anti-tip ring base that prevents the backward spills you inevitably see with cheap knockoffs. I've watched a fourth grader tip a generic brand onto the tile; the Kore base catches them every time.
Introduce them with structured "wobble breaks" every 20 minutes rather than letting students bounce all period. Pair them with standard desks initially instead of removing traditional chairs entirely. This hybrid approach maintains student engagement without sacrificing stability for written work. When I piloted these, I kept three traditional chairs per table and added two wobbles. The kids who needed them gravitated there immediately.
Check the base before you buy. Verify the rubberized bottom prevents floor damage. Avoid models with hard plastic bottoms; they scratch vinyl and wood within a week, and your custodian will start giving you side-eye every morning. If you hear scraping during transitions, you picked the wrong brand.
Standing Desks with Height-Adjustable Features
You have three realistic price tiers. The Luxor pneumatic desk ($450) adjusts with a lever in seconds. Manual crank models ($280) work fine but annoy students during transitions when they have to spin the handle ten times. Desktop converters ($150) turn existing tables into stand-up options but eat surface space. Whichever you choose, ensure the height range spans 22–48 inches to accommodate 5th graders through seniors.
Ergonomics are non-negotiable. Elbows must maintain a 90-degree angle, monitors sit at eye level, and you need a mandatory anti-fatigue mat. The WellnessMats 3x2-foot model ($80) prevents joint strain. Skip the mat, and students will lean on desks within ten minutes, defeating the purpose and creating posture problems worse than sitting.
Limit standing intervals to 20 minutes maximum. Provide bar-height stools for intermittent sitting. Without the option to sit, high schoolers will drag standard chairs over, creating a tripping hazard and ruining your classroom layout flow. I learned this the hard way during a biology lab; three stools solved the problem instantly.
Floor Seating with Portable Lap Desks
For elementary learning zones, pair the LapGear MyDesk ($25) with Foamnasium Wedge cushions ($40). The lap desk creates a hard writing surface for notebooks or tablets; the wedge supports backs better than bean bags that swallow kids whole and ruin their posture. I've used this combo in 3rd grade reading groups for three years.
Storage requires planning. Target cube organizers (13-inch) hold four units per cube, keeping your acoustic design intact by preventing clutter from absorbing sound panels. Restrict usage to 6–8 students simultaneously in a designated "cozy corner." More than that, and you lose sight lines and management descends into chaos. I tried ten once; two kids hid behind bean bags and stopped working entirely.
Establish a weekly cleaning schedule. Disinfectant wipes on the lap desks and removable cushion covers prevent the germ transmission that spikes every February. This educational technology—yes, furniture counts—only works when it doesn't make half your class sick. Label each cushion with student numbers to track who last cleaned what.
Digital Classroom Setup Components
Interactive Display Boards and Document Cameras
You can't build a modern learning space around a projector that washes out every time someone opens the blinds. You need an interactive display that actually responds to touch without the cursor ghosting three inches from your finger.
Compare the three main contenders:
Smart Board GX Series ($2,800): 20-point touch, $120/year software after year one, 5-year warranty
Promethean ActivPanel Nickel ($3,200): 15-point touch, lifetime licensing included
Clevertouch Impact ($2,900): 20-point touch, free over-the-air updates, 3-year warranty
For demonstrating manipulatives or showcasing student work in real time, skip the overhead projector gathering dust in storage. The IPEVO VZ-R ($270) connects via HDMI or USB and streams at 8MP resolution. I've used it to project fraction tiles live onto the board while kids follow along at their desks, and the lag is minimal enough that you can actually write notes over the image in real time.
Mount the screen center at 48-inch height for elementary students—any higher and 3rd graders lose the bottom third of the display. For middle and high school, 54 inches keeps sight lines clear without forcing neck strain. When integrating interactive whiteboards, placement matters more than pixel count. I learned this the hard way when I mounted one too high and watched my 5th graders crane their necks for forty-five minutes straight.
Device Charging Stations and Cable Management
Nothing kills a lesson like twenty tablets hitting 5% battery simultaneously. You need a charging strategy that doesn't trip the breaker every afternoon or create a snake pit of cords across your classroom floor.
The Bretford Cube Cart mini holds ten devices and costs around $600—perfect for a single class set if you rotate station groups. If you're running true 1:1, the Tripp Lite 32-port station ($1,200) handles full classroom deployment but requires a 20-amp dedicated circuit. Standard 15-amp outlets will trip when thirty Chromebooks draw power simultaneously during that narrow window between lunch and math. Have your facilities team verify amperage before the cart arrives, not after.
Prevent cable disasters with proper hardware:
Tripp Lite cable raceways ($12 per 5-foot section) along baseboards eliminate trip hazards
Color-coded Velcro ties and labeled charging cables—red for group 1, blue for group 2
20-amp dedicated circuits for charging carts to prevent breaker trips
Security and safety aren't optional. Carts must feature locking mechanisms and meet UL 1678 tip-resistance standards. A third-grader climbing to reach the top shelf shouldn't send thirty iPads crashing onto the tile. Check the casters before you buy—if they don't lock independently, the cart becomes a projectile during a fire drill.
Digital Collaboration Zones with Screen Sharing
Once displays are mounted and devices charged, you need distinct learning zones where students can project their work without hijacking your main teaching board.
Choose screen mirroring hardware that matches your ecosystem:
Apple TV 4K ($130) for iOS environments—enable AirPlay permissions through MDM Solution
Google Chromecast ($30) for Google Workspace schools
Microsoft Wireless Display Adapters for Windows Miracast compatibility without extra apps
Reserve 10-by-10-foot zones with secondary displays visible from 20 feet. Arrange paired seating or flexible furniture so two students can program together or peer-edit essays while casting to the shared screen. I position these near my daily digital dashboard setup so groups can reference the agenda while working without turning their backs to the main instructional area.
Here's what nobody tells you during planning: digital collaboration zones run loud. The combination of screen sharing, verbal processing, and paired discussion generates 10–15 dB more ambient noise than individual headphone work. Position these zones away from quiet reading nooks, or provide Bluetooth headsets for the collaboration groups to contain the audio. And upgrade your network infrastructure before the devices arrive—each simultaneous screen-sharing device requires 25 Mbps. A classroom of eight mirroring students will saturate a standard 100 Mbps connection. Plan those upgrades now, or your digital classroom setup becomes a laggy, buffering frustration that kills student engagement.
How Do You Budget for a Complete Learning Space Transformation?
Plan $15-25 per square foot for a complete learning space transformation, spreading costs across 12 months so you don't blow your entire stipend before winter break. That works out to roughly $500 for a basic refresh covering paint and DIY rearrangement. $2000-3000 buys enough flexible furniture for 30 kids to choose their seats. $5000-8000 funds the full package: charging stations, interactive displays, and the infrastructure to support real educational technology integration instead of just hooking up an old projector.
Start by auditing your classroom things with a teacher supply checklist and inventory tracker. You can't budget for gaps until you know what you already own.
Budget Tier | Amount | What It Covers |
|---|---|---|
Shoestring | $500 | Paint, DIY rearrangement, 6 wobble stools |
Standard | $3000 | Flexible seating, acoustic panels, task lighting |
Premium | $8000 | Standing desks, interactive board, charging cart, complete acoustic treatment |
The Shoestring tier works if you focus on classroom layout over new purchases. Move your teacher desk to the corner, paint one accent wall, and buy six wobble stools for your highest-energy kids. I taught 5th grade in a room that looked brand new after a weekend of painting and rearranging—total cost $340. The student engagement jumped immediately because kids could actually see the board from their new spots.
Where to Find the Money
DonorsChoose projects average six weeks to fund when you keep requests under $1000. Post in September and you're usually cleared by October break.
AdoptAClassroom.org offers immediate $500-2000 grants without the crowdfunding wait, though competition is stiff.
Local education foundations typically award $1000-5000 for innovative spaces, but they want details: sketch your learning zones and explain how they'll boost attention.
Smart Cuts That Don't Hurt
Repaint existing furniture instead of replacing it. A $50 can of chalk paint transforms a metal bookshelf that would cost $400 new. Contact high schools or event venues about used stadium cushions from closed venues—$10-20 each versus $80 retail for floor seating. Run your current devices into the ground before buying new ones; acoustic design matters more than another Chromebook cart when half your class can't hear the video because of echo.
Implementing Your New Learning Space Without Disrupting Instruction
Don't flip the switch overnight. Roll out your classroom layout changes in phases so you can spot problems before they become disasters. I learned this the hard way after spending a weekend rearranging every desk and bookshelf, only to spend Monday chasing kids who treated the new setup like a playground.
Use this phased calendar with built-in go/no-go decision gates:
Week 1: Move the desks. That's it. Just change the footprint. Watch how traffic flows during transitions. If kids trip over each other getting to the pencil sharpener, fix the flow before you add flexible furniture.
Week 3: Introduce six wobble stools. Not twenty. Six. Place them in your most visible spot and teach the protocol: you sit here when you can work without tipping. If those six stools work—if they don't become weapons or distraction devices—proceed. If not, stop.
Week 5: Activate the educational technology zone. Unplug the Chromebook cart in its new home. Practice device retrieval and return until it runs silent.
Week 8: Add full sensory elements—headphones, fidgets, acoustic design panels—completing your learning zones.
Here's what destroys student engagement faster than a fire drill: changing every piece of classroom stuff over summer break without asking the kids who use it. I've seen teachers return in August to find flexible seating flipped upside down, cushions torn, and standing desks used as fort walls. Educator reports suggest simultaneous overhauls create misuse rates near 40%. Instead, co-create expectations. Show students the plan. Let them vote on which learning space rules make sense. Ownership beats compliance every time.
Invest three full days in teaching procedures before touching academic content. Day one covers movement protocols: how to walk without bumping, how to carry a chair safely. Day two practices material retrieval from new storage spots. Day three rehearses seating choice procedures—how to pick a spot, how to switch if it's not working, how the teacher reserves the right to move anyone instantly. These aren't wasted days. They're the foundation.
Measure success with hard data. Track off-task behavior for three weeks after each phase. If incidents drop by 25%, green light the next rollout. If behavior increases—even by 10%—revert immediately to your previous configuration. Pride has no place here. A failed layout taught me more than research-based classroom organization strategies ever could, but only because I admitted the layout failed and moved the desks back.
Where Learning Space Is Heading
You can buy every flexible seating option on the market and still have a room where kids stare at the clock. The physical space matters, but your response to it matters more. Start with one change that solves a specific problem you noticed last week—the glare on the whiteboard at 2 p.m., the traffic jam by the pencil sharpener, or the fact that four kids always hide in the back row during discussions. Fix that first. Watch how it changes the energy in the room.
Then ask your students. They know exactly where they focus best and which corners feel safe or stressful. Give them two choices for where to work tomorrow, even if it's just "desk or floor by the bookshelf." That shift costs nothing and builds the trust you'll need if you ever do get that grant for new flexible furniture.
Stop waiting for the perfect budget or the summer renovation. Pick one wall, one bin, or one seating routine. Change it before Friday.
Still grading everything by hand?
EMStudio is a free teaching management app — manage your classes, students, lessons, and more!
Learn More
Still grading everything by hand?
EMStudio is a free teaching management app — manage your classes, students, lessons, and more!
Learn More


Notion4Teachers
Notion templates to simplify administrative tasks and enhance your teaching experience.


2026 Notion4Teachers. All Rights Reserved.
Notion4Teachers
Notion templates to simplify administrative tasks and enhance your teaching experience.
2026 Notion4Teachers. All Rights Reserved.
Notion4Teachers
Notion templates to simplify administrative tasks and enhance your teaching experience.
2026 Notion4Teachers. All Rights Reserved.