
Teacher Modelling: 4 Steps to Effective Demonstration
Teacher Modelling: 4 Steps to Effective Demonstration

Article by
Milo
ESL Content Coordinator & Educator
ESL Content Coordinator & Educator
All Posts
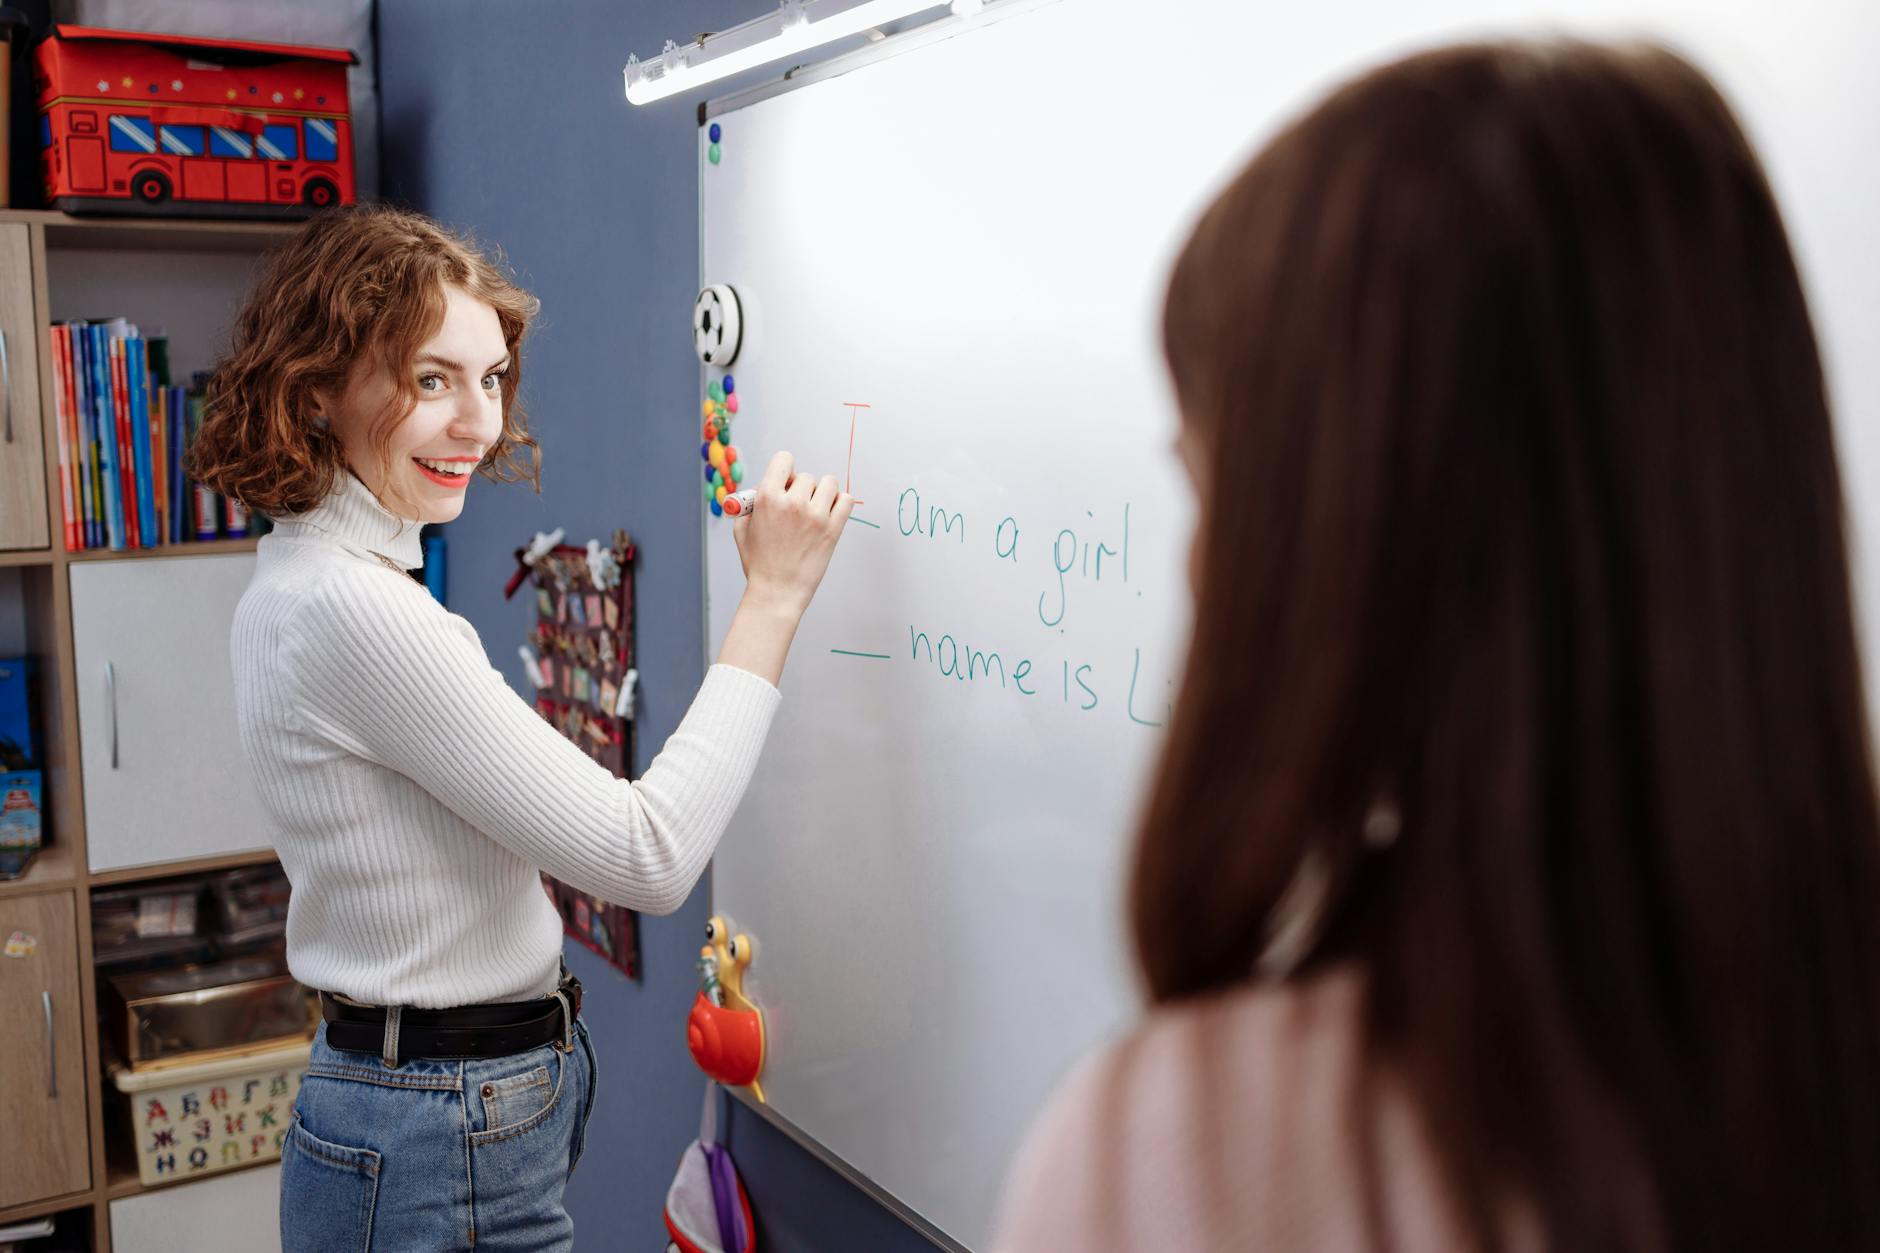
You watch a student stare at a blank page for ten minutes after you explained the assignment. You showed them the rubric. You gave examples. But they’re stuck. That gap between your explanation and their independent work is where teacher modelling either works or fails.
Most of us rush it. We demo for two minutes, then hand out the worksheet. But real cognitive apprenticeship takes time. You need a think-aloud protocol that makes your metacognition visible. You need the gradual release of responsibility — I Do, We Do, You Do — executed with patience. Get it right, and you stop answering the same question forty times. This four-step framework shows you how to plan explicit instruction that actually transfers to student independence.
Still grading everything by hand?
EMStudio is a free teaching management app — manage your classes, students, lessons, and more!
Learn More

Still grading everything by hand?
EMStudio is a free teaching management app — manage your classes, students, lessons, and more!
Learn More
Table of Contents
Understanding the I Do You Do We Do Framework
Teacher Modelling as a Core Teaching Strategy
The i do you do we do teaching strategy isn't just fancy wording for "I talk, you listen." It's cognitive apprenticeship. Think of it like a tradesperson showing an apprentice how to frame a wall—not by handing over a hammer and walking away, but by modeling the cut, explaining the angle, then guiding the first few swings.
John Hattie's meta-analysis puts direct instruction at an effect size of 0.59, well above the hinge point of 0.40. But teacher clarity—what happens during the I Do phase—hits 0.75. That's the difference between traditional lecture and making thinking visible. In lecture, students see the product, a finished essay or solved equation. In evidence-based models of explicit instruction, they see the messy process, the false starts, the self-corrections.
Effective teacher modelling requires three things:
Explicit demonstration: You solve the problem or execute the skill while students watch, no skipping steps.
Metacognitive verbalization: You talk through the confusion, the backtracking, the "wait, that doesn't look right" moments.
Immediate application opportunity: Students try something similar while the strategy is still fresh, usually during the We Do phase.
This beats unguided discovery every time. Discovery has its place, but when you're teaching procedural skills like long division or essay structure, leaving kids to figure it out wastes instructional minutes and frustrates struggling learners. Kids stop trying when they fail silently for ten minutes. The apprenticeship model respects working memory limits by chunking new information into demonstrated, coached, then independent practice.
The Three Phases of Gradual Release
The gradual release of responsibility moves through three distinct phases in a typical 45-minute block:
I Do (10-15 minutes): Complete expert demonstration with think-aloud protocol. You narrate every decision while students observe.
We Do (15-20 minutes): Guided practice with fading support. Students work with partners or partially complete tasks while you circulate.
You Do (15-20 minutes): Independent application with monitoring. You watch for transfer but resist the urge to rescue immediately.
Barak Rosenshine's 7th Principle of Instruction is non-negotiable here: students need extensive guided practice before flying solo. Research suggests they need to hit 80% accuracy during We Do before you transition to You Do. That eighty percent threshold isn't arbitrary; it signals that students have moved from mimicking to understanding. That final 15 to 20 minutes is independent practice—You Do—where you monitor but don't rescue. If kids are bombing the We Do, you don't move on. You model again tomorrow.
This pacing prevents the common trap of releasing too early. I've watched teachers spend 25 minutes explaining, then assign 20 problems for homework wondering why kids failed. The We Do phase is where metacognition happens—students speak their thinking while you correct misconceptions in real time.
This structure reflects explicit instruction at its most effective. You're not abandoning students to struggle productively before they've seen expertise in action. You're showing, sharing, then watching—making sure the cognitive apprenticeship sticks before the bell rings.
When to Use Demonstration as a Teaching Strategy
Not every lesson needs a full demonstration. Match your modeling intensity to the learning objective. Use this framework to decide your approach.
Approach | Skill Complexity | Student Prior Knowledge | Time Constraints |
|---|---|---|---|
Full demonstration | Procedural with 3+ steps (long division, lab safety) | Low or none | 45-50 minute period available |
Partial modeling | Conceptual understanding (theme analysis, photosynthesis) | Some familiarity | 30 minutes available |
Worked examples only | Review or mastered material | High | 15 minutes or less |
Kindergarten through 2nd grade brains check out after 15 to 20 minutes of focused attention. You need to cycle through I Do You Do We Do teaching strategy loops multiple times per lesson, resetting attention with new demonstrations frequently. By high school, you can run 20 to 30 minute modeling cycles before students need independent processing time, though even seniors benefit from seeing you think through complex texts occasionally.
Deciding when to model fully versus partially comes down to error analysis. If students making mistakes will ingrain bad habits that take weeks to fix—like improper fraction operations or incorrect lab safety—you need the full cognitive apprenticeship with every step visible. The stakes dictate the support level. If the error risk is low and the thinking is the point, partial demonstration preserves student agency while still providing guardrails.
Time constraints force hard choices. With only twenty minutes, don't cram all three phases poorly. Instead, use worked examples and jump to guided practice, saving the full think-aloud for the next day's opener when you have adequate time for the complete gradual release of responsibility cycle. Quality beats quantity here.
Step 1 — Plan Your Explicit Modelling Session
Select Skills Worthy of Demonstration
Not every skill deserves your time up front. I target procedures where my diagnostic data shows error rates above 40%, or anything requiring three or more sequential decisions. Teacher modelling works best for these bottlenecks, especially with procedures prone to specific misconceptions like subtracting smaller from larger in regrouping.
Skip the low-hanging fruit:
State capitals and other declarative knowledge—flashcards work better.
Skills already mastered by 80% of the class.
Open-ended creative tasks without defined procedures.
Break your chosen skill into three to five micro-steps before you touch chart paper. If you can't name the specific motor actions and cognitive decisions students must replicate, you're not ready to demonstrate.
Script Your Think-Aloud Commentary
Talking while thinking is harder than it looks. I script my think-aloud protocol using stems like "I notice...", "This reminds me of...", and "I need to check..." Aim for one verbalization every thirty seconds—any faster and you’re just narrating, not thinking out loud.
Hit four metacognitive moves: planning ("First I will..."), monitoring ("Does this make sense?"), evaluation ("This works because..."), and self-correction ("I need to start over...").
Fourth grade math: "I notice these denominators are different. First I will find a common multiple. Does twelve work? Let me check..."
Seventh grade ELA: "This word choice feels harsh. This reminds me of sarcasm. I need to check if the author is mocking the character."
Tenth grade science: "I have three oxygens on the left. This doesn't work because the right side shows five. I need to start over with different coefficients."
Anticipate Misconceptions and Prepare Visuals
Spend twenty to thirty minutes planning to yield ten minutes of tight demonstration. I use the planning habits of highly effective educators and a structured lesson plan template: objective, materials, steps, potential errors, check questions. List two anticipated misconceptions and prepare worked examples showing the errors. Script your explicit warning: "Watch out for..."
Prepare visual anchors on 18x24 chart paper or a digital slide using high-contrast markers—black, red, and blue only. Set your document camera to 1.5x zoom for handwriting clarity. Check lighting to eliminate shadows.
This preparation embodies cognitive apprenticeship. You’re externalizing the self-correction behaviors that define the modeling teaching strategy, setting up the gradual release of responsibility.

Step 2 — Execute the I Do Phase with Clear Demonstration
Positioning for Maximum Student Visibility
Stand at a 45-degree angle to the board. Your face stays visible while your hand writes. Students in rows one through five need diagonal sightlines to catch both your expressions and your pen strokes.
Check from a kid's desk height before class starts. Can they see the bottom of the whiteboard without craning necks? Keep that viewing angle under 15 degrees. Position your document camera to capture hand movements and text simultaneously—no one learns from a floating disembodied pen.
Clear visual obstructions. Move that podium. Adjust blinds to kill the glare. If they can't see, you're not doing teacher modelling—you're doing performance art for the front row.
Verbalizing Internal Cognitive Processes
Explicit instruction needs you crack open your brain. Use the think-aloud protocol to verbalize metacognition. Structure the demonstration using worked examples. First, present the complete solution in silence so students see the endgame. Second, demonstrate with full think-aloud—planning your approach, monitoring progress, evaluating correctness, and repairing errors. Third, invite predictions before writing the next step.
Here's what it sounds like with fractions: "I see the denominator is eight and this one is four. I need to find a common multiple. I'm thinking eight works because four times two is eight, so I'll convert this fraction..." Don't sanitize the struggle. Let them hear the hesitation. This cognitive apprenticeship shows novices how experts think. Record yourself once. Transcribing lectures into clean notes helps you spot where you skipped steps.
Pacing and Checking for Initial Understanding
Follow the pacing formula: one minute of demonstration per grade level. Seventh graders get seven minutes of teacher modeling examples maximum. Build in three strategic pause points where students process silently.
Every two to three minutes, drop a comprehension check. Use non-verbal signals—thumbs up or down, fingers one through five for clarity, or whiteboard responses. Add choral response for key steps. Use turn-and-talks: "Tell your partner the next move before I write it." This prevents cognitive overload.
These innovative tools to engage and inspire keep the gradual release of responsibility on track. If half the class looks confused, stop. Back up. Model again.

Step 3 — How Do You Facilitate the We Do Transition?
Facilitate the We Do transition by shifting from full teacher demonstration to guided practice where students contribute steps while you provide scaffolds. Use the handover technique: teacher holds the pen, then shared control, then student control with teacher monitoring. Maintain 80% accuracy threshold before independent work.
The We Do phase sits in the middle of explicit instruction. Students attempt the skill while you remain within arm's reach. Think of it as productive struggle with safety nets. They try the steps, stumble, and you supply cues before frustration wins. This is cognitive apprenticeship in action, not observation from afar.
I use four scaffold levels that fade like training wheels. Level 1 means I complete 90% of the work and students fill one blank. Level 2 puts the pen in their hand while I point. Level 3 has them working with cue cards visible. Level 4 is solo work with monitoring nearby. Each level drops support while maintaining accuracy.
Level 1: Teacher completes 90%, student fills blank.
Level 2: Shared pen with teacher pointing and guiding.
Level 3: Student works with cue cards or process steps visible.
Level 4: Student works independently with teacher monitoring only.
Never drop scaffolds until four out of five kids can verbalize the process. I check this with entrance tickets or choral response. If 80% can explain the steps without notes, we move forward. If not, we stay at the current level for another round. This prevents sending kids to independent practice lost and confused.
During group work, assigned roles prevent the "one kid does everything" problem. I use Recorder, Questioner, Skeptic, and Timekeeper. These rotate daily so everyone practices each cognitive function. It keeps all brains engaged during the collaborative learning methods we use in this phase.
Guided Practice with Strategic Teacher Support
The graduated pen technique controls the handoff. Phase 1: I hold the marker and think aloud. Phase 2: the student holds the tool while I point. Phase 3: they write while I offer verbal prompts. Phase 4: independent work with proximity. This mirrors the gradual release of responsibility model. If they panic when you step back, you handed over the pen too fast.
Last month my fifth graders tackled persuasive writing. I modelled the hook during I Do. For We Do, I used the frame "In this essay, I will argue that _____ because _____." I held the pen for the first example, then handed it to Marcus while I pointed to the evidence. By the third thesis, I only prompted "what's your reason?" This is how teacher modelling bridges to autonomy without leaving kids stranded.
Stand where you can see papers but not hover. When I see a mistake forming, I use the think-aloud protocol to wonder "does that evidence support the claim?" rather than correcting outright. This keeps the pen in their hand and the thinking in their brain.
Using Prompts and Scaffolds Effectively
Different scaffolds suit different grades. Sentence frames work K-12 for academic language. Partially completed graphic organizers help grades 3-8. Cue cards support all ages. Worked examples with blanks suit grades 6-12, showing solutions with key steps missing.
Fading requires a schedule. After two or three successful trials at 80% accuracy, remove the most supportive element first. Drop sentence frames while keeping the checklist. Never remove everything at once. The imitation method of teaching only works if students internalize the model, not copy it forever.
Watch for the scaffold becoming a crutch. If students cannot start without the frame, you faded too fast or need more active learning strategies. Back up one level. The goal is fluent, independent application.
Metacognition grows when students name the scaffold they used. Ask, "How did the cue card help?" This teaches them to create their own supports. Eventually, they should tell you which worked examples they mentally reference. That is when cognitive apprenticeship worked.
Managing Group Dynamics During Collaborative Work
Structured collaboration prevents chaos. I assign four rotating roles: Reader reads the problem, Planner suggests the strategy, Checker verifies steps against the model, and Reporter shares thinking with the class. These roles make thinking visible and distribute the cognitive load. Everyone processes content, not just copies answers.
Noise levels need explicit signals. Level 0 means silent observation. Level 1 is whisper to partner. Level 2 allows table talk. I use hand signals to shift levels—fist for zero, one finger for whisper, open palm for table talk. Transitions take ten seconds. If it takes longer, we practice until automatic.
The Skeptic role pairs well with the Checker. While the Checker verifies steps, the Skeptic asks "what if" questions or hunts errors. This creates cognitive conflict that deepens understanding. I rotate roles every fifteen minutes so no one gets stuck being scribe for forty-five minutes. Movement resets attention.
When groups stall, resist rescuing immediately. Use the three-before-me rule: check the cue card, ask the table, and check another group before calling you. This keeps you available for true breakdowns versus simple laziness. During this phase, monitor for systematic errors needing reteaching versus individual mistakes needing a quick prompt.

Step 4 — How Do You Troubleshoot Common Modelling Challenges?
Troubleshoot modelling challenges by diagnosing confusion through comprehension checks, breaking demonstrations into micro-steps, and using pause-and-highlight for misconceptions. Adjust pacing with extended wait time and color-coding. Gather feedback via two-question exit tickets and video self-analysis to refine technique.
Modelling fails silently. Students nod while lost, or watch passively without engaging their brains. You need diagnostic tools to catch the breakdown before it becomes a classroom of errors. The best demonstrations mean nothing if no one follows.
When teacher modelling goes wrong, it falls into three traps. Cognitive overload slams working memory when you demo ten steps at once—students remember the first and last, but the middle disappears. Expertise reversal bores kids by demonstrating skills they mastered last week. Passive observation looks like engagement but produces nothing—students watch like it's Netflix without the cognitive apprenticeship happening in their heads.
Spot confusion with questions that force specific answers. Ask "What did you notice about step 3?" instead of "Do you understand?" The second invites lying. Use formative assessment examples for immediate use like having students write the next step on whiteboards before you continue. This reveals gaps in their think-aloud protocol understanding without embarrassing anyone.
Build a rapid response system based on confusion levels:
If 50%+ confusion: Stop and re-demonstrate with color-coding. Mark errors in red, correct moves in green, to make thinking visible.
If 20-50% confusion: Pull a small group for targeted reteach while others begin independent practice.
If under 20% confusion: Deploy peer tutoring during the You Do phase. This keeps your explicit instruction efficient without holding back ready kids.
Close the loop with data. Run a two-question exit ticket: "What was clearest?" and "What needs reteaching?" Also record yourself monthly. Watch for teacher talk time creeping past 70%, or students staring at the ceiling. These classroom management strategies prevent drift in your demonstration technique over the year.
Handling Student Confusion and Misconceptions
Confusion has body language. Frozen hands hovering over materials. Off-task behavior popping up within 90 seconds. Procedural errors revealing fundamental misunderstanding of prerequisites, not just careless mistakes. Watch for the kid who asks "Which page?" when you're three steps into the worked examples. These are your early warning signals.
Intervene immediately. Use the telephone technique: the student whispers their understanding, you amplify the correct version for the class. Or pause and highlight an exaggerated error—"Watch what happens if I skip this step"—to trigger metacognition. Never push through the confusion. That just buries the misunderstanding deeper where it's harder to fix.
Create mistake-friendly moments. Tell students you'll demonstrate a common error in five minutes and they should catch it. This keeps their brains alert during passive viewing. When someone makes the error later, celebrate it: "Perfect, this is exactly what I hoped we'd see." This reframes confusion as data, changing how reluctant learners engage.
Adjusting Pace for Different Learning Needs
Differentiation means adjusting support, not content rigor. Try these specific scaffolds:
For IEP students: Provide a visual checklist of steps they physically check off as you demonstrate.
For EAL learners: Pre-teach five key vocabulary terms with images before starting—words like "annotate" need concrete anchors.
For advanced learners: Add predictive prompts: "What would happen if I reversed these steps?"
Control the tempo deliberately. Add three seconds of wait time after each step—count it in your head. Use stop-and-jot: thirty seconds to summarize the step in their notebook before you continue. Break a ten-minute demo into two five-minute chunks with practice in between. This honors the gradual release of responsibility without rushing the "We Do" into oblivion.
Watch for pacing cues. If three hands go up immediately, you moved too fast. If everyone starts the next step before you finish, you moved too slow. Add a worked examples review for the first group, or extension challenges for the second. Your demonstration isn't a train on tracks—steer based on who is on board.
Gathering Feedback to Refine Your Modelling Technique
Video doesn't lie. Record a ten-minute demonstration and review with a three-point rubric. Check your talk time—aim for 60-70%, leaving space for processing. Verify visual accessibility: can the back row see each step? Note student gaze direction. If they're watching your face instead of your hands, your cognitive apprenticeship setup needs rearranging.
Let students grade your clarity. Use a Likert scale from 1-4 on two items: "I could see clearly" and "The explanation made sense." Add one open response: "One thing to change." Read these while the lesson is fresh. If three kids mention the same confusion point, you've found your target for tomorrow's reteach. This closes the feedback loop on your demonstration as a teaching strategy.
Build a personal improvement log. After each video review, write one sentence about what you'll change next time. "Use red for errors." "Wait three seconds longer." Review this log monthly to spot patterns. Small shifts compound over a semester. Your modelling technique should evolve continuously, just like student learning.

Getting Started with Teacher Modelling
You don't need to model every lesson tomorrow. Pick one skill your students butchered last week—maybe annotating text or writing a thesis statement. Plan one explicit demonstration using the think-aloud protocol. Watch what happens when you actually show your thinking instead of just describing it. That single shift changes how kids attack problems.
Gradual release of responsibility isn't a one-day event. It's a slow handoff over weeks, sometimes months. Stay in the I Do phase longer than feels comfortable. Your cognitive apprenticeship gives students the mental models they need to work independently later. When you rush to You Do, you leave kids guessing.
Start small. I once spent ten minutes modelling how to highlight only the key evidence in a paragraph while my 7th graders watched. The next day, their attempts were cleaner than any lecture I had given. Explicit instruction takes time upfront, but it saves you reteaching later.
Pick one standard your students missed on the last assessment.
Script a 5-minute think-aloud showing exactly how you would solve it.
Model it live tomorrow, then immediately shift to We Do.
Note where they get stuck and model that specific step again.

Understanding the I Do You Do We Do Framework
Teacher Modelling as a Core Teaching Strategy
The i do you do we do teaching strategy isn't just fancy wording for "I talk, you listen." It's cognitive apprenticeship. Think of it like a tradesperson showing an apprentice how to frame a wall—not by handing over a hammer and walking away, but by modeling the cut, explaining the angle, then guiding the first few swings.
John Hattie's meta-analysis puts direct instruction at an effect size of 0.59, well above the hinge point of 0.40. But teacher clarity—what happens during the I Do phase—hits 0.75. That's the difference between traditional lecture and making thinking visible. In lecture, students see the product, a finished essay or solved equation. In evidence-based models of explicit instruction, they see the messy process, the false starts, the self-corrections.
Effective teacher modelling requires three things:
Explicit demonstration: You solve the problem or execute the skill while students watch, no skipping steps.
Metacognitive verbalization: You talk through the confusion, the backtracking, the "wait, that doesn't look right" moments.
Immediate application opportunity: Students try something similar while the strategy is still fresh, usually during the We Do phase.
This beats unguided discovery every time. Discovery has its place, but when you're teaching procedural skills like long division or essay structure, leaving kids to figure it out wastes instructional minutes and frustrates struggling learners. Kids stop trying when they fail silently for ten minutes. The apprenticeship model respects working memory limits by chunking new information into demonstrated, coached, then independent practice.
The Three Phases of Gradual Release
The gradual release of responsibility moves through three distinct phases in a typical 45-minute block:
I Do (10-15 minutes): Complete expert demonstration with think-aloud protocol. You narrate every decision while students observe.
We Do (15-20 minutes): Guided practice with fading support. Students work with partners or partially complete tasks while you circulate.
You Do (15-20 minutes): Independent application with monitoring. You watch for transfer but resist the urge to rescue immediately.
Barak Rosenshine's 7th Principle of Instruction is non-negotiable here: students need extensive guided practice before flying solo. Research suggests they need to hit 80% accuracy during We Do before you transition to You Do. That eighty percent threshold isn't arbitrary; it signals that students have moved from mimicking to understanding. That final 15 to 20 minutes is independent practice—You Do—where you monitor but don't rescue. If kids are bombing the We Do, you don't move on. You model again tomorrow.
This pacing prevents the common trap of releasing too early. I've watched teachers spend 25 minutes explaining, then assign 20 problems for homework wondering why kids failed. The We Do phase is where metacognition happens—students speak their thinking while you correct misconceptions in real time.
This structure reflects explicit instruction at its most effective. You're not abandoning students to struggle productively before they've seen expertise in action. You're showing, sharing, then watching—making sure the cognitive apprenticeship sticks before the bell rings.
When to Use Demonstration as a Teaching Strategy
Not every lesson needs a full demonstration. Match your modeling intensity to the learning objective. Use this framework to decide your approach.
Approach | Skill Complexity | Student Prior Knowledge | Time Constraints |
|---|---|---|---|
Full demonstration | Procedural with 3+ steps (long division, lab safety) | Low or none | 45-50 minute period available |
Partial modeling | Conceptual understanding (theme analysis, photosynthesis) | Some familiarity | 30 minutes available |
Worked examples only | Review or mastered material | High | 15 minutes or less |
Kindergarten through 2nd grade brains check out after 15 to 20 minutes of focused attention. You need to cycle through I Do You Do We Do teaching strategy loops multiple times per lesson, resetting attention with new demonstrations frequently. By high school, you can run 20 to 30 minute modeling cycles before students need independent processing time, though even seniors benefit from seeing you think through complex texts occasionally.
Deciding when to model fully versus partially comes down to error analysis. If students making mistakes will ingrain bad habits that take weeks to fix—like improper fraction operations or incorrect lab safety—you need the full cognitive apprenticeship with every step visible. The stakes dictate the support level. If the error risk is low and the thinking is the point, partial demonstration preserves student agency while still providing guardrails.
Time constraints force hard choices. With only twenty minutes, don't cram all three phases poorly. Instead, use worked examples and jump to guided practice, saving the full think-aloud for the next day's opener when you have adequate time for the complete gradual release of responsibility cycle. Quality beats quantity here.
Step 1 — Plan Your Explicit Modelling Session
Select Skills Worthy of Demonstration
Not every skill deserves your time up front. I target procedures where my diagnostic data shows error rates above 40%, or anything requiring three or more sequential decisions. Teacher modelling works best for these bottlenecks, especially with procedures prone to specific misconceptions like subtracting smaller from larger in regrouping.
Skip the low-hanging fruit:
State capitals and other declarative knowledge—flashcards work better.
Skills already mastered by 80% of the class.
Open-ended creative tasks without defined procedures.
Break your chosen skill into three to five micro-steps before you touch chart paper. If you can't name the specific motor actions and cognitive decisions students must replicate, you're not ready to demonstrate.
Script Your Think-Aloud Commentary
Talking while thinking is harder than it looks. I script my think-aloud protocol using stems like "I notice...", "This reminds me of...", and "I need to check..." Aim for one verbalization every thirty seconds—any faster and you’re just narrating, not thinking out loud.
Hit four metacognitive moves: planning ("First I will..."), monitoring ("Does this make sense?"), evaluation ("This works because..."), and self-correction ("I need to start over...").
Fourth grade math: "I notice these denominators are different. First I will find a common multiple. Does twelve work? Let me check..."
Seventh grade ELA: "This word choice feels harsh. This reminds me of sarcasm. I need to check if the author is mocking the character."
Tenth grade science: "I have three oxygens on the left. This doesn't work because the right side shows five. I need to start over with different coefficients."
Anticipate Misconceptions and Prepare Visuals
Spend twenty to thirty minutes planning to yield ten minutes of tight demonstration. I use the planning habits of highly effective educators and a structured lesson plan template: objective, materials, steps, potential errors, check questions. List two anticipated misconceptions and prepare worked examples showing the errors. Script your explicit warning: "Watch out for..."
Prepare visual anchors on 18x24 chart paper or a digital slide using high-contrast markers—black, red, and blue only. Set your document camera to 1.5x zoom for handwriting clarity. Check lighting to eliminate shadows.
This preparation embodies cognitive apprenticeship. You’re externalizing the self-correction behaviors that define the modeling teaching strategy, setting up the gradual release of responsibility.
Step 2 — Execute the I Do Phase with Clear Demonstration
Positioning for Maximum Student Visibility
Stand at a 45-degree angle to the board. Your face stays visible while your hand writes. Students in rows one through five need diagonal sightlines to catch both your expressions and your pen strokes.
Check from a kid's desk height before class starts. Can they see the bottom of the whiteboard without craning necks? Keep that viewing angle under 15 degrees. Position your document camera to capture hand movements and text simultaneously—no one learns from a floating disembodied pen.
Clear visual obstructions. Move that podium. Adjust blinds to kill the glare. If they can't see, you're not doing teacher modelling—you're doing performance art for the front row.
Verbalizing Internal Cognitive Processes
Explicit instruction needs you crack open your brain. Use the think-aloud protocol to verbalize metacognition. Structure the demonstration using worked examples. First, present the complete solution in silence so students see the endgame. Second, demonstrate with full think-aloud—planning your approach, monitoring progress, evaluating correctness, and repairing errors. Third, invite predictions before writing the next step.
Here's what it sounds like with fractions: "I see the denominator is eight and this one is four. I need to find a common multiple. I'm thinking eight works because four times two is eight, so I'll convert this fraction..." Don't sanitize the struggle. Let them hear the hesitation. This cognitive apprenticeship shows novices how experts think. Record yourself once. Transcribing lectures into clean notes helps you spot where you skipped steps.
Pacing and Checking for Initial Understanding
Follow the pacing formula: one minute of demonstration per grade level. Seventh graders get seven minutes of teacher modeling examples maximum. Build in three strategic pause points where students process silently.
Every two to three minutes, drop a comprehension check. Use non-verbal signals—thumbs up or down, fingers one through five for clarity, or whiteboard responses. Add choral response for key steps. Use turn-and-talks: "Tell your partner the next move before I write it." This prevents cognitive overload.
These innovative tools to engage and inspire keep the gradual release of responsibility on track. If half the class looks confused, stop. Back up. Model again.
Step 3 — How Do You Facilitate the We Do Transition?
Facilitate the We Do transition by shifting from full teacher demonstration to guided practice where students contribute steps while you provide scaffolds. Use the handover technique: teacher holds the pen, then shared control, then student control with teacher monitoring. Maintain 80% accuracy threshold before independent work.
The We Do phase sits in the middle of explicit instruction. Students attempt the skill while you remain within arm's reach. Think of it as productive struggle with safety nets. They try the steps, stumble, and you supply cues before frustration wins. This is cognitive apprenticeship in action, not observation from afar.
I use four scaffold levels that fade like training wheels. Level 1 means I complete 90% of the work and students fill one blank. Level 2 puts the pen in their hand while I point. Level 3 has them working with cue cards visible. Level 4 is solo work with monitoring nearby. Each level drops support while maintaining accuracy.
Level 1: Teacher completes 90%, student fills blank.
Level 2: Shared pen with teacher pointing and guiding.
Level 3: Student works with cue cards or process steps visible.
Level 4: Student works independently with teacher monitoring only.
Never drop scaffolds until four out of five kids can verbalize the process. I check this with entrance tickets or choral response. If 80% can explain the steps without notes, we move forward. If not, we stay at the current level for another round. This prevents sending kids to independent practice lost and confused.
During group work, assigned roles prevent the "one kid does everything" problem. I use Recorder, Questioner, Skeptic, and Timekeeper. These rotate daily so everyone practices each cognitive function. It keeps all brains engaged during the collaborative learning methods we use in this phase.
Guided Practice with Strategic Teacher Support
The graduated pen technique controls the handoff. Phase 1: I hold the marker and think aloud. Phase 2: the student holds the tool while I point. Phase 3: they write while I offer verbal prompts. Phase 4: independent work with proximity. This mirrors the gradual release of responsibility model. If they panic when you step back, you handed over the pen too fast.
Last month my fifth graders tackled persuasive writing. I modelled the hook during I Do. For We Do, I used the frame "In this essay, I will argue that _____ because _____." I held the pen for the first example, then handed it to Marcus while I pointed to the evidence. By the third thesis, I only prompted "what's your reason?" This is how teacher modelling bridges to autonomy without leaving kids stranded.
Stand where you can see papers but not hover. When I see a mistake forming, I use the think-aloud protocol to wonder "does that evidence support the claim?" rather than correcting outright. This keeps the pen in their hand and the thinking in their brain.
Using Prompts and Scaffolds Effectively
Different scaffolds suit different grades. Sentence frames work K-12 for academic language. Partially completed graphic organizers help grades 3-8. Cue cards support all ages. Worked examples with blanks suit grades 6-12, showing solutions with key steps missing.
Fading requires a schedule. After two or three successful trials at 80% accuracy, remove the most supportive element first. Drop sentence frames while keeping the checklist. Never remove everything at once. The imitation method of teaching only works if students internalize the model, not copy it forever.
Watch for the scaffold becoming a crutch. If students cannot start without the frame, you faded too fast or need more active learning strategies. Back up one level. The goal is fluent, independent application.
Metacognition grows when students name the scaffold they used. Ask, "How did the cue card help?" This teaches them to create their own supports. Eventually, they should tell you which worked examples they mentally reference. That is when cognitive apprenticeship worked.
Managing Group Dynamics During Collaborative Work
Structured collaboration prevents chaos. I assign four rotating roles: Reader reads the problem, Planner suggests the strategy, Checker verifies steps against the model, and Reporter shares thinking with the class. These roles make thinking visible and distribute the cognitive load. Everyone processes content, not just copies answers.
Noise levels need explicit signals. Level 0 means silent observation. Level 1 is whisper to partner. Level 2 allows table talk. I use hand signals to shift levels—fist for zero, one finger for whisper, open palm for table talk. Transitions take ten seconds. If it takes longer, we practice until automatic.
The Skeptic role pairs well with the Checker. While the Checker verifies steps, the Skeptic asks "what if" questions or hunts errors. This creates cognitive conflict that deepens understanding. I rotate roles every fifteen minutes so no one gets stuck being scribe for forty-five minutes. Movement resets attention.
When groups stall, resist rescuing immediately. Use the three-before-me rule: check the cue card, ask the table, and check another group before calling you. This keeps you available for true breakdowns versus simple laziness. During this phase, monitor for systematic errors needing reteaching versus individual mistakes needing a quick prompt.
Step 4 — How Do You Troubleshoot Common Modelling Challenges?
Troubleshoot modelling challenges by diagnosing confusion through comprehension checks, breaking demonstrations into micro-steps, and using pause-and-highlight for misconceptions. Adjust pacing with extended wait time and color-coding. Gather feedback via two-question exit tickets and video self-analysis to refine technique.
Modelling fails silently. Students nod while lost, or watch passively without engaging their brains. You need diagnostic tools to catch the breakdown before it becomes a classroom of errors. The best demonstrations mean nothing if no one follows.
When teacher modelling goes wrong, it falls into three traps. Cognitive overload slams working memory when you demo ten steps at once—students remember the first and last, but the middle disappears. Expertise reversal bores kids by demonstrating skills they mastered last week. Passive observation looks like engagement but produces nothing—students watch like it's Netflix without the cognitive apprenticeship happening in their heads.
Spot confusion with questions that force specific answers. Ask "What did you notice about step 3?" instead of "Do you understand?" The second invites lying. Use formative assessment examples for immediate use like having students write the next step on whiteboards before you continue. This reveals gaps in their think-aloud protocol understanding without embarrassing anyone.
Build a rapid response system based on confusion levels:
If 50%+ confusion: Stop and re-demonstrate with color-coding. Mark errors in red, correct moves in green, to make thinking visible.
If 20-50% confusion: Pull a small group for targeted reteach while others begin independent practice.
If under 20% confusion: Deploy peer tutoring during the You Do phase. This keeps your explicit instruction efficient without holding back ready kids.
Close the loop with data. Run a two-question exit ticket: "What was clearest?" and "What needs reteaching?" Also record yourself monthly. Watch for teacher talk time creeping past 70%, or students staring at the ceiling. These classroom management strategies prevent drift in your demonstration technique over the year.
Handling Student Confusion and Misconceptions
Confusion has body language. Frozen hands hovering over materials. Off-task behavior popping up within 90 seconds. Procedural errors revealing fundamental misunderstanding of prerequisites, not just careless mistakes. Watch for the kid who asks "Which page?" when you're three steps into the worked examples. These are your early warning signals.
Intervene immediately. Use the telephone technique: the student whispers their understanding, you amplify the correct version for the class. Or pause and highlight an exaggerated error—"Watch what happens if I skip this step"—to trigger metacognition. Never push through the confusion. That just buries the misunderstanding deeper where it's harder to fix.
Create mistake-friendly moments. Tell students you'll demonstrate a common error in five minutes and they should catch it. This keeps their brains alert during passive viewing. When someone makes the error later, celebrate it: "Perfect, this is exactly what I hoped we'd see." This reframes confusion as data, changing how reluctant learners engage.
Adjusting Pace for Different Learning Needs
Differentiation means adjusting support, not content rigor. Try these specific scaffolds:
For IEP students: Provide a visual checklist of steps they physically check off as you demonstrate.
For EAL learners: Pre-teach five key vocabulary terms with images before starting—words like "annotate" need concrete anchors.
For advanced learners: Add predictive prompts: "What would happen if I reversed these steps?"
Control the tempo deliberately. Add three seconds of wait time after each step—count it in your head. Use stop-and-jot: thirty seconds to summarize the step in their notebook before you continue. Break a ten-minute demo into two five-minute chunks with practice in between. This honors the gradual release of responsibility without rushing the "We Do" into oblivion.
Watch for pacing cues. If three hands go up immediately, you moved too fast. If everyone starts the next step before you finish, you moved too slow. Add a worked examples review for the first group, or extension challenges for the second. Your demonstration isn't a train on tracks—steer based on who is on board.
Gathering Feedback to Refine Your Modelling Technique
Video doesn't lie. Record a ten-minute demonstration and review with a three-point rubric. Check your talk time—aim for 60-70%, leaving space for processing. Verify visual accessibility: can the back row see each step? Note student gaze direction. If they're watching your face instead of your hands, your cognitive apprenticeship setup needs rearranging.
Let students grade your clarity. Use a Likert scale from 1-4 on two items: "I could see clearly" and "The explanation made sense." Add one open response: "One thing to change." Read these while the lesson is fresh. If three kids mention the same confusion point, you've found your target for tomorrow's reteach. This closes the feedback loop on your demonstration as a teaching strategy.
Build a personal improvement log. After each video review, write one sentence about what you'll change next time. "Use red for errors." "Wait three seconds longer." Review this log monthly to spot patterns. Small shifts compound over a semester. Your modelling technique should evolve continuously, just like student learning.
Getting Started with Teacher Modelling
You don't need to model every lesson tomorrow. Pick one skill your students butchered last week—maybe annotating text or writing a thesis statement. Plan one explicit demonstration using the think-aloud protocol. Watch what happens when you actually show your thinking instead of just describing it. That single shift changes how kids attack problems.
Gradual release of responsibility isn't a one-day event. It's a slow handoff over weeks, sometimes months. Stay in the I Do phase longer than feels comfortable. Your cognitive apprenticeship gives students the mental models they need to work independently later. When you rush to You Do, you leave kids guessing.
Start small. I once spent ten minutes modelling how to highlight only the key evidence in a paragraph while my 7th graders watched. The next day, their attempts were cleaner than any lecture I had given. Explicit instruction takes time upfront, but it saves you reteaching later.
Pick one standard your students missed on the last assessment.
Script a 5-minute think-aloud showing exactly how you would solve it.
Model it live tomorrow, then immediately shift to We Do.
Note where they get stuck and model that specific step again.
Still grading everything by hand?
EMStudio is a free teaching management app — manage your classes, students, lessons, and more!
Learn More
Still grading everything by hand?
EMStudio is a free teaching management app — manage your classes, students, lessons, and more!
Learn More


Notion4Teachers
Notion templates to simplify administrative tasks and enhance your teaching experience.


2026 Notion4Teachers. All Rights Reserved.
Notion4Teachers
Notion templates to simplify administrative tasks and enhance your teaching experience.
2026 Notion4Teachers. All Rights Reserved.
Notion4Teachers
Notion templates to simplify administrative tasks and enhance your teaching experience.
2026 Notion4Teachers. All Rights Reserved.