
Online Teaching: 3 Steps to Launch Your Virtual Classroom
Online Teaching: 3 Steps to Launch Your Virtual Classroom

Article by
Milo
ESL Content Coordinator & Educator
ESL Content Coordinator & Educator
All Posts
Most teachers who struggled with online teaching didn't fail because of bad tech skills. They failed because they tried to replicate their physical classroom instead of building something new. I learned this in March 2020 when my 7th graders sat in silence during my first video conferencing session. I was talking at a grid of black boxes while my lesson died in the chat. That's when I realized digital pedagogy isn't classroom teaching through a screen—it's an entirely different craft. You need asynchronous learning workflows that function and synchronous instruction that keeps kids from checking TikTok.
Over the next three years, I rebuilt my approach. I tested screen sharing strategies that don't bore students, figured out which learning management system features save time, and planned lessons that work remotely. The teachers who thrive aren't the tech wizards with glowing headsets. They're the ones who nail the fundamentals: a structured digital space, interactive lessons that demand participation, and video presence that commands attention. This post walks through the three steps that took me from panicked Zoom host to confident virtual teacher. No theory. Just the setup, planning, and delivery tactics that work.
Still grading everything by hand?
EMStudio is a free teaching management app — manage your classes, students, lessons, and more!
Learn More

Still grading everything by hand?
EMStudio is a free teaching management app — manage your classes, students, lessons, and more!
Learn More
Table of Contents
Essential Technology and Workspace Setup for Teaching Online
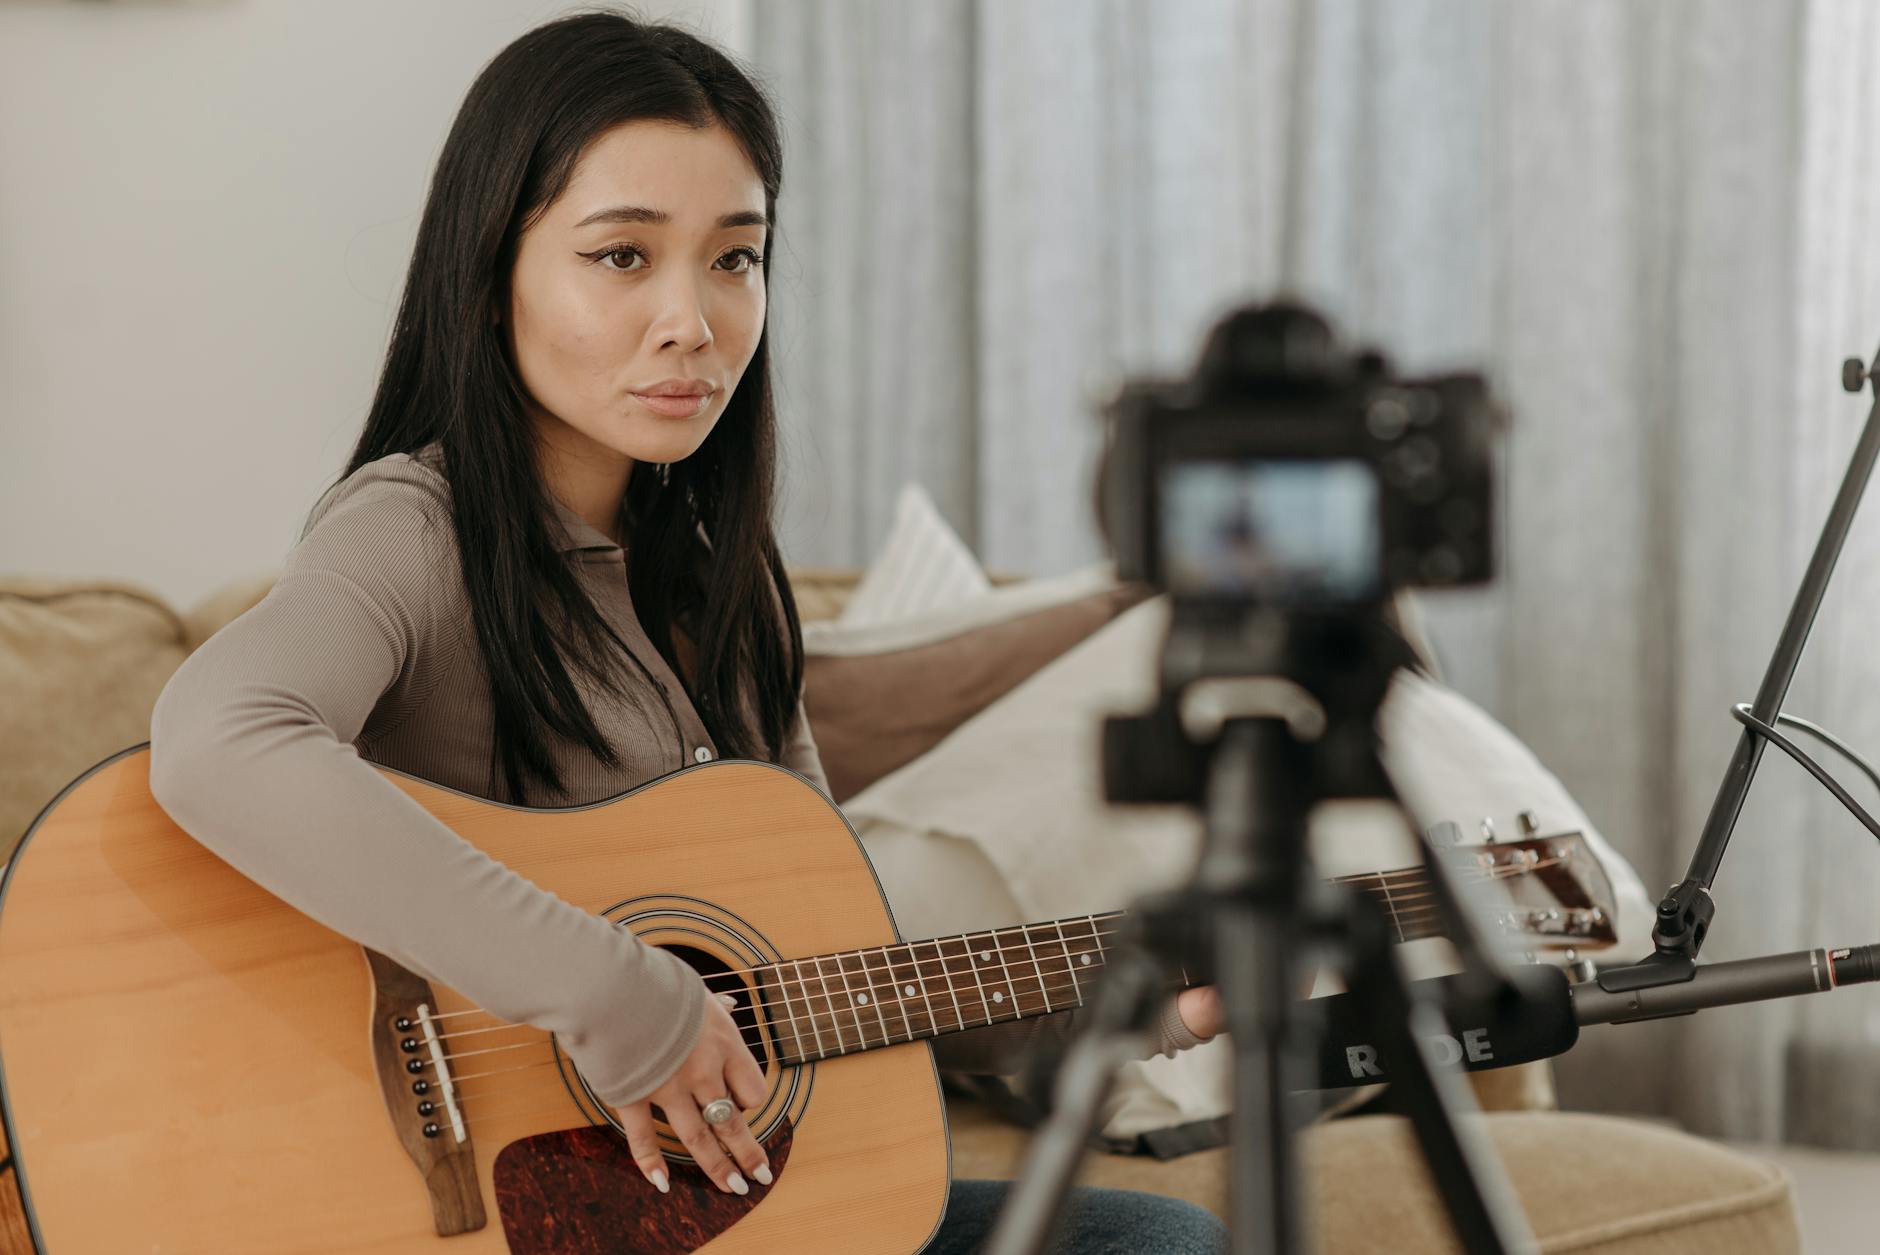
Online teaching demands gear that works every time. Your audio makes or breaks digital distance learning. Students forgive blurry video when your voice sounds present. They won't forgive sounding like you're teaching from a submarine. I've tested three setups across different price points while teaching online from my spare bedroom.
For most synchronous instruction, the Blue Yeti USB ($129) handles classes under 25 students. It sits on your desk and picks up your voice clearly without software fiddling. Position it 6-8 inches from your mouth. Any farther and you sound distant. Any closer and you breathe into their earbuds.
Teaching from a busy household? The Jabra Evolve2 40 headset ($99) blocks background noise with its foam ear cushions. I used this when my construction-worker neighbor decided 9 AM was jackhammer time. The mic arm keeps your voice consistent even when you turn to reference your learning management system.
For asynchronous learning videos that last, upgrade to the Samson Q2U XLR ($69) paired with a Focusrite Scarlett Solo ($119). This combo gives you broadcast quality. I record my math explanations with this setup. The difference is noticeable when students rewatch videos at 2x speed.
Lighting matters more than your camera. You need 5600K color temperature and at least 800 lumens. Position your light at a 45-degree angle to eliminate shadows under your eyes. You don't want to look like you're telling ghost stories during your video conferencing sessions.
Three options work. The Neewer 18-inch ring light ($35) gets the job done. For teachers thinking about career growth, a well-written cover letter for teaching job can help present your online teaching experience professionally. The Elgato Key Light Mini ($129) adjusts via app and mounts cleanly. Or use a north-facing window—free, but unreliable in December. Pair any option with virtual classroom setup best practices to get your positioning right.
Place your webcam at eye level exactly. Use a laptop stand or a stack of books. Looking down at your students puts you in a position of accidental authority. Looking up at them invites chaos. Eye level creates conversation.
Your internet connection determines whether screen sharing flows or stutters. You need 10 Mbps upload minimum for 1080p teaching. Run an Ethernet cable directly to your laptop if possible. WiFi drops when your spouse streams Netflix or your teenager uploads TikToks during your live sessions.
If you must use WiFi, follow three router rules. Raise the unit 4 feet off the ground—shelves work better than floors. Maintain clear line-of-sight between router and teaching space; walls slow signals. Keep it 5 feet from microwaves or baby monitors. These devices compete for the same 2.4 GHz frequencies and freeze your connection mid-explanation.
Digital pedagogy requires showing your work live. For math and science demonstrations, grab a document camera instead of fighting with a mouse. The IPEVO VZ-X ($199) connects wirelessly, letting you move around the room while solving equations. The OKIOCAM S ($69) plugs in via USB and handles daily graphing without fuss. Both beat writing with a trackpad.
Physical setup prevents the back pain that ruins virtual online schooling. Your external keyboard should sit at elbow height with wrists straight. Your monitor's top third must align with eye level; never look down at students. If your feet dangle, use a footrest or box. I learned this the hard way after three months of hunching over my kitchen table. Setting up a dedicated home office for teaching online means treating your body like it matters.
Step 1 — Design Your Digital Classroom Structure and Workflow
You can have the best webcam and fastest internet, but without a clear structure, your online teaching falls apart by Wednesday. I learned this the hard way during my first semester in a district online academy. Kids couldn't find assignments. Parents emailed daily asking where things were. I spent more time managing confusion than teaching content. Structure is not optional in remote teaching. It is the skeleton that holds your digital pedagogy upright when the Wi-Fi flickers and the Chromebooks lag.
Start with your learning management system. Picking the wrong one creates friction for every assignment afterward. Here is how the three major platforms stack up for K-12 virtual classrooms.
Feature | Google Classroom | Canvas LMS | Schoology |
|---|---|---|---|
Initial Setup | 30 minutes | 3 hours | 2 hours |
Storage Limits | 15GB shared | 500MB per file | 100MB per file |
Parent Portal | Limited | Add-on required | Built-in |
Best For | K-12 simple workflows | Higher education rubrics | Middle school |
Winner | Speed | Assessment depth | Family engagement |
I use Google Classroom for my 7th graders because I refuse to spend my Sunday managing complex permissions. If you need weighted grading categories and rubric matrices, Canvas wins. Schoology splits the difference with a parent portal that actually works. For help deciding, read our guide on choosing the right learning management system.
Once you pick your platform, build your folder taxonomy before you post a single resource. Keep your folder depth to three levels maximum. Anything deeper buries materials where students cannot find them. Use this naming convention:
Week01-Resources for readings and videos.
Week01-Assignments for handouts and submission links.
Week01-Discussions for forum prompts and replies.
The leading zeros force chronological sorting. Without them, Week10 appears before Week2. I color-code each week in Google Drive so students can spot the current unit instantly. Visual cues reduce the cognitive load for kids already overwhelmed by virtual learning.
Require specific file naming for submissions: LastName_AssignmentName_Date. When 150 essays hit your inbox, you will thank yourself. I learned this after downloading forty files named "essay.docx" during my first month of remote teaching. Now I deduct points for incorrect filenames. It sounds harsh, but it teaches digital organization skills they will need in high school and college. Consistency matters more than perfection in an online academy.
Set your communication protocols on day one. Promise a 24-hour response time for emails. Commit to 48-hour turnaround for grading feedback. Post these timelines in your syllabus and stick to them. Use the free tier of Calendly or Google Calendar appointment slots for virtual office hours. Students book 15-minute slots instead of emailing "are you available?" ten times a week. Boundaries prevent burnout. I check email at 7 AM and 3 PM only. Students adapt quickly when expectations are clear.
Establish an asynchronous first rule. When a student emails a question applicable to the whole class, post the answer to your LMS discussion board. Then reply to the student with the link. This cuts repetitive emails in half and builds a FAQ library organically. It is a core virtual education classroom management strategy that saves hours. See more tactics in our post on virtual education classroom management strategies. Last year, this single rule reduced my inbox volume by sixty percent during our digital modular distance learning unit.
Balance your synchronous instruction and asynchronous learning deliberately. For secondary students, I use a 60/40 split. Sixty percent happens in self-paced modules built in Google Sites or Canvas modules. Forty percent happens live over video conferencing with screen sharing for direct instruction. High schoolers need time to process independently through digital modular distance learning. They can rewatch video explanations and pause to take notes. Live time becomes precious discussion rather than lecture. This respects their growing autonomy while keeping them connected.
Flip that ratio for elementary. Younger learners need 70 percent synchronous face time. They lack the executive function for independent digital work. Short, live sessions with frequent check-ins work better than long assignments. I taught 3rd grade remotely for six weeks. Thirty-minute Zoom blocks with movement breaks kept them engaged. Asynchronous work was limited to reading and simple math facts. Anything complex required live video conferencing support. Their brains are still learning to manage time. Meet them where they are.
Post your module overviews 48 hours before you teach them. Hattie's Visible Learning research shows teacher clarity carries an effect size of 0.75. When students see learning objectives and success criteria in advance, they learn almost twice as fast. This clarity is the heart of effective digital pedagogy. Structure is not rigid. It is the foundation that lets you improvise when technology fails or a lesson falls flat. With solid workflows, you can focus on teaching instead of troubleshooting.

Step 2 — How Do You Plan Interactive Lessons for Remote Learning?
Plan interactive lessons by breaking content into 10-minute chunks, embedding formative checks every 5 minutes using tools like Pear Deck or Mentimeter, and incorporating breakout rooms for 4-6 students for 7-minute collaborative tasks. Always include a 'hook' activity using multimedia within the first 90 seconds.
Multimedia hooks grab attention faster than my voice ever could. A thirty-second video clip or provocative image activates prior knowledge before I say a word. In remote learning, you compete with TikTok and doorbells; the first ninety seconds determine whether they lean in or check out.
I use the "segment, interact, reset" method for video teaching. Every ten minutes, I switch gears. Two minutes for a multimedia hook—maybe a TikTok clip or provocative image. Seven minutes for content delivery with embedded interaction. Eight minutes for breakout application.
This rhythm prevents the glazed-over stare I see when I lecture past the fifteen-minute mark in online teaching. Teen brains check out without variety; digital pedagogy demands we respect that cognitive limit.
Formative checks happen every five minutes, not at the end. I embed Pear Deck into Google Slides—it's $150 yearly for unlimited presentations, though the free tier gives you five. Mentimeter works with two questions per slide on the free plan. These tools force participation from kids who'd rather mute themselves and disappear during synchronous instruction. The data exports to my learning management system for quick small-group planning next class.
Breakout rooms need structure or they become digital recess. I pre-assign groups in Zoom for long-term projects so students build trust, but use randomization for jigsaw activities. Groups of four to six work best for seven-minute tasks.
Each breakout needs one specific deliverable—one Google Slide answering a posted question, or one solved problem. I broadcast a two-minute warning so they don't waste time panicking about sharing innovative tools to engage and inspire students. Clear protocols turn video conferencing chaos into focused collaboration.
Different tools serve different phases of remote learning. I match the tool to the cognitive load—novelty for introduction, familiarity for review.
Nearpod ($120/year Gold license): VR field trips and collaborative boards for introducing new concepts.
Jamboard (free with Google Workspace): Brainstorming with a fifty-page limit, ideal for synthesis activities.
Slido (free: 3 polls per event): Q&A and word clouds for exit tickets.
Using the wrong tool at the wrong time wastes minutes you don't have in a 45-minute block.
For content that doesn't need real-time interaction, I shift to asynchronous learning via strategies for successful flipped classrooms. This preserves synchronous instruction time for actual dialogue rather than passive consumption. My digital distance education mission prioritizes human connection over screen sharing marathons. Recorded lessons let students pause and rewind, which they can't do during live video teaching.
Replacing "turn and talk" requires creativity in web based learning. I assign Partner A and Partner B, then push them into private chat pairs for ninety seconds. They paste evidence from the text or debate the prompt before returning to whole-group video conferencing. This keeps the social aspect of learning alive even through screens.
Instead of hand-raising, I use reaction buttons or "waterfall" chats where everyone types answers but hits enter only on my count of three.
For cold calling, Wheel of Names or ClassDojo randomizer maintains the accountability of in-person questioning without the awkward silence of video teaching delays.
Step 3 — Master Video Teaching Techniques for Virtual Education
Your webcam replaces your whiteboard in virtual education. Position it wrong, and students spend the period staring up your nose. I learned this during my first semester of distance ed when a 4th grader asked why my ceiling fan looked like a helicopter. Whether you're recording for asynchronous learning or hosting live synchronous instruction, technical basics determine if students hear your lesson or get distracted by your laundry pile. This is northstar online learning: clear video keeps focus on content, not production mistakes.
Place your camera lens exactly at eye level. Most laptop cameras sit 6 inches too low, forcing you to look down at students which creates a power dynamic you don't want. Stack textbooks or buy a $12 laptop stand. Sit 2 to 3 feet away from the lens—any closer distorts your face like a funhouse mirror; farther away loses the emotional connection crucial for elementary engagement.
Compose using the rule of thirds: position your eyes on the top horizontal line, leaving negative space above your head. Maintain at least 3 feet of depth behind you to avoid looking trapped in a cardboard box. Virtual backgrounds tempt teachers hiding messy rooms, but without proper equipment, you get edge artifacts that flicker when you move. Buy the $20 Neewer green screen kit if you must use them. Otherwise, face a neutral wall or bookshelf. Students forgive boring backgrounds. They fixate on glitchy edges during video conferencing.
Lighting separates amateur video class recordings from professional ones. Adapt traditional three-point lighting for cramped home offices. Your key light—either a large north-facing window or a 5600K LED panel—sits at your 10 o'clock position. This color temperature matches natural daylight and prevents you from looking orange or sickly green. Place your fill light at 2 o'clock, dialed to exactly 50% intensity of your key light. This softens harsh shadows without flattening your features into a ghostly blur.
If you're spending money on one upgrade, skip the 4K camera and buy the $40 Neewer ring light instead. Mount it 12 inches from your face, slightly above eye level, pointing down at a 45-degree angle. Never rely on overhead ceiling fixtures common in apartments. They create raccoon-like shadows under your eyes and highlight every forehead wrinkle, making you look exhausted before you've even taken attendance.
Asynchronous learning videos follow different rules than live teaching. You can't read the room when recording, so you must build engagement checkpoints into the video itself. Use Loom for quick concept explanations—the free tier allows 25 videos up to 5 minutes each, while the $8 monthly plan removes both limits entirely. For longer screen sharing demonstrations or software walkthroughs, Screencastify costs $49 yearly for unlimited recording versus the free version's restrictive 5-minute cutoff that always interrupts your flow mid-sentence.
Cap every recording at 7 minutes maximum regardless of platform. Attention spans fracture after that in digital pedagogy environments. Add chapter markers every 2 minutes so students can scrub back to specific concepts without rewatching your entire introduction. Embed comprehension checks using Edpuzzle—the free tier covers 20 videos—to force students to answer multiple choice or open response questions before continuing past certain timestamps. Consider transcribing lectures into clean notes for your learning management system to support students sharing devices with siblings or those who process written text faster than audio explanations.
Your voice behaves differently through a microphone than across a physical classroom. Increase your speaking volume 20% over your normal online teaching voice. Digital compression algorithms strip away vocal energy and high frequencies, making you sound flat and bored even when you're genuinely enthusiastic about quadratic equations. Pause strategically every 45 seconds, counting silently in your head if needed. These silences feel agonizing to you during recording, but they give students essential processing time to absorb complex instructions without pausing the video.
Smile while talking. The physical act lifts your soft palate and adds warmth that laptop microphones often filter out into cold, robotic tones. When emphasizing critical points, look directly into the camera lens, not at your own face on the screen preview. This creates artificial eye contact that signals importance to the viewer. Keep your lesson notes at camera level using the Teleprompter app ($15) or simply place sticky notes at the very top of your monitor bezel. This maintains your natural eyeline while keeping your talking points visible without obvious downward glances.
Test your setup before each semester. Open your video conferencing platform and record a 30-second test. Watch for echo, background hum from HVAC systems, and whether your glasses create glare from the key light. I caught a flickering fluorescent bulb last year that gave two students headaches before I noticed. Fix these now, or you'll troubleshoot during your first live class while thirty kids wait.
What Are the Biggest Mistakes New Online Teachers Make?
New online teachers typically make five critical errors: lecturing for more than 15 minutes without interaction, neglecting to record sessions for absent students, overloading platforms with too many apps, ignoring camera presence and lighting, and failing to establish clear digital etiquette norms upfront. These mistakes reduce engagement and increase cognitive load.
I learned these the hard way during my first semester of remote education. My students tuned out after twenty minutes of screen sharing. My audio cut out. Three kids couldn't find the assignment because I posted it in the wrong app. Chaos.
The fifteen-minute lecture ceiling is real. When I first started schooling online, I talked for forty minutes straight. By minute twelve, the chat filled with "I don't get it." Attention fractures in synchronous instruction faster than in physical rooms.
Fix it with the 10/2 rule. Teach for ten minutes, then give two minutes for processing. I drop a Poll Everywhere question at the eight-minute mark to check pulse. If someone asks a complex off-topic question, I park it in a shared Google Doc labeled "Parking Lot" and keep moving.
I keep the Parking Lot open in a separate tab. When a student asks about dinosaurs during math, I type the question there and promise to address it Friday. This validates curiosity without sacrificing the current objective. The 10/2 rule keeps my digital pedagogy student-centered.
Failing to record creates equity gaps. Absent students miss content permanently unless you have reliable asynchronous learning backup. Configure your video conferencing platform to auto-record to the cloud. I set mine to delete after thirty days, or you can archive to Google Drive unlimited education storage.
Zoom makes auto-recording simple. In account settings, toggle "Auto-record to cloud" for all meetings. Enable "Optimize for 3rd party video editor" to keep files manageable. Check your district's retention schedule—some require ninety days, others allow immediate deletion.
Legal compliance matters. Post a recording notice in your virtual classroom before hitting the button. Obtain consent per FERPA and your district Acceptable Use Policy. I've seen teachers face compliance issues for skipping this. Avoid common mistakes when managing digital records by documenting your policy upfront.
Platform overload cripples learning. I once used seven apps in one week. Students forgot passwords. Assignments vanished. Now I follow the rule of three: one learning management system (Canvas or Google Classroom), one video platform (Zoom or Meet), and exactly one engagement tool.
Choose that third tool based on your goal:
Teaching a concept? Use a digital whiteboard like Explain Everything.
Checking understanding? Deploy Kahoot.
Collaborating? Open a shared Google Doc.
If the tool doesn't fit one of these buckets, skip it. New teachers often grab every shiny app on Twitter. Resist. When demonstrating a problem, screen sharing your whiteboard beats jumping between tabs. Students lose track when you switch contexts too often.
Poor production quality undermines authority. You don't need a studio, but you need standards. Audio matters most. If students strain to hear, they check out mentally.
Run through this audio checklist before every session:
Mute your notifications.
Use a headset instead of built-in mics.
Test your levels to hit between negative twelve and negative six decibels.
Visually, center your face in the frame. Place your light source in front of you, not behind. I disable virtual backgrounds entirely—they eat bandwidth. Position your camera at eye level. Look at the lens when speaking, not at your own face. I place a sticky note next to my webcam as a reminder.
Missing digital etiquette norms creates daily friction. In week one, co-create a Video Class Contract with students. Cover camera-on policies, chat usage, and virtual hand-raising protocols. Post it in your learning management system for reference.
Establish one specific rule: thumbs up reaction means "I understand," chat means "I have a question," and unmuting happens only when called. I enforce this ruthlessly for the first month. Once habits form, online teaching feels structured rather than chaotic. This discipline supports maintaining a healthy work-life balance because you're not managing constant disruption.
The contract lives as a shared document that every student signs digitally. I review it before major projects. When a student violates norms, I point to the clause we agreed upon. No arguing. The consistency saves minutes every period, which adds up to hours over a term.

Where Does Online Teaching Fit in Your Practice?
Online teaching isn't a temporary fix or a digital version of worksheets. It's a distinct space where synchronous instruction and asynchronous learning serve different purposes. Your learning management system becomes your classroom walls; your video conferencing tool becomes your presence. I've seen teachers treat virtual classrooms as second-tier compared to physical ones, and students feel that energy immediately. The setup you built in these three steps works whether you're teaching hybrid, fully remote, or blending Friday's snow day into Monday's lesson.
Start with one change. Pick the workflow that frustrated you most this week and rebuild it using your new digital structure. Test it with your next class. Notice what shifts when students know exactly where to find materials and you know exactly how to reach them through a screen. The tech stops being the lesson and starts being the tool.
You already have the content knowledge. The question is whether you'll let distance dictate your teaching quality or use these structures to make your instruction more intentional than it was in the building. Which student from this year would thrive if you started tomorrow with just the asynchronous learning workflow you designed today?
Essential Technology and Workspace Setup for Teaching Online
Online teaching demands gear that works every time. Your audio makes or breaks digital distance learning. Students forgive blurry video when your voice sounds present. They won't forgive sounding like you're teaching from a submarine. I've tested three setups across different price points while teaching online from my spare bedroom.
For most synchronous instruction, the Blue Yeti USB ($129) handles classes under 25 students. It sits on your desk and picks up your voice clearly without software fiddling. Position it 6-8 inches from your mouth. Any farther and you sound distant. Any closer and you breathe into their earbuds.
Teaching from a busy household? The Jabra Evolve2 40 headset ($99) blocks background noise with its foam ear cushions. I used this when my construction-worker neighbor decided 9 AM was jackhammer time. The mic arm keeps your voice consistent even when you turn to reference your learning management system.
For asynchronous learning videos that last, upgrade to the Samson Q2U XLR ($69) paired with a Focusrite Scarlett Solo ($119). This combo gives you broadcast quality. I record my math explanations with this setup. The difference is noticeable when students rewatch videos at 2x speed.
Lighting matters more than your camera. You need 5600K color temperature and at least 800 lumens. Position your light at a 45-degree angle to eliminate shadows under your eyes. You don't want to look like you're telling ghost stories during your video conferencing sessions.
Three options work. The Neewer 18-inch ring light ($35) gets the job done. For teachers thinking about career growth, a well-written cover letter for teaching job can help present your online teaching experience professionally. The Elgato Key Light Mini ($129) adjusts via app and mounts cleanly. Or use a north-facing window—free, but unreliable in December. Pair any option with virtual classroom setup best practices to get your positioning right.
Place your webcam at eye level exactly. Use a laptop stand or a stack of books. Looking down at your students puts you in a position of accidental authority. Looking up at them invites chaos. Eye level creates conversation.
Your internet connection determines whether screen sharing flows or stutters. You need 10 Mbps upload minimum for 1080p teaching. Run an Ethernet cable directly to your laptop if possible. WiFi drops when your spouse streams Netflix or your teenager uploads TikToks during your live sessions.
If you must use WiFi, follow three router rules. Raise the unit 4 feet off the ground—shelves work better than floors. Maintain clear line-of-sight between router and teaching space; walls slow signals. Keep it 5 feet from microwaves or baby monitors. These devices compete for the same 2.4 GHz frequencies and freeze your connection mid-explanation.
Digital pedagogy requires showing your work live. For math and science demonstrations, grab a document camera instead of fighting with a mouse. The IPEVO VZ-X ($199) connects wirelessly, letting you move around the room while solving equations. The OKIOCAM S ($69) plugs in via USB and handles daily graphing without fuss. Both beat writing with a trackpad.
Physical setup prevents the back pain that ruins virtual online schooling. Your external keyboard should sit at elbow height with wrists straight. Your monitor's top third must align with eye level; never look down at students. If your feet dangle, use a footrest or box. I learned this the hard way after three months of hunching over my kitchen table. Setting up a dedicated home office for teaching online means treating your body like it matters.
Step 1 — Design Your Digital Classroom Structure and Workflow
You can have the best webcam and fastest internet, but without a clear structure, your online teaching falls apart by Wednesday. I learned this the hard way during my first semester in a district online academy. Kids couldn't find assignments. Parents emailed daily asking where things were. I spent more time managing confusion than teaching content. Structure is not optional in remote teaching. It is the skeleton that holds your digital pedagogy upright when the Wi-Fi flickers and the Chromebooks lag.
Start with your learning management system. Picking the wrong one creates friction for every assignment afterward. Here is how the three major platforms stack up for K-12 virtual classrooms.
Feature | Google Classroom | Canvas LMS | Schoology |
|---|---|---|---|
Initial Setup | 30 minutes | 3 hours | 2 hours |
Storage Limits | 15GB shared | 500MB per file | 100MB per file |
Parent Portal | Limited | Add-on required | Built-in |
Best For | K-12 simple workflows | Higher education rubrics | Middle school |
Winner | Speed | Assessment depth | Family engagement |
I use Google Classroom for my 7th graders because I refuse to spend my Sunday managing complex permissions. If you need weighted grading categories and rubric matrices, Canvas wins. Schoology splits the difference with a parent portal that actually works. For help deciding, read our guide on choosing the right learning management system.
Once you pick your platform, build your folder taxonomy before you post a single resource. Keep your folder depth to three levels maximum. Anything deeper buries materials where students cannot find them. Use this naming convention:
Week01-Resources for readings and videos.
Week01-Assignments for handouts and submission links.
Week01-Discussions for forum prompts and replies.
The leading zeros force chronological sorting. Without them, Week10 appears before Week2. I color-code each week in Google Drive so students can spot the current unit instantly. Visual cues reduce the cognitive load for kids already overwhelmed by virtual learning.
Require specific file naming for submissions: LastName_AssignmentName_Date. When 150 essays hit your inbox, you will thank yourself. I learned this after downloading forty files named "essay.docx" during my first month of remote teaching. Now I deduct points for incorrect filenames. It sounds harsh, but it teaches digital organization skills they will need in high school and college. Consistency matters more than perfection in an online academy.
Set your communication protocols on day one. Promise a 24-hour response time for emails. Commit to 48-hour turnaround for grading feedback. Post these timelines in your syllabus and stick to them. Use the free tier of Calendly or Google Calendar appointment slots for virtual office hours. Students book 15-minute slots instead of emailing "are you available?" ten times a week. Boundaries prevent burnout. I check email at 7 AM and 3 PM only. Students adapt quickly when expectations are clear.
Establish an asynchronous first rule. When a student emails a question applicable to the whole class, post the answer to your LMS discussion board. Then reply to the student with the link. This cuts repetitive emails in half and builds a FAQ library organically. It is a core virtual education classroom management strategy that saves hours. See more tactics in our post on virtual education classroom management strategies. Last year, this single rule reduced my inbox volume by sixty percent during our digital modular distance learning unit.
Balance your synchronous instruction and asynchronous learning deliberately. For secondary students, I use a 60/40 split. Sixty percent happens in self-paced modules built in Google Sites or Canvas modules. Forty percent happens live over video conferencing with screen sharing for direct instruction. High schoolers need time to process independently through digital modular distance learning. They can rewatch video explanations and pause to take notes. Live time becomes precious discussion rather than lecture. This respects their growing autonomy while keeping them connected.
Flip that ratio for elementary. Younger learners need 70 percent synchronous face time. They lack the executive function for independent digital work. Short, live sessions with frequent check-ins work better than long assignments. I taught 3rd grade remotely for six weeks. Thirty-minute Zoom blocks with movement breaks kept them engaged. Asynchronous work was limited to reading and simple math facts. Anything complex required live video conferencing support. Their brains are still learning to manage time. Meet them where they are.
Post your module overviews 48 hours before you teach them. Hattie's Visible Learning research shows teacher clarity carries an effect size of 0.75. When students see learning objectives and success criteria in advance, they learn almost twice as fast. This clarity is the heart of effective digital pedagogy. Structure is not rigid. It is the foundation that lets you improvise when technology fails or a lesson falls flat. With solid workflows, you can focus on teaching instead of troubleshooting.
Step 2 — How Do You Plan Interactive Lessons for Remote Learning?
Plan interactive lessons by breaking content into 10-minute chunks, embedding formative checks every 5 minutes using tools like Pear Deck or Mentimeter, and incorporating breakout rooms for 4-6 students for 7-minute collaborative tasks. Always include a 'hook' activity using multimedia within the first 90 seconds.
Multimedia hooks grab attention faster than my voice ever could. A thirty-second video clip or provocative image activates prior knowledge before I say a word. In remote learning, you compete with TikTok and doorbells; the first ninety seconds determine whether they lean in or check out.
I use the "segment, interact, reset" method for video teaching. Every ten minutes, I switch gears. Two minutes for a multimedia hook—maybe a TikTok clip or provocative image. Seven minutes for content delivery with embedded interaction. Eight minutes for breakout application.
This rhythm prevents the glazed-over stare I see when I lecture past the fifteen-minute mark in online teaching. Teen brains check out without variety; digital pedagogy demands we respect that cognitive limit.
Formative checks happen every five minutes, not at the end. I embed Pear Deck into Google Slides—it's $150 yearly for unlimited presentations, though the free tier gives you five. Mentimeter works with two questions per slide on the free plan. These tools force participation from kids who'd rather mute themselves and disappear during synchronous instruction. The data exports to my learning management system for quick small-group planning next class.
Breakout rooms need structure or they become digital recess. I pre-assign groups in Zoom for long-term projects so students build trust, but use randomization for jigsaw activities. Groups of four to six work best for seven-minute tasks.
Each breakout needs one specific deliverable—one Google Slide answering a posted question, or one solved problem. I broadcast a two-minute warning so they don't waste time panicking about sharing innovative tools to engage and inspire students. Clear protocols turn video conferencing chaos into focused collaboration.
Different tools serve different phases of remote learning. I match the tool to the cognitive load—novelty for introduction, familiarity for review.
Nearpod ($120/year Gold license): VR field trips and collaborative boards for introducing new concepts.
Jamboard (free with Google Workspace): Brainstorming with a fifty-page limit, ideal for synthesis activities.
Slido (free: 3 polls per event): Q&A and word clouds for exit tickets.
Using the wrong tool at the wrong time wastes minutes you don't have in a 45-minute block.
For content that doesn't need real-time interaction, I shift to asynchronous learning via strategies for successful flipped classrooms. This preserves synchronous instruction time for actual dialogue rather than passive consumption. My digital distance education mission prioritizes human connection over screen sharing marathons. Recorded lessons let students pause and rewind, which they can't do during live video teaching.
Replacing "turn and talk" requires creativity in web based learning. I assign Partner A and Partner B, then push them into private chat pairs for ninety seconds. They paste evidence from the text or debate the prompt before returning to whole-group video conferencing. This keeps the social aspect of learning alive even through screens.
Instead of hand-raising, I use reaction buttons or "waterfall" chats where everyone types answers but hits enter only on my count of three.
For cold calling, Wheel of Names or ClassDojo randomizer maintains the accountability of in-person questioning without the awkward silence of video teaching delays.
Step 3 — Master Video Teaching Techniques for Virtual Education
Your webcam replaces your whiteboard in virtual education. Position it wrong, and students spend the period staring up your nose. I learned this during my first semester of distance ed when a 4th grader asked why my ceiling fan looked like a helicopter. Whether you're recording for asynchronous learning or hosting live synchronous instruction, technical basics determine if students hear your lesson or get distracted by your laundry pile. This is northstar online learning: clear video keeps focus on content, not production mistakes.
Place your camera lens exactly at eye level. Most laptop cameras sit 6 inches too low, forcing you to look down at students which creates a power dynamic you don't want. Stack textbooks or buy a $12 laptop stand. Sit 2 to 3 feet away from the lens—any closer distorts your face like a funhouse mirror; farther away loses the emotional connection crucial for elementary engagement.
Compose using the rule of thirds: position your eyes on the top horizontal line, leaving negative space above your head. Maintain at least 3 feet of depth behind you to avoid looking trapped in a cardboard box. Virtual backgrounds tempt teachers hiding messy rooms, but without proper equipment, you get edge artifacts that flicker when you move. Buy the $20 Neewer green screen kit if you must use them. Otherwise, face a neutral wall or bookshelf. Students forgive boring backgrounds. They fixate on glitchy edges during video conferencing.
Lighting separates amateur video class recordings from professional ones. Adapt traditional three-point lighting for cramped home offices. Your key light—either a large north-facing window or a 5600K LED panel—sits at your 10 o'clock position. This color temperature matches natural daylight and prevents you from looking orange or sickly green. Place your fill light at 2 o'clock, dialed to exactly 50% intensity of your key light. This softens harsh shadows without flattening your features into a ghostly blur.
If you're spending money on one upgrade, skip the 4K camera and buy the $40 Neewer ring light instead. Mount it 12 inches from your face, slightly above eye level, pointing down at a 45-degree angle. Never rely on overhead ceiling fixtures common in apartments. They create raccoon-like shadows under your eyes and highlight every forehead wrinkle, making you look exhausted before you've even taken attendance.
Asynchronous learning videos follow different rules than live teaching. You can't read the room when recording, so you must build engagement checkpoints into the video itself. Use Loom for quick concept explanations—the free tier allows 25 videos up to 5 minutes each, while the $8 monthly plan removes both limits entirely. For longer screen sharing demonstrations or software walkthroughs, Screencastify costs $49 yearly for unlimited recording versus the free version's restrictive 5-minute cutoff that always interrupts your flow mid-sentence.
Cap every recording at 7 minutes maximum regardless of platform. Attention spans fracture after that in digital pedagogy environments. Add chapter markers every 2 minutes so students can scrub back to specific concepts without rewatching your entire introduction. Embed comprehension checks using Edpuzzle—the free tier covers 20 videos—to force students to answer multiple choice or open response questions before continuing past certain timestamps. Consider transcribing lectures into clean notes for your learning management system to support students sharing devices with siblings or those who process written text faster than audio explanations.
Your voice behaves differently through a microphone than across a physical classroom. Increase your speaking volume 20% over your normal online teaching voice. Digital compression algorithms strip away vocal energy and high frequencies, making you sound flat and bored even when you're genuinely enthusiastic about quadratic equations. Pause strategically every 45 seconds, counting silently in your head if needed. These silences feel agonizing to you during recording, but they give students essential processing time to absorb complex instructions without pausing the video.
Smile while talking. The physical act lifts your soft palate and adds warmth that laptop microphones often filter out into cold, robotic tones. When emphasizing critical points, look directly into the camera lens, not at your own face on the screen preview. This creates artificial eye contact that signals importance to the viewer. Keep your lesson notes at camera level using the Teleprompter app ($15) or simply place sticky notes at the very top of your monitor bezel. This maintains your natural eyeline while keeping your talking points visible without obvious downward glances.
Test your setup before each semester. Open your video conferencing platform and record a 30-second test. Watch for echo, background hum from HVAC systems, and whether your glasses create glare from the key light. I caught a flickering fluorescent bulb last year that gave two students headaches before I noticed. Fix these now, or you'll troubleshoot during your first live class while thirty kids wait.
What Are the Biggest Mistakes New Online Teachers Make?
New online teachers typically make five critical errors: lecturing for more than 15 minutes without interaction, neglecting to record sessions for absent students, overloading platforms with too many apps, ignoring camera presence and lighting, and failing to establish clear digital etiquette norms upfront. These mistakes reduce engagement and increase cognitive load.
I learned these the hard way during my first semester of remote education. My students tuned out after twenty minutes of screen sharing. My audio cut out. Three kids couldn't find the assignment because I posted it in the wrong app. Chaos.
The fifteen-minute lecture ceiling is real. When I first started schooling online, I talked for forty minutes straight. By minute twelve, the chat filled with "I don't get it." Attention fractures in synchronous instruction faster than in physical rooms.
Fix it with the 10/2 rule. Teach for ten minutes, then give two minutes for processing. I drop a Poll Everywhere question at the eight-minute mark to check pulse. If someone asks a complex off-topic question, I park it in a shared Google Doc labeled "Parking Lot" and keep moving.
I keep the Parking Lot open in a separate tab. When a student asks about dinosaurs during math, I type the question there and promise to address it Friday. This validates curiosity without sacrificing the current objective. The 10/2 rule keeps my digital pedagogy student-centered.
Failing to record creates equity gaps. Absent students miss content permanently unless you have reliable asynchronous learning backup. Configure your video conferencing platform to auto-record to the cloud. I set mine to delete after thirty days, or you can archive to Google Drive unlimited education storage.
Zoom makes auto-recording simple. In account settings, toggle "Auto-record to cloud" for all meetings. Enable "Optimize for 3rd party video editor" to keep files manageable. Check your district's retention schedule—some require ninety days, others allow immediate deletion.
Legal compliance matters. Post a recording notice in your virtual classroom before hitting the button. Obtain consent per FERPA and your district Acceptable Use Policy. I've seen teachers face compliance issues for skipping this. Avoid common mistakes when managing digital records by documenting your policy upfront.
Platform overload cripples learning. I once used seven apps in one week. Students forgot passwords. Assignments vanished. Now I follow the rule of three: one learning management system (Canvas or Google Classroom), one video platform (Zoom or Meet), and exactly one engagement tool.
Choose that third tool based on your goal:
Teaching a concept? Use a digital whiteboard like Explain Everything.
Checking understanding? Deploy Kahoot.
Collaborating? Open a shared Google Doc.
If the tool doesn't fit one of these buckets, skip it. New teachers often grab every shiny app on Twitter. Resist. When demonstrating a problem, screen sharing your whiteboard beats jumping between tabs. Students lose track when you switch contexts too often.
Poor production quality undermines authority. You don't need a studio, but you need standards. Audio matters most. If students strain to hear, they check out mentally.
Run through this audio checklist before every session:
Mute your notifications.
Use a headset instead of built-in mics.
Test your levels to hit between negative twelve and negative six decibels.
Visually, center your face in the frame. Place your light source in front of you, not behind. I disable virtual backgrounds entirely—they eat bandwidth. Position your camera at eye level. Look at the lens when speaking, not at your own face. I place a sticky note next to my webcam as a reminder.
Missing digital etiquette norms creates daily friction. In week one, co-create a Video Class Contract with students. Cover camera-on policies, chat usage, and virtual hand-raising protocols. Post it in your learning management system for reference.
Establish one specific rule: thumbs up reaction means "I understand," chat means "I have a question," and unmuting happens only when called. I enforce this ruthlessly for the first month. Once habits form, online teaching feels structured rather than chaotic. This discipline supports maintaining a healthy work-life balance because you're not managing constant disruption.
The contract lives as a shared document that every student signs digitally. I review it before major projects. When a student violates norms, I point to the clause we agreed upon. No arguing. The consistency saves minutes every period, which adds up to hours over a term.
Where Does Online Teaching Fit in Your Practice?
Online teaching isn't a temporary fix or a digital version of worksheets. It's a distinct space where synchronous instruction and asynchronous learning serve different purposes. Your learning management system becomes your classroom walls; your video conferencing tool becomes your presence. I've seen teachers treat virtual classrooms as second-tier compared to physical ones, and students feel that energy immediately. The setup you built in these three steps works whether you're teaching hybrid, fully remote, or blending Friday's snow day into Monday's lesson.
Start with one change. Pick the workflow that frustrated you most this week and rebuild it using your new digital structure. Test it with your next class. Notice what shifts when students know exactly where to find materials and you know exactly how to reach them through a screen. The tech stops being the lesson and starts being the tool.
You already have the content knowledge. The question is whether you'll let distance dictate your teaching quality or use these structures to make your instruction more intentional than it was in the building. Which student from this year would thrive if you started tomorrow with just the asynchronous learning workflow you designed today?
Still grading everything by hand?
EMStudio is a free teaching management app — manage your classes, students, lessons, and more!
Learn More
Still grading everything by hand?
EMStudio is a free teaching management app — manage your classes, students, lessons, and more!
Learn More


Notion4Teachers
Notion templates to simplify administrative tasks and enhance your teaching experience.


2026 Notion4Teachers. All Rights Reserved.
Notion4Teachers
Notion templates to simplify administrative tasks and enhance your teaching experience.
2026 Notion4Teachers. All Rights Reserved.
Notion4Teachers
Notion templates to simplify administrative tasks and enhance your teaching experience.
2026 Notion4Teachers. All Rights Reserved.