
12 Classroom Organization Ideas That Actually Work
12 Classroom Organization Ideas That Actually Work

Article by
Milo
ESL Content Coordinator & Educator
ESL Content Coordinator & Educator
All Posts
It's mid-September and your 4th graders are transitioning from math to science. The floor is littered with scraps, three kids are asking where the scissors went, and you just stepped on a rogue glue stick while hunting for the exit tickets you printed this morning.
Classroom organization isn't about Pinterest-perfect bins or color-coded labels that peel off by November. It's building systems that survive real kids, real spills, and the chaos of a Tuesday afternoon when everyone's running on empty and patience is thin. You need storage solutions and transition procedures that students manage themselves without asking where the glue sticks live every single time. When your material management works and visual schedules guide the flow, you teach actual content instead of playing traffic-cop with supplies.
This post covers twelve ideas that work in actual working classrooms. You'll learn how to set up learning centers that build student independence, paperwork systems that don't bury your desk, and desk arrangements that maximize your limited space. These aren't theories. They're systems I've adjusted through years of watching what falls apart and what actually sticks when the October slump hits and kids test every boundary you've set up since August first began.
Still grading everything by hand?
EMStudio is a free teaching management app — manage your classes, students, lessons, and more!
Learn More

Still grading everything by hand?
EMStudio is a free teaching management app — manage your classes, students, lessons, and more!
Learn More
Table of Contents
How to Organize Supplies for Easy Student Access?
Use clear bins with picture labels for elementary students, vertical towers for small spaces, and designated tool stations. Label everything at student eye level (PreK-2) or with text (grades 3+). Systems fail without consistent routines, so teach specific retrieval and return procedures during the first two weeks of school.
Your classroom organization lives or dies by how quickly students can grab what they need and put it back. If they need your permission to get a pair of scissors, you'll spend your day as a supply clerk instead of a teacher.
Choose your weapon. The Sterilite 3-Drawer Cart runs $25 with drawers measuring 12x12x7 inches that hold 15 lbs each—perfect for paper and light math tools in grades PreK-5. The IKEA Trofast frame costs $40 plus $4 per bin; it survives rough handling but takes 90 minutes to assemble. Really Good Stuff Easy-Label Bins cost $8 each, stack when empty, and crack by year three if you overfill them beyond capacity.
Labels fail first. Budget $50-75 for Avery 22807 labels and 3M thermal laminating pouches at 5 mil thickness. Unprotected paper labels peel by month six from sanitizer and student handling. Replace them during winter break, not mid-lesson.
Bin Type | Cost per Student | Prep Time | Best Grade Range | Lifespan |
|---|---|---|---|---|
Sterilite 3-Drawer | ~$6 | 60 min | PreK-5 | 3-4 years |
IKEA Trofast | ~$8 | 90 min | PreK-2 | 5+ years |
Really Good Stuff | ~$2 | 30 min | K-5 | 2-3 years |
Clear Bin Systems with Picture Labels
Use Avery 22807 2x4 inch labels with photo icons for non-readers in PreK-K and simple text for grades 1+. Pair them with Really Good Stuff Clear View Bins or Sterilite 6-quart clear boxes running $2-4 each. The transparency lets students see contents instantly without dumping everything on the floor to check. These bins withstand the drop test from a kindergarten desk, though the lids crack if students stand on them.
Mount labels at 24-36 inches—exactly where kindergarten eyes land when standing. Include both images and words for ELL students. Laminate every label using 3M thermal laminating pouches at 5 mil thickness; unprotected paper dissolves by month six from sanitizer exposure. Budget $50-75 for a complete labeling system including backups.
In a first-grade classroom of 24, use six bins with four students assigned to each. Stock every bin with 20 unifix cubes, four counting bears, and one laminated ten-frame. Students retrieve their designated bin only when they hear the transition chime, preventing traffic jams at the shelf. Teach the procedure explicitly: lift, carry with two hands, return before the timer buzzes.
Vertical Storage Towers for Limited Spaces
The 10-drawer mobile organizer from Honey-Can-Do or Seville Classics measures 13 inches wide by 15 inches deep by 38 inches high. It squeezes into 24-inch corner spaces and costs $35-50. Each drawer holds 15 lbs maximum—fine for paper and art supplies, but never for textbooks. The plastic drawers slide smoothly even when filled with construction paper.
Add locking casters for $12 to prevent tipping when fourth graders lean on open drawers. Assign drawers by table number so Table 1 always uses Drawer 1. This eliminates the "where do I put this?" bottleneck during cleanup. In classrooms under 500 square feet, this vertical solution frees up valuable floor space for reading nooks.
These towers work best for grades 3-6 where students can read vertical labels without picture support. Post labels on the front of each drawer, not the top, so seated students can see them. Keep a teacher supply checklist for inventory management taped to the side so you notice when the glue sticks run low before Friday.
Student-Accessible Tool Stations
Position a 3-tier rolling cart like the IKEA RSKOG ($40) where students can reach it without leaving their seats. Top tier holds daily essentials: scissors, glue sticks, pencils. Middle tier stores weekly rotations like markers and colored pencils. Bottom tier catches overflow and backup stock. The steel construction survives collisions with chair legs better than plastic alternatives.
Run a quota system to stop hoarding. Each table gets exactly two scissors and one glue stick per student—no exceptions. Color-code each tier with 3M 471 vinyl tape matching your table colors so students return items to the correct level. When the tape shows wear, peel it off and reapply fresh strips during winter break.
Assign a materials manager job that rotates weekly. This student checks quotas every Friday during a five-minute cleanup window, flagging missing items with a red cup. Restock from your essential classroom supplies and storage solutions before Monday. This routine builds student independence while keeping you out of the supply business.
What Are the Best Paperwork and Filing Systems?
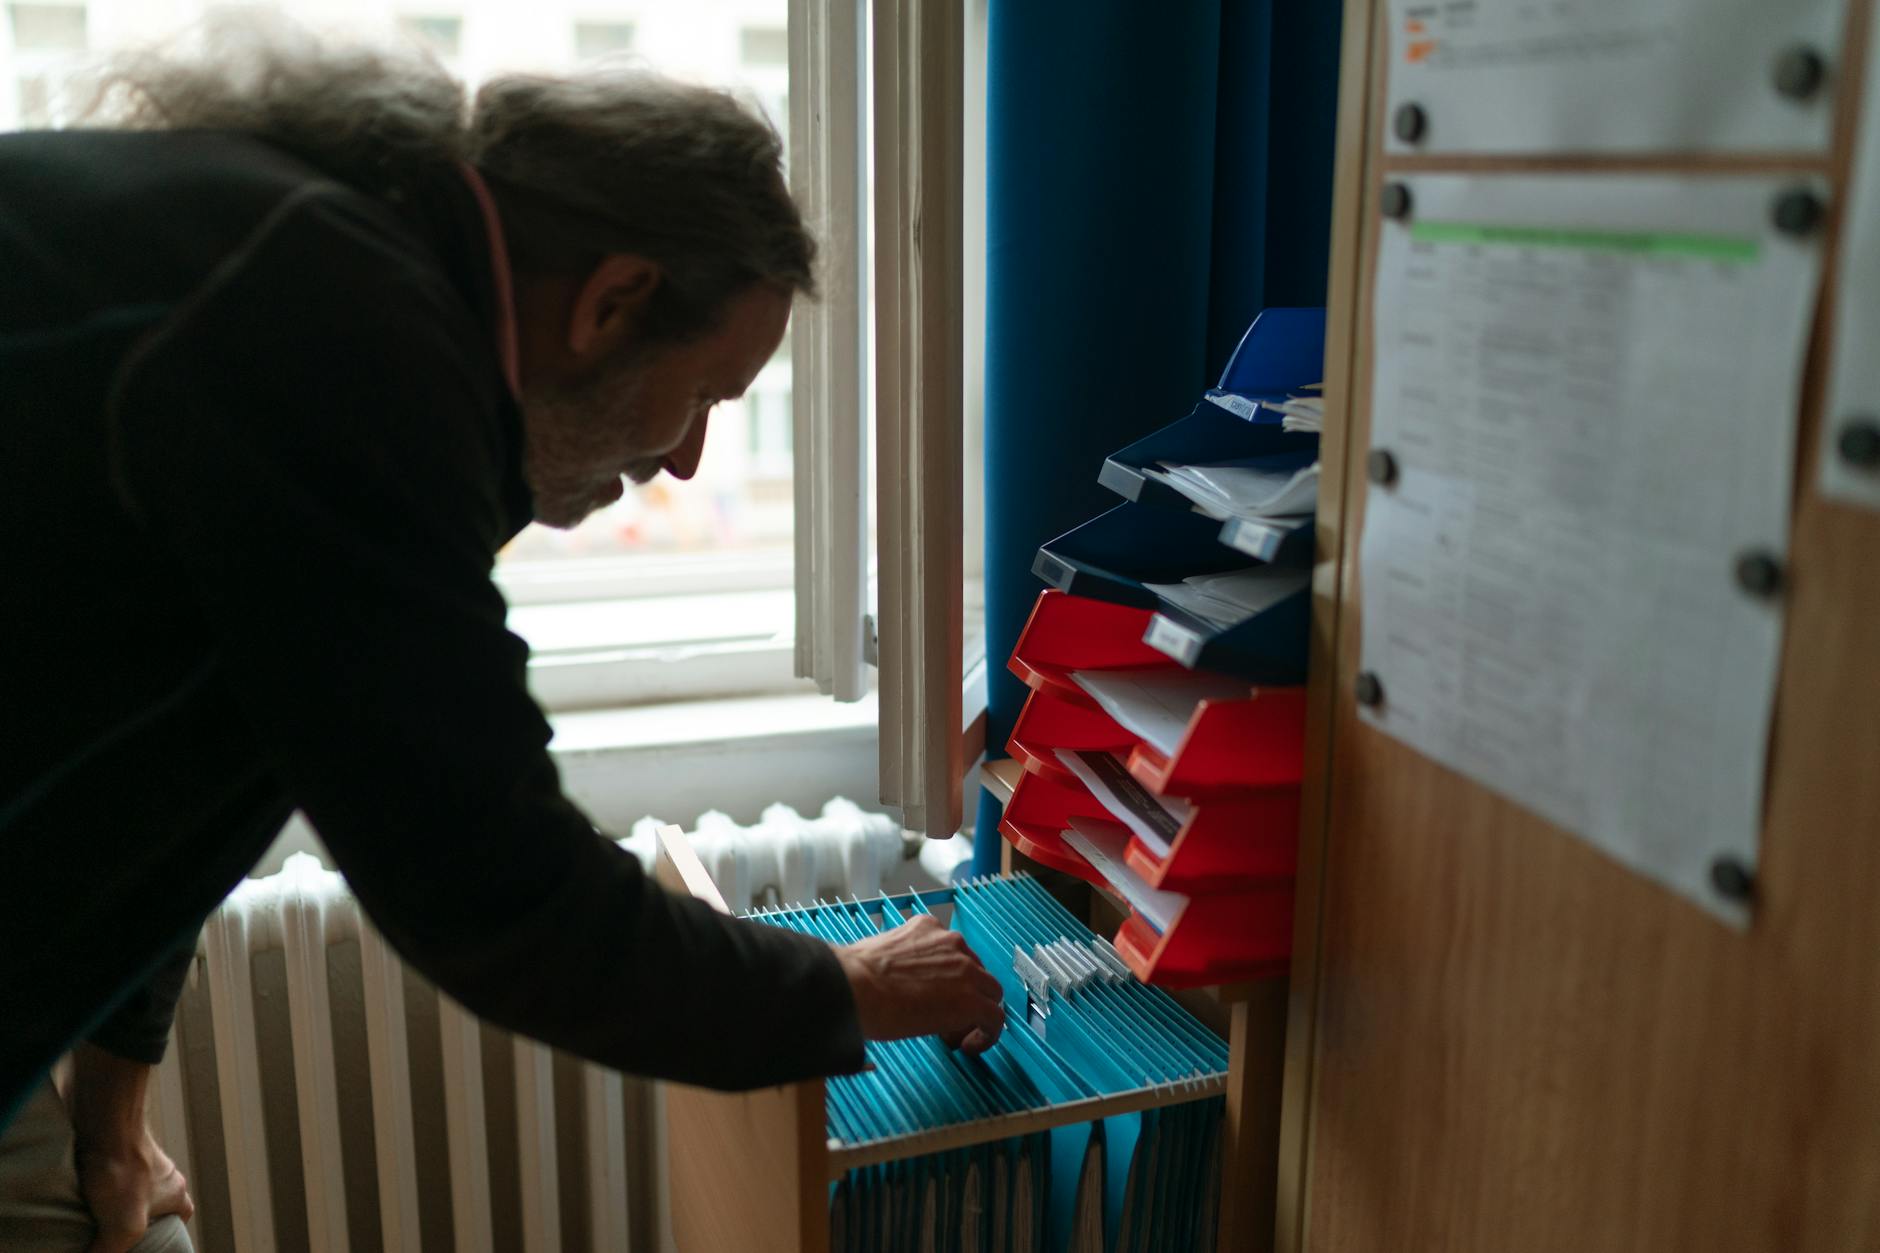
The Friday Filing Basket method reduces daily paperwork to one weekly session. Combine with digital scanning for active documents using Adobe Scan or CamScanner, and color-coded hanging files by subject. Keep originals of legal documents (IEPs, signatures) in physical files while scanning daily work to reduce clutter and free up desk space.
You will drown in paper by October without a system. I learned that the hard way my second year.
The Friday Filing Basket Method
Buy a Sterilite basket—11x14x7 inches, about eight bucks at any big-box store. Drop every incoming paper there Monday through Thursday. Permission slips, late work, admin memos, and notes from the nurse—everything lands here. Do not file immediately. Let it accumulate.
Friday during your planning period, take twenty minutes. Sort into four piles: return to students, file, copy/scan, recycle. Three-hole punch the keepers. File only essentials. Photograph stellar student work for portfolios, then toss the originals. This batching prevents the mental switching cost of handling papers five times daily and preserves your sanity.
This cuts daily filing from fifteen minutes to five. You save roughly forty-five hours per school year. That is an entire work week back for actual teaching instead of shuffling dead trees around your room.
Digital Scanning Workflows for Active Documents
Adobe Scan is free, cleans images automatically, and reads text for searching later. CamScanner costs fifty-nine dollars yearly but batches fifty pages faster with better edge detection for crooked pages. Both dump straight to Google Drive or OneDrive for automatic backup.
Scan immediately after grading while the red pen is still out. Name files with dates: 2024-09-15_Math_Fractions. Create folders by month or unit. Share access with special education coordinators for quick IEP documentation pulls without digging through filing cabinets.
Match the storage to the stakes. Daily math exit tickets? Digital only—scan, record, shred. Summative unit tests? Digital plus physical backup until semester ends. IEPs, 504s, and signed parent contracts? Physical file as primary, digital as secondary. Courts want ink, not pixels.
Keep active documents for nine weeks. Archive to a "Previous Years" folder at semester end. Purge daily practice work after the unit assessment. For full protocols on managing teacher records and paperwork online, check your district retention policies first.
Color-Coded Hanging Files by Subject or Period
Assign colors permanently: Blue for Math, Red for ELA, Green for Science, Yellow for Social Studies, Purple for Intervention. Use Avery ReadyTabs or Pendaflex color folders in a four-drawer lateral file or portable hanging box. This visual component cuts student questions about where things go and supports your overall classroom organization.
Alphabetize student last names within each color section. Put "To Be Graded" at the front, "Graded/Record" at the back. This visual system prevents the dreaded "lost paper" hunt during transition procedures when students are shifting to learning centers or material management stations. It also builds student independence—kids learn to file their own returned work by color without asking you.
Clean files monthly during your Friday session. Move old assessments to archive boxes or scan-and-shred to prevent drawer jams. Never store IEPs, 504 plans, or signed legal documents digitally only—keep the physical paper locked up in a secure cabinet. Digital serves as backup, never primary, for compliance and legal protection.
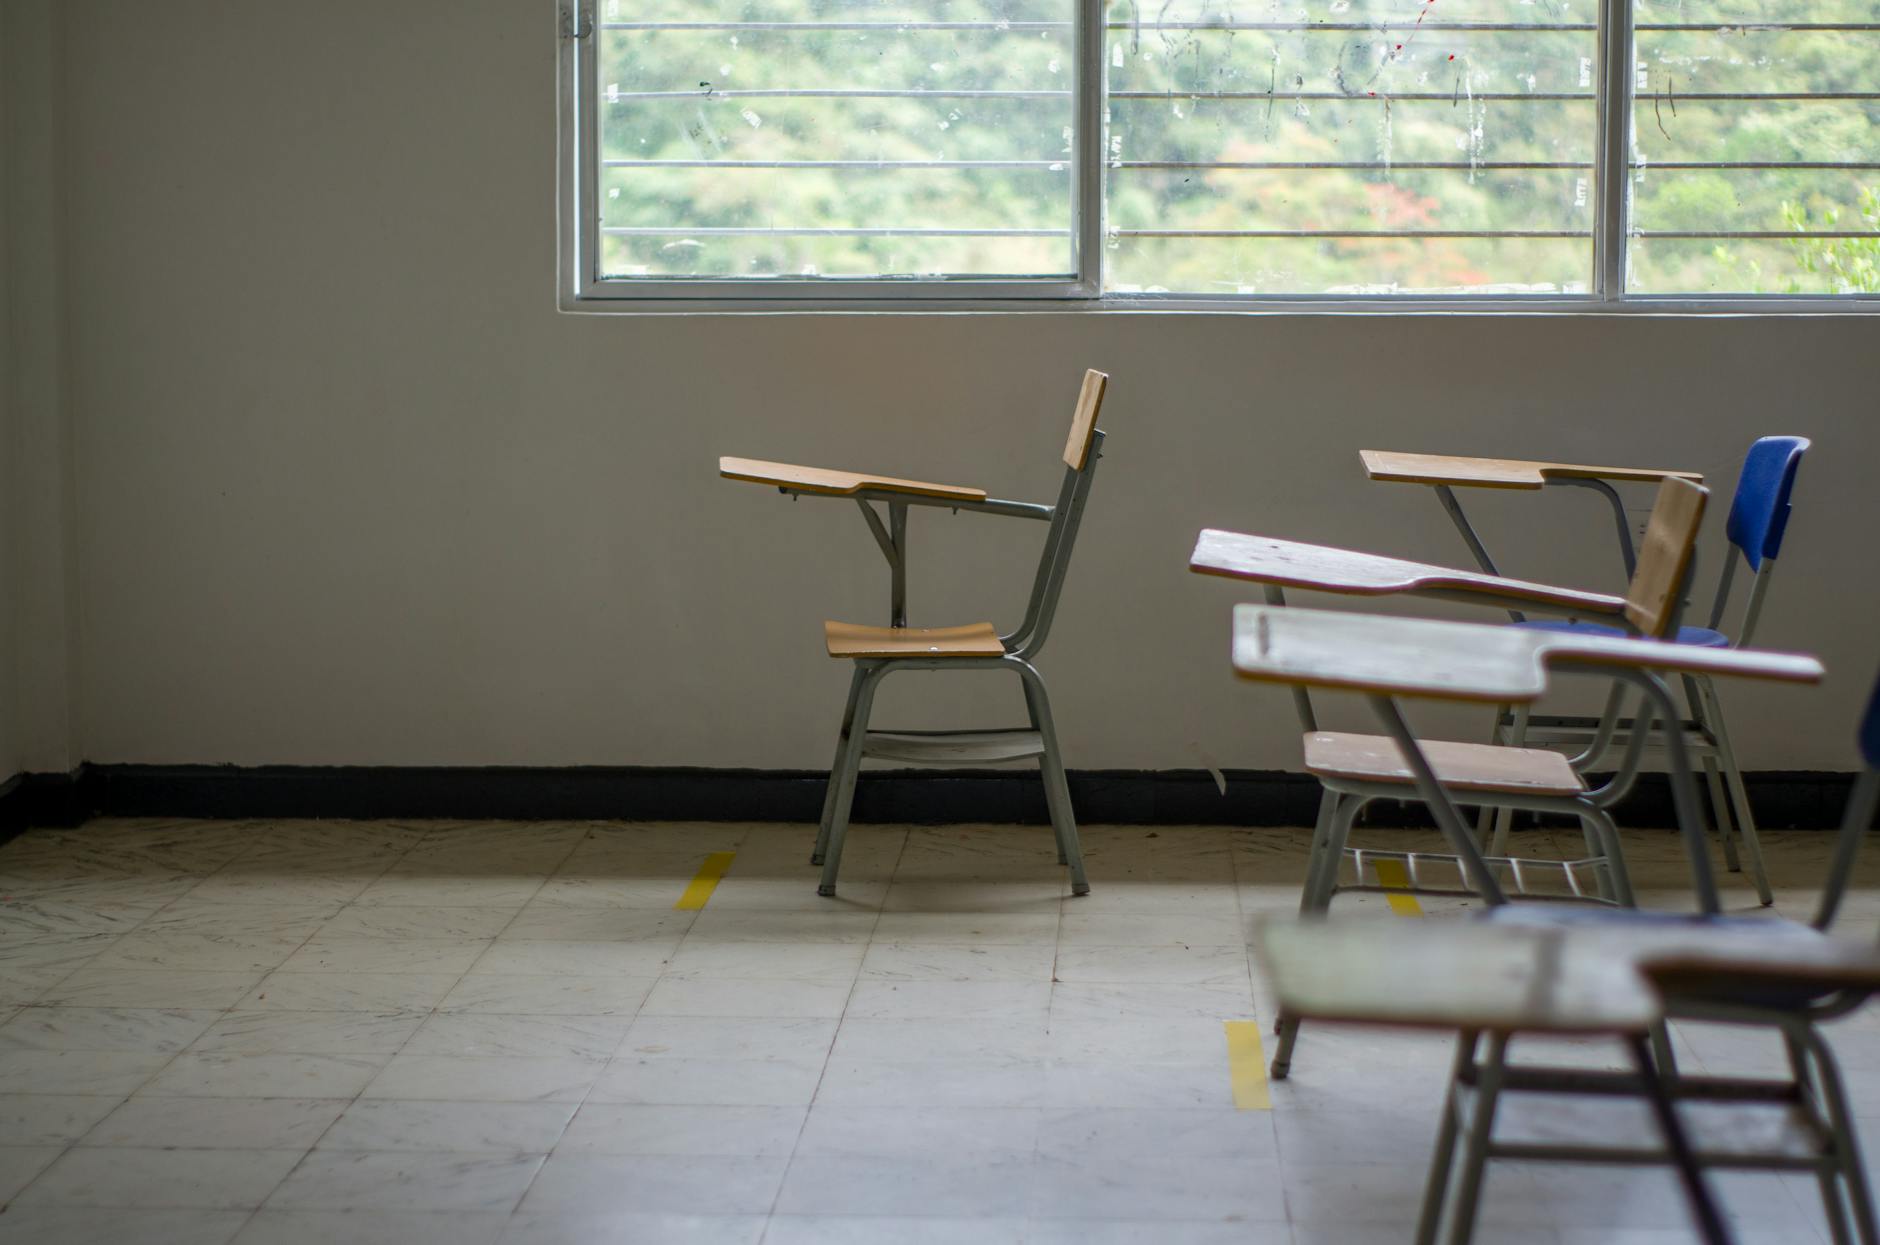
Desk Arrangements That Maximize Learning Space
Match your layout to your square footage and teaching goals. Rooms under 500 square feet need Pod Groups. Spaces over 800 square feet accommodate a Hybrid model. Choose the U-Shape for discussion-heavy content. Revert to rows for standardized testing requiring isolation. This decision tree simplifies your classroom organization plan.
The U-Shape Configuration for Discussion-Based Learning
The U-Shape requires 36 to 42 inches of center clearance for your movement. Place desks only on the outside; inside placement causes crowding. You can fit 28 to 32 students maximum in a standard 28-by-30-foot room. This suits grades 6 through 12 discussion seminars or advanced 5th-grade morning meetings.
Position strong students at the corners to anchor discussion. Stand in the center. Watch the back corners for hidden devices. Install 16-by-20-inch acrylic mirrors ($15 each) for visual access, or avoid this layout with middle schoolers lacking self-regulation.
Pod Groups with Defined Traffic Patterns
Pod Groups seat four to five students at hexagonal tables. Maintain 48-inch aisles between pods for ADA access; 60 inches prevents bottlenecks. Use 2-inch 3M 471 vinyl floor tape to mark traffic patterns and create one-way "roads."
Assign "materials runners" from each pod for material management. This reduces congestion during transitions. This setup suits grades 3 through 6 for collaborative learning centers. It fails in high school if students lack group skills or cheat during assessments. Review effective learning zones and classroom design for traffic flow ideas.
Hybrid Individual and Collaborative Zones
The Hybrid layout places rows in the front two-thirds for direct instruction and standing tables or rugs in the back third for collaboration. Signal rotations with three chimes or a lightswitch flip. This supports student independence during transition procedures.
Standing tables cost around $150 each; floor cushions run $25 to $40. You might fit 20 individual desks and 12 collaborative spaces for a 32-student class. This storage solution saves space compared to extra desks. See flexible seating implementation strategies for setup tips.
How to Create Organizational Systems for Centers and Stations?
Use rotating bin carts with locking wheels for each center, digital checklists on tablets for accountability, and pre-prepped material bags for instant distribution. Centers succeed when transition times stay under 2 minutes and students manage material retrieval independently without teacher intervention.
You need systems that survive 25 eight-year-olds rotating every 15 minutes. Material management breaks down when students hunt for supplies. Fix the logistics, and your types of learning stations that work actually get used.
Adapt tools to your grade using appropriate visual schedules. PreK-K needs photo cue cards on rings instead of written lists. Fourth and fifth graders use laminated clipboards with dry-erase markers. Middle schoolers use digital badges or QR code check-ins.
Watch the failure point: missing pieces kill momentum. Use a red/green cup system at each center. Green means complete, red means missing items. Students report problems immediately, not during cleanup.
Rotating Bin Carts with Activity Compartments
Buy Sterilite 3-drawer wide carts (15x21x24 inches) for $25-30 each. One cart per center. Label drawers with activity numbers and difficulty levels like "Level 1, 2, 3" for differentiation.
Each drawer holds six complete activity sets. Center 3 might contain six ziplock bags, each with 20 base-ten blocks, one place value mat, and one marker. Students grab a bag, work, return it.
Replace standard wheels with 2-inch locking casters ($12 per set). Test it: a 50-pound student should lean on it without movement. This prevents rolling during instruction and keeps transition procedures under two minutes.
Digital Checklists and Accountability Boards
Use Google Keep for free shareable checklists, Classkick for real-time monitoring, or laminated paper on rings for low-tech rooms. Students arrive, grab the device or clipboard, finish the task, mark completion.
They photograph work or check the box, then show you the screen before rotating. You watch completion hit 90% before the two-minute bell sounds. For non-digital rooms, use a magnetic board. Students move their name magnet to "Completed" when done. You see immediately who lags behind.
This builds student independence and frees you to teach.
Pre-Prepped Material Bags for Quick Transitions
Use gallon-sized freezer bags with double zipper seals, not regular storage bags. Label with Sharpie Ultra Fine Point: student name, center name, date. Tape a laminated contents list inside, photographed for non-readers.
Store bags in a shoe-organizer "mailbox" on the wall or inside the center bin. Students grab their bag upon arrival, work, then return it to the designated spot. Nothing floats loose in the center area.
Prep five weeks at once. Twenty bags per student times 25 students equals 500 bags. Store extras in labeled copy paper boxes on a high shelf. These storage solutions cut weekly refill time to 20 minutes versus an hour daily. Solid classroom organization saves your Sundays.
How to Maintain Organization Systems All Year Long?
Maintain systems by implementing monthly 30-minute maintenance checks, rotating student jobs weekly to prevent burnout, and resetting procedures after breaks. Systems collapse when labels peel, bins break, or routines aren't practiced. Replace worn materials during prep periods and re-teach expectations quarterly to sustain organization year-round.
Organization dies in February. Not because your storage solutions failed, but because you stopped checking them.
Sustainable classroom organization relies on classroom procedures that eliminate daily chaos. You can't maintain what you haven't clearly defined. Write down your transition procedures and post them with visual schedules near each station. Kids need to see the steps, not just hear them, or they will keep asking where things go. Clear procedures make maintenance possible.
Set a recurring calendar block for the last Friday of every month. Spend thirty minutes on a four-week rotation. Week one: replace peeling labels and restock tape. Week two: inventory bins for missing items. Week three: rotate student classroom jobs so no one gets stuck sharpening pencils all year. Week four: donate or recycle unused materials that are collecting dust. Keep a "needs attention" sticky note on your desk to capture issues as they arise.
By week six, your students should handle eighty percent of supply replenishment. Post a job chart with roles like librarian, materials manager, and tech support. You shift from manager to monitor. You watch; they fetch. This student independence frees you to teach during learning centers. You won't hunt for scissors. If you're still restocking paper trays in March, you kept the job too long.
Watch for three warning signs. If transitions take longer than three minutes, if twenty percent of your materials are consistently missing, or if you are retrieving supplies while students watch, your material management system is broken. These trigger points demand an immediate reset, not a Band-Aid. Stop the lesson. Fix the system. Then resume.
Treat maintenance like troubleshooting. When October chaos hits—kids forgetting where markers live—reteach your transition procedures from scratch. After winter break, conduct a full inventory and retrain every classroom job; they forgot. Come spring clutter, purge thirty percent of accumulated papers and supplies ruthlessly. If you haven't touched it since September, you don't need it.
These classroom organization ideas only work if you protect the time to maintain them. Block your calendar now before the year starts. Thirty minutes monthly saves you hours of frustration when systems break down mid-lesson. The best storage solutions in the world won't survive a year of neglect.
Your First Week Implementation Checklist
You have five days to build systems that last. Move fast, spend smart, and test everything with real students before Friday. A strong start prevents you from reorganizing in November when you should be teaching vocabulary instead of hunting for glue sticks.
The Five-Day Sequence
Day 1: Move furniture. Create 48-inch traffic paths and position your command zone near the door. Test sight lines to every desk while seated. If you cannot see the pencil sharpener from your teaching chair, move the chair.
Day 2: Label everything. Print labels for bins, cubbies, and learning centers. Mark traffic patterns with tape on the floor so 3rd graders know where to walk. Label before you fill containers so you know what fits where.
Day 3: Distribute supplies and assign jobs. Place pencils, glue sticks, and notebooks in storage solutions at student height. Post visual schedules showing who sharpens pencils and who passes papers. Teach two students where extra paper lives so they can answer "I need another sheet" without interrupting your small group.
Day 4: Set up digital systems. Create folders for student work, parent emails, and your comprehensive classroom management plan template. Sync your gradebook before the first assignment hits. Test your projector and document camera now, not when 25 kids are waiting.
Day 5: Train students. Practice transition procedures five times. Time them. If it takes longer than five minutes, cut a step. Have students move from desks to carpet and back until they can do it silently. This drills material management into muscle memory.
Budget Under $200
Spend money on function, not aesthetics. Buy labels and clear bins first ($80), then a simple filing system ($40). Use free apps for digital organization. Skip the decor until October when your classroom organization systems actually work. A pretty bulletin board means nothing if students cannot find their math journals.
Essential vs. Nice-to-Have
Essential: Labeled bins at student height, clear 48-inch traffic paths, and a command zone with your clipboard, phone, and intercom within arm's reach. These build student independence and keep you teaching instead of searching.
Nice-to-have: Matching color schemes, themed labels, and flexible seating options. Add these only after material management runs without you hovering. Do not buy bean bags until you know where the reading logs live.
Friday at 3pm Check
By Friday afternoon, three things must happen automatically. Students transition between activities in under five minutes without you counting down. You never leave your teaching spot to fetch supplies during a lesson. When a kid forgets a pencil, they walk to the tool station instead of your desk.
If those three metrics fail, your classroom organization elementary systems need repair. Fix them this weekend before bad habits cement. For detailed guidance, grab our survival guide for your first year of teaching.

The Future of Classroom Organization in the Classroom
Organization isn't a destination you reach in August. Your systems will shift as your students grow into student independence and your curriculum demands change. The bins that worked for September might become bottlenecks by March. Stay flexible and treat your setup as a living document that responds to daily classroom reality, not rigid rules.
What's changing now is the push toward true student ownership. Teachers are ditching teacher-centered storage for material management that puts tools directly in kids' hands. Visual schedules and clear transition procedures are replacing constant teacher direction. The goal is a room that runs itself. Kids know the drill whether you're conferencing at the back table or handling a crisis at the door.
Stay ahead by building iteration into your weekly practice. Notice friction points during transition procedures and adjust immediately, not yearly. Ask students which supplies they can actually reach and which remain invisible to them. Your systems should evolve faster than the curriculum changes, creating mental space for actual teaching, not constant management.
How to Organize Supplies for Easy Student Access?
Use clear bins with picture labels for elementary students, vertical towers for small spaces, and designated tool stations. Label everything at student eye level (PreK-2) or with text (grades 3+). Systems fail without consistent routines, so teach specific retrieval and return procedures during the first two weeks of school.
Your classroom organization lives or dies by how quickly students can grab what they need and put it back. If they need your permission to get a pair of scissors, you'll spend your day as a supply clerk instead of a teacher.
Choose your weapon. The Sterilite 3-Drawer Cart runs $25 with drawers measuring 12x12x7 inches that hold 15 lbs each—perfect for paper and light math tools in grades PreK-5. The IKEA Trofast frame costs $40 plus $4 per bin; it survives rough handling but takes 90 minutes to assemble. Really Good Stuff Easy-Label Bins cost $8 each, stack when empty, and crack by year three if you overfill them beyond capacity.
Labels fail first. Budget $50-75 for Avery 22807 labels and 3M thermal laminating pouches at 5 mil thickness. Unprotected paper labels peel by month six from sanitizer and student handling. Replace them during winter break, not mid-lesson.
Bin Type | Cost per Student | Prep Time | Best Grade Range | Lifespan |
|---|---|---|---|---|
Sterilite 3-Drawer | ~$6 | 60 min | PreK-5 | 3-4 years |
IKEA Trofast | ~$8 | 90 min | PreK-2 | 5+ years |
Really Good Stuff | ~$2 | 30 min | K-5 | 2-3 years |
Clear Bin Systems with Picture Labels
Use Avery 22807 2x4 inch labels with photo icons for non-readers in PreK-K and simple text for grades 1+. Pair them with Really Good Stuff Clear View Bins or Sterilite 6-quart clear boxes running $2-4 each. The transparency lets students see contents instantly without dumping everything on the floor to check. These bins withstand the drop test from a kindergarten desk, though the lids crack if students stand on them.
Mount labels at 24-36 inches—exactly where kindergarten eyes land when standing. Include both images and words for ELL students. Laminate every label using 3M thermal laminating pouches at 5 mil thickness; unprotected paper dissolves by month six from sanitizer exposure. Budget $50-75 for a complete labeling system including backups.
In a first-grade classroom of 24, use six bins with four students assigned to each. Stock every bin with 20 unifix cubes, four counting bears, and one laminated ten-frame. Students retrieve their designated bin only when they hear the transition chime, preventing traffic jams at the shelf. Teach the procedure explicitly: lift, carry with two hands, return before the timer buzzes.
Vertical Storage Towers for Limited Spaces
The 10-drawer mobile organizer from Honey-Can-Do or Seville Classics measures 13 inches wide by 15 inches deep by 38 inches high. It squeezes into 24-inch corner spaces and costs $35-50. Each drawer holds 15 lbs maximum—fine for paper and art supplies, but never for textbooks. The plastic drawers slide smoothly even when filled with construction paper.
Add locking casters for $12 to prevent tipping when fourth graders lean on open drawers. Assign drawers by table number so Table 1 always uses Drawer 1. This eliminates the "where do I put this?" bottleneck during cleanup. In classrooms under 500 square feet, this vertical solution frees up valuable floor space for reading nooks.
These towers work best for grades 3-6 where students can read vertical labels without picture support. Post labels on the front of each drawer, not the top, so seated students can see them. Keep a teacher supply checklist for inventory management taped to the side so you notice when the glue sticks run low before Friday.
Student-Accessible Tool Stations
Position a 3-tier rolling cart like the IKEA RSKOG ($40) where students can reach it without leaving their seats. Top tier holds daily essentials: scissors, glue sticks, pencils. Middle tier stores weekly rotations like markers and colored pencils. Bottom tier catches overflow and backup stock. The steel construction survives collisions with chair legs better than plastic alternatives.
Run a quota system to stop hoarding. Each table gets exactly two scissors and one glue stick per student—no exceptions. Color-code each tier with 3M 471 vinyl tape matching your table colors so students return items to the correct level. When the tape shows wear, peel it off and reapply fresh strips during winter break.
Assign a materials manager job that rotates weekly. This student checks quotas every Friday during a five-minute cleanup window, flagging missing items with a red cup. Restock from your essential classroom supplies and storage solutions before Monday. This routine builds student independence while keeping you out of the supply business.
What Are the Best Paperwork and Filing Systems?
The Friday Filing Basket method reduces daily paperwork to one weekly session. Combine with digital scanning for active documents using Adobe Scan or CamScanner, and color-coded hanging files by subject. Keep originals of legal documents (IEPs, signatures) in physical files while scanning daily work to reduce clutter and free up desk space.
You will drown in paper by October without a system. I learned that the hard way my second year.
The Friday Filing Basket Method
Buy a Sterilite basket—11x14x7 inches, about eight bucks at any big-box store. Drop every incoming paper there Monday through Thursday. Permission slips, late work, admin memos, and notes from the nurse—everything lands here. Do not file immediately. Let it accumulate.
Friday during your planning period, take twenty minutes. Sort into four piles: return to students, file, copy/scan, recycle. Three-hole punch the keepers. File only essentials. Photograph stellar student work for portfolios, then toss the originals. This batching prevents the mental switching cost of handling papers five times daily and preserves your sanity.
This cuts daily filing from fifteen minutes to five. You save roughly forty-five hours per school year. That is an entire work week back for actual teaching instead of shuffling dead trees around your room.
Digital Scanning Workflows for Active Documents
Adobe Scan is free, cleans images automatically, and reads text for searching later. CamScanner costs fifty-nine dollars yearly but batches fifty pages faster with better edge detection for crooked pages. Both dump straight to Google Drive or OneDrive for automatic backup.
Scan immediately after grading while the red pen is still out. Name files with dates: 2024-09-15_Math_Fractions. Create folders by month or unit. Share access with special education coordinators for quick IEP documentation pulls without digging through filing cabinets.
Match the storage to the stakes. Daily math exit tickets? Digital only—scan, record, shred. Summative unit tests? Digital plus physical backup until semester ends. IEPs, 504s, and signed parent contracts? Physical file as primary, digital as secondary. Courts want ink, not pixels.
Keep active documents for nine weeks. Archive to a "Previous Years" folder at semester end. Purge daily practice work after the unit assessment. For full protocols on managing teacher records and paperwork online, check your district retention policies first.
Color-Coded Hanging Files by Subject or Period
Assign colors permanently: Blue for Math, Red for ELA, Green for Science, Yellow for Social Studies, Purple for Intervention. Use Avery ReadyTabs or Pendaflex color folders in a four-drawer lateral file or portable hanging box. This visual component cuts student questions about where things go and supports your overall classroom organization.
Alphabetize student last names within each color section. Put "To Be Graded" at the front, "Graded/Record" at the back. This visual system prevents the dreaded "lost paper" hunt during transition procedures when students are shifting to learning centers or material management stations. It also builds student independence—kids learn to file their own returned work by color without asking you.
Clean files monthly during your Friday session. Move old assessments to archive boxes or scan-and-shred to prevent drawer jams. Never store IEPs, 504 plans, or signed legal documents digitally only—keep the physical paper locked up in a secure cabinet. Digital serves as backup, never primary, for compliance and legal protection.
Desk Arrangements That Maximize Learning Space
Match your layout to your square footage and teaching goals. Rooms under 500 square feet need Pod Groups. Spaces over 800 square feet accommodate a Hybrid model. Choose the U-Shape for discussion-heavy content. Revert to rows for standardized testing requiring isolation. This decision tree simplifies your classroom organization plan.
The U-Shape Configuration for Discussion-Based Learning
The U-Shape requires 36 to 42 inches of center clearance for your movement. Place desks only on the outside; inside placement causes crowding. You can fit 28 to 32 students maximum in a standard 28-by-30-foot room. This suits grades 6 through 12 discussion seminars or advanced 5th-grade morning meetings.
Position strong students at the corners to anchor discussion. Stand in the center. Watch the back corners for hidden devices. Install 16-by-20-inch acrylic mirrors ($15 each) for visual access, or avoid this layout with middle schoolers lacking self-regulation.
Pod Groups with Defined Traffic Patterns
Pod Groups seat four to five students at hexagonal tables. Maintain 48-inch aisles between pods for ADA access; 60 inches prevents bottlenecks. Use 2-inch 3M 471 vinyl floor tape to mark traffic patterns and create one-way "roads."
Assign "materials runners" from each pod for material management. This reduces congestion during transitions. This setup suits grades 3 through 6 for collaborative learning centers. It fails in high school if students lack group skills or cheat during assessments. Review effective learning zones and classroom design for traffic flow ideas.
Hybrid Individual and Collaborative Zones
The Hybrid layout places rows in the front two-thirds for direct instruction and standing tables or rugs in the back third for collaboration. Signal rotations with three chimes or a lightswitch flip. This supports student independence during transition procedures.
Standing tables cost around $150 each; floor cushions run $25 to $40. You might fit 20 individual desks and 12 collaborative spaces for a 32-student class. This storage solution saves space compared to extra desks. See flexible seating implementation strategies for setup tips.
How to Create Organizational Systems for Centers and Stations?
Use rotating bin carts with locking wheels for each center, digital checklists on tablets for accountability, and pre-prepped material bags for instant distribution. Centers succeed when transition times stay under 2 minutes and students manage material retrieval independently without teacher intervention.
You need systems that survive 25 eight-year-olds rotating every 15 minutes. Material management breaks down when students hunt for supplies. Fix the logistics, and your types of learning stations that work actually get used.
Adapt tools to your grade using appropriate visual schedules. PreK-K needs photo cue cards on rings instead of written lists. Fourth and fifth graders use laminated clipboards with dry-erase markers. Middle schoolers use digital badges or QR code check-ins.
Watch the failure point: missing pieces kill momentum. Use a red/green cup system at each center. Green means complete, red means missing items. Students report problems immediately, not during cleanup.
Rotating Bin Carts with Activity Compartments
Buy Sterilite 3-drawer wide carts (15x21x24 inches) for $25-30 each. One cart per center. Label drawers with activity numbers and difficulty levels like "Level 1, 2, 3" for differentiation.
Each drawer holds six complete activity sets. Center 3 might contain six ziplock bags, each with 20 base-ten blocks, one place value mat, and one marker. Students grab a bag, work, return it.
Replace standard wheels with 2-inch locking casters ($12 per set). Test it: a 50-pound student should lean on it without movement. This prevents rolling during instruction and keeps transition procedures under two minutes.
Digital Checklists and Accountability Boards
Use Google Keep for free shareable checklists, Classkick for real-time monitoring, or laminated paper on rings for low-tech rooms. Students arrive, grab the device or clipboard, finish the task, mark completion.
They photograph work or check the box, then show you the screen before rotating. You watch completion hit 90% before the two-minute bell sounds. For non-digital rooms, use a magnetic board. Students move their name magnet to "Completed" when done. You see immediately who lags behind.
This builds student independence and frees you to teach.
Pre-Prepped Material Bags for Quick Transitions
Use gallon-sized freezer bags with double zipper seals, not regular storage bags. Label with Sharpie Ultra Fine Point: student name, center name, date. Tape a laminated contents list inside, photographed for non-readers.
Store bags in a shoe-organizer "mailbox" on the wall or inside the center bin. Students grab their bag upon arrival, work, then return it to the designated spot. Nothing floats loose in the center area.
Prep five weeks at once. Twenty bags per student times 25 students equals 500 bags. Store extras in labeled copy paper boxes on a high shelf. These storage solutions cut weekly refill time to 20 minutes versus an hour daily. Solid classroom organization saves your Sundays.
How to Maintain Organization Systems All Year Long?
Maintain systems by implementing monthly 30-minute maintenance checks, rotating student jobs weekly to prevent burnout, and resetting procedures after breaks. Systems collapse when labels peel, bins break, or routines aren't practiced. Replace worn materials during prep periods and re-teach expectations quarterly to sustain organization year-round.
Organization dies in February. Not because your storage solutions failed, but because you stopped checking them.
Sustainable classroom organization relies on classroom procedures that eliminate daily chaos. You can't maintain what you haven't clearly defined. Write down your transition procedures and post them with visual schedules near each station. Kids need to see the steps, not just hear them, or they will keep asking where things go. Clear procedures make maintenance possible.
Set a recurring calendar block for the last Friday of every month. Spend thirty minutes on a four-week rotation. Week one: replace peeling labels and restock tape. Week two: inventory bins for missing items. Week three: rotate student classroom jobs so no one gets stuck sharpening pencils all year. Week four: donate or recycle unused materials that are collecting dust. Keep a "needs attention" sticky note on your desk to capture issues as they arise.
By week six, your students should handle eighty percent of supply replenishment. Post a job chart with roles like librarian, materials manager, and tech support. You shift from manager to monitor. You watch; they fetch. This student independence frees you to teach during learning centers. You won't hunt for scissors. If you're still restocking paper trays in March, you kept the job too long.
Watch for three warning signs. If transitions take longer than three minutes, if twenty percent of your materials are consistently missing, or if you are retrieving supplies while students watch, your material management system is broken. These trigger points demand an immediate reset, not a Band-Aid. Stop the lesson. Fix the system. Then resume.
Treat maintenance like troubleshooting. When October chaos hits—kids forgetting where markers live—reteach your transition procedures from scratch. After winter break, conduct a full inventory and retrain every classroom job; they forgot. Come spring clutter, purge thirty percent of accumulated papers and supplies ruthlessly. If you haven't touched it since September, you don't need it.
These classroom organization ideas only work if you protect the time to maintain them. Block your calendar now before the year starts. Thirty minutes monthly saves you hours of frustration when systems break down mid-lesson. The best storage solutions in the world won't survive a year of neglect.
Your First Week Implementation Checklist
You have five days to build systems that last. Move fast, spend smart, and test everything with real students before Friday. A strong start prevents you from reorganizing in November when you should be teaching vocabulary instead of hunting for glue sticks.
The Five-Day Sequence
Day 1: Move furniture. Create 48-inch traffic paths and position your command zone near the door. Test sight lines to every desk while seated. If you cannot see the pencil sharpener from your teaching chair, move the chair.
Day 2: Label everything. Print labels for bins, cubbies, and learning centers. Mark traffic patterns with tape on the floor so 3rd graders know where to walk. Label before you fill containers so you know what fits where.
Day 3: Distribute supplies and assign jobs. Place pencils, glue sticks, and notebooks in storage solutions at student height. Post visual schedules showing who sharpens pencils and who passes papers. Teach two students where extra paper lives so they can answer "I need another sheet" without interrupting your small group.
Day 4: Set up digital systems. Create folders for student work, parent emails, and your comprehensive classroom management plan template. Sync your gradebook before the first assignment hits. Test your projector and document camera now, not when 25 kids are waiting.
Day 5: Train students. Practice transition procedures five times. Time them. If it takes longer than five minutes, cut a step. Have students move from desks to carpet and back until they can do it silently. This drills material management into muscle memory.
Budget Under $200
Spend money on function, not aesthetics. Buy labels and clear bins first ($80), then a simple filing system ($40). Use free apps for digital organization. Skip the decor until October when your classroom organization systems actually work. A pretty bulletin board means nothing if students cannot find their math journals.
Essential vs. Nice-to-Have
Essential: Labeled bins at student height, clear 48-inch traffic paths, and a command zone with your clipboard, phone, and intercom within arm's reach. These build student independence and keep you teaching instead of searching.
Nice-to-have: Matching color schemes, themed labels, and flexible seating options. Add these only after material management runs without you hovering. Do not buy bean bags until you know where the reading logs live.
Friday at 3pm Check
By Friday afternoon, three things must happen automatically. Students transition between activities in under five minutes without you counting down. You never leave your teaching spot to fetch supplies during a lesson. When a kid forgets a pencil, they walk to the tool station instead of your desk.
If those three metrics fail, your classroom organization elementary systems need repair. Fix them this weekend before bad habits cement. For detailed guidance, grab our survival guide for your first year of teaching.
The Future of Classroom Organization in the Classroom
Organization isn't a destination you reach in August. Your systems will shift as your students grow into student independence and your curriculum demands change. The bins that worked for September might become bottlenecks by March. Stay flexible and treat your setup as a living document that responds to daily classroom reality, not rigid rules.
What's changing now is the push toward true student ownership. Teachers are ditching teacher-centered storage for material management that puts tools directly in kids' hands. Visual schedules and clear transition procedures are replacing constant teacher direction. The goal is a room that runs itself. Kids know the drill whether you're conferencing at the back table or handling a crisis at the door.
Stay ahead by building iteration into your weekly practice. Notice friction points during transition procedures and adjust immediately, not yearly. Ask students which supplies they can actually reach and which remain invisible to them. Your systems should evolve faster than the curriculum changes, creating mental space for actual teaching, not constant management.
Still grading everything by hand?
EMStudio is a free teaching management app — manage your classes, students, lessons, and more!
Learn More
Still grading everything by hand?
EMStudio is a free teaching management app — manage your classes, students, lessons, and more!
Learn More


Notion4Teachers
Notion templates to simplify administrative tasks and enhance your teaching experience.


2026 Notion4Teachers. All Rights Reserved.
Notion4Teachers
Notion templates to simplify administrative tasks and enhance your teaching experience.
2026 Notion4Teachers. All Rights Reserved.
Notion4Teachers
Notion templates to simplify administrative tasks and enhance your teaching experience.
2026 Notion4Teachers. All Rights Reserved.