Teaching Pre K: The 4-Step Classroom Success Framework
Teaching Pre K: The 4-Step Classroom Success Framework

Article by
Milo
ESL Content Coordinator & Educator
ESL Content Coordinator & Educator
All Posts
Teaching pre k is not about preparing children for first grade by making them act like first graders. I walked into a classroom last October where four-year-olds sat in rows doing rainbow tracing for twenty minutes straight. The teacher looked exhausted. The kids looked checked out. That room had it backwards.
Real pre-k is loud. It’s paint on elbows and block towers that crash. When we force emergent curriculum into rigid schedules, we miss the point. Last year, I watched a boy spend ten minutes just trying to balance a cardboard tube on his head. He was exploring physics. I didn't stop him. I scaffolded the moment by handing him a scarf to see if it changed the balance.
But loose doesn't mean lazy. You can't just dump toys on shelves and call it play-based learning. You need systems. You need authentic assessment that happens while they play, not during stressful pull-out testing. You need to know how to turn a tantrum over a broken crayon into a lesson on resilience and social-emotional learning.
That's exactly why I built this four-step framework. After fifteen years of teaching pre k, I've learned that developmentally appropriate practice isn't a free-for-all. It requires structure. These steps cover how you design the environment, how you teach without killing the joy, how you handle the hard behaviors, and how you assess learning without stopping the play. This is what actually works.
Still grading everything by hand?
EMStudio is a free teaching management app — manage your classes, students, lessons, and more!
Learn More

Still grading everything by hand?
EMStudio is a free teaching management app — manage your classes, students, lessons, and more!
Learn More
Table of Contents
Step 1 — How Do You Design a Classroom Environment That Supports Independent Learning?
Design classroom environments with 4-6 defined learning centers (100 sq ft per center), clear visual boundaries using shelving, and open-ended materials like unit blocks and loose parts. Include visual schedules at child eye-level (24-36 inches) and ensure 40% of space allows for gross motor movement. This setup reduces dependency on teacher direction.
I learned this the hard way in my first year of preschool teaching. I arranged desks in rows facing a whiteboard. Chaos. Kids needed me for every decision. Now I design spaces where 4-year-olds know exactly where to go and what to do without asking.
Arranging Learning Centers for Self-Directed Exploration
Arrange your block center with 100 square feet of open floor and shelving borders that define the space without blocking sight lines. Place the art center on tile flooring with a 36-inch clearance radius for messy play and easy water access. Position the quiet library on carpet with bookshelves acting as acoustic buffers against noisier centers. The science discovery table needs natural light from a window. Dramatic play belongs adjacent to blocks so buildings can become houses or shops.
Diagram traffic flow to eliminate runways. Arrange centers in pods, not linear rows. This prevents the running loops that happen when kids race down long corridors of tables. Position your small-group teaching table with your back to the wall. This gives you a 180-degree visual scan of all centers during effective classroom design and learning zones. Never place centers in straight lines that create bowling alley effects where children gain speed. Use a neutral color palette with defined display zones to reduce visual clutter.
Your teaching methods for nursery class succeed or fail based on spatial planning, not lesson plans. Manage center capacity using a necklace or clothespin system. Each center accommodates four to six children max. When all clips are taken, the center is full. Follow NAEYC standards: provide 50 square feet per child indoors for gross motor movement, with 40 percent of your room dedicated to active learning centers, not whole-group gathering spaces.
This ratio prevents overcrowding that leads to conflict and dependency on teacher intervention. The necklace system teaches self-regulation as children learn to read visual cues about space availability. Provide flexible seating options, not rigid chairs.
Creating Visual Schedules That Reduce Anxiety
Mount visual schedules at 24 to 36 inches from the floor, with the bottom of the schedule no lower than 24 inches. Choose your format based on age: horizontal pocket charts work for ages two to three ($25), vertical magnetic strips suit ages three to four ($35), and individual mini-schedule binders help ages four to five or children with ASD ($40). Mount them near cubbies for easy reference.
Progress from object schedules (real items in bags) for two-year-olds, to photo schedules using actual classroom pictures for three-year-olds, to symbolic icon schedules for four-year-olds. Place a red dot checkpoint at transition points. Children pause at the dot to check their schedule before moving to the next activity. This visual cue supports developmentally appropriate practice by meeting children at their current cognitive level and reducing transition meltdowns.
Use a Time Timer visual countdown clock ($30) or sand timers at each center. Give a three-minute warning, then a one-minute warning, followed by your transition signal. This predictable routine reduces anxiety and supports social-emotional learning through clear expectations. The visual countdown helps children develop time concepts without relying solely on adult reminders. These teaching methods for pre primary classes build executive function skills naturally.
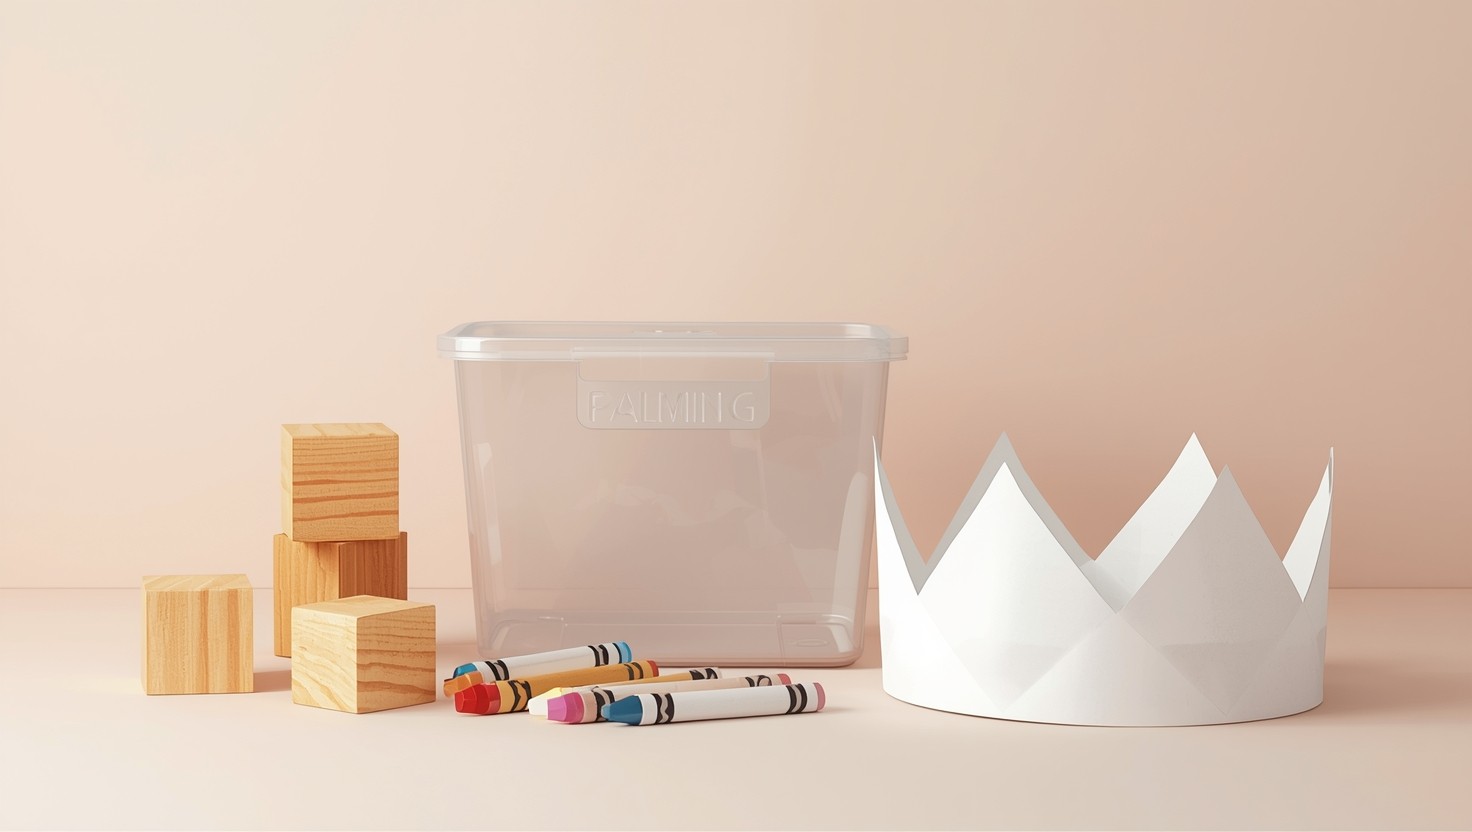
Selecting Open-Ended Materials That Grow With Development
Stock your shelves with open-ended materials that support emergent curriculum and scaffolding. Closed-ended materials like workbooks and electronic toys have one correct answer. Open-ended materials like unit blocks and playdough allow for multiple solutions. Build your starter set for under $100: 68-piece standard unit blocks, loose parts collections including pine cones and fabric scraps, and art provocations like clay and wire. These materials grow with the child from simple stacking to complex construction.
Buy the Loose Parts Ten kit for $50: corks, fabric samples, PVC pipes, stones, shells, buttons, ribbons, cardboard tubes, clothespins, and wooden spools. These support play-based learning and authentic assessment opportunities. Avoid single-use plastics and battery-operated toys that limit creativity. Children return to these materials weekly because the possibilities expand as their skills grow.
Store materials in clear labeled bins with photo and word labels at child height (12 to 18 inches). Rotate 50 percent of materials monthly to maintain novelty while making sure a three-week familiarity period for mastery. This organization creates learning stations that support self-directed exploration. When children can access and return materials independently, you spend less time managing supplies and more time observing learning. This system supports methods of teaching for preschool and pre primary teaching methods that emphasize child autonomy.
Step 2 — Which Intentional Teaching Strategies Work Best for Pre K?
Effective intentional teaching in pre-k combines planned interactions with child-led exploration. Use the 'I do, We do, You do' modelling sequence for new skills, scaffold play by adjusting materials or asking extending questions like 'What would happen if...?', and maintain a 1:4 ratio of teacher-directed to child-choice activities throughout the day.
Intentional teaching is not worksheets at tables. It is watching four-year-olds in the block corner and knowing exactly when to slide in that heavier block.
The HighScope plan-do-review cycle structures this balance. Plan runs ten minutes in small groups where children sketch intentions. Do lasts forty-five to sixty minutes of active learning where you shift roles—stage manager setting up, observer documenting with your clipboard, mediator for conflicts, and planner connecting curriculum. Review takes fifteen minutes recalling what happened. I used this with my morning pre-k class last year; the consistency calmed the room. intentional play and learning strategies help here.
Choose your teaching style based on the objective. Direct instruction works for explicit letter sounds. Guided discovery fits teacher-facilitated science experiments. Free play allows child-led exploration with you observing. I use direct instruction for safety procedures, guided discovery for sensory bins, and free play for the house center.
Modelling and Demonstration Techniques
The 'I do, We do, You do' progression builds muscle memory. I demonstrate with a think-aloud for three minutes—'I notice this block wobbling, so I will try a wider base.' We do guided practice for five minutes using a puppet or peer model. You do gives ten minutes for independent attempts with a self-check visual. Mastery takes three to five days of repetition.
Think-alouds make thinking visible. For scissor grip, I chant 'thumb up' while cutting. For hand-washing, I narrate the twenty-second soap sequence. For parallel play entry, I model standing near and matching activity. I demonstrate at fifty percent speed, face-to-face at eye level, using real scissors not miniatures.
Mirror neurons fire when children watch slow, clear demonstrations. For shy children, I use a puppet model. The puppet attempts the skill first, making mistakes the child can correct. This lowers the stakes.
Scaffolding Play to Meet Specific Learning Objectives
Scaffolding means keeping tasks in the zone of proximal development—things children can do with help but not alone. When a four-year-old's tower collapses, I follow the decision flowchart. First, adapt materials: offer heavier blocks. Second, try peer collaboration: pair with a stable builder. Third, offer a verbal cue: 'What do you notice about the base?' Fourth, provide direct demonstration. I wait ten seconds before intervening again.
I track scaffolds on a gradual release sheet. I note whether I used physical, verbal, material, or peer support, then mark the date I removed the scaffold. Removal indicates mastery. Teaching pre k requires this documentation to avoid hovering.
Using Open-Ended Questions to Extend Critical Thinking
Open-ended questions extend thinking; closed questions kill it. Use these strategies for extending critical thinking to avoid single-word answers.
Do ask 'What do you notice about...?' Don't ask 'What color is this?' Do ask 'How else could you...?' Don't ask 'Is this a triangle?' Do ask 'Why do you think that happened?' Don't ask 'Did you like that?' Do ask 'Tell me more about...' Don't ask 'Is this hard?' Do ask 'How did you figure that out?' Don't ask 'Are you done?' Do ask 'What would happen if...?' Don't ask 'Can you count these?' Do ask 'How could you make that stronger?' Don't ask 'What letter is this?'
Print these ten open-ended questions for your apron pocket:
What would happen if...?
How could you make that stronger?
Tell me about your plan.
What do you notice about...?
How else could you...?
Why do you think that happened?
What is your plan for...?
Tell me more about...
How did you figure that out?
What reminds you of...?
After asking, use the question pause. Count to ten silently. Research shows children need five to seven seconds of processing time. I breathe slowly and wait. Someone always speaks before I finish counting.

Step 3 — How Do You Build Relationships and Manage Classroom Behavior?
Build relationships through consistent morning greeting rituals (eye contact, name use, choice of handshake/hug/wave) and predictable transitions using auditory cues like chimes or songs. Use positive behavior guidance by describing desired behaviors specifically ('Walking feet in the hallway') and offering choices rather than commands, reserving time-outs only for safety-related behaviors.
Teaching pre k means managing tiny humans who are still learning to regulate their emotions. The relationships you build in September determine how smoothly your January runs. Here is what actually works when the crayons hit the floor.
Establishing Morning Connection Rituals
I kneel at the classroom door every morning. My eyes are level with theirs—about 36 inches off the ground. I hold a small choice board showing three options: handshake, hug, or wave. They pick. I use their name twice during our ten-second exchange. "Good morning, Marcus. I see you chose the handshake, Marcus." This isn't wasted time. It is the deposit in their emotional bank account that prevents overdrafts later.
Inside the classroom, we run a Responsive Classroom morning meeting. Greeting takes three minutes. Sharing with a talking stick takes five. A quick group game takes five more. News and announcements—really just reviewing the visual schedule—take three. Total time is fifteen to twenty minutes, max. That aligns with a four-year-old's attention span. Stretch it longer and you lose them.
We track moods on a four-color chart. Blue means tired. Green means calm. Yellow means excited. Red means upset. Each child has a photo token they place on their color. I scan the board while they do this. Three reds means I need to adjust my plans before we start the math lesson. One year, I had a little girl who landed on red every Monday morning for six weeks. Turns out, her parents worked late Sunday nights and she was sleeping in the car. The mood meter showed me what she couldn't say.
Jobs rotate weekly. We have five: weather reporter, door holder, line leader, gardener, and messenger. Each job has a photo cue card showing exactly what success looks like. Every child gets each job twice per semester. The power trip of being line leader is universal. Deny it to a four-year-old and you have created an enemy.
Managing Transitions Between Activities Smoothly
The 20-5-2 protocol saves my sanity. Twenty minutes before cleanup, I announce it casually. At five minutes, I start the Time Timer so they see the red wedge disappearing. At two minutes, I tap each child on the shoulder individually. Then comes the signal. I use a $12 Sanity Saver Wireless Doorbell. One chime means freeze. Two chimes means line up. The sound cuts through the chaos better than my voice ever could.
My transition toolkit has three categories. Auditory includes the doorbell, chime bars, a rainstick for gentle warnings, and cleanup songs like the Barney Clean Up song or Raffi. Visual includes dimming the lights to fifty percent or raising my hand. Tactile includes the vibration plate we stand on for brain breaks or a steady drum beat they can feel in their chests. Transitions should never exceed three minutes in pre-k. After that, you are managing chaos, not children.
Cleanup used to be a nightmare until I implemented zones. Colored tape on the floor divides the room into permanent clean-up territories. The red zone kid always knows they own the block area. I provide child-sized tools: a broom, a dustpan, and spray bottles filled with water only. We use a 5-4-3-2-1 countdown with large visual number cards. The specificity of classroom rules and procedures that transform behavior matters more than the rules themselves.
Implementing Positive Behavior Guidance Techniques
I follow positive behavior support for classroom success at the tier one level. This means universal strategies that work for everyone, not just the problem kids. I reserve time-outs—removal from the group—for safety issues only. Hitting gets a break. Refusing to share does not.
There are three situations where time-outs backfire completely. When a child is emotionally dysregulated, removing them escalates the crisis. When they are overwhelmed by sensory input, isolation feels like punishment for their neurology. When they make a first-time mistake, they need teaching, not exile. In these cases, I use the Cozy Cube.
The Cozy Cube is a 30-by-30-inch space in the corner with a bean bag, a liquid motion timer, a Hoberman sphere breathing ball, and an emotion chart. Use is voluntary. The sand timer limits stays to three minutes. Before returning to the group, the child checks in with me. "Are you ready to be safe with your body?" If they say no, they stay until the next flip of the timer. It is a tool, not a punishment.
I distinguish between three interventions. Redirection swaps an activity when a child seeks attention—you can't throw blocks, but you can throw these beanbags into the basket. Re-teaching happens after the storm passes, calmly reviewing the skill we missed. Logical consequences connect the action to the cleanup—a spilled milk means helping me wipe it. Each serves a different developmental purpose.
Specific praise beats generic compliments. I use the formula: "I noticed you [specific action] which helped [result]." Not "good job," but "I noticed you zipped your coat by yourself which helped you get outside faster." This is behavior-specific praise. It tells them exactly what worked.
I have made five relationship mistakes repeatedly. Rushing morning greetings—now I force three seconds of eye contact. Correcting behavior publicly—now I use private whispers at the child's eye level. Inconsistent boundaries—now we have posted visual rules I actually enforce. Labeling children—now I describe the behavior, not the character. Insufficient wait time—now I count five seconds silently after asking a question. Developmentally appropriate practice means matching my speed to their processing, not the other way around.

Step 4 — How Do You Assess Learning and Partner With Families?
Assess pre-k learning through authentic observation using tools like anecdotal running records or Teaching Strategies GOLD, documenting developmental progress during natural play, not formal testing. Share learning via weekly digital portfolios (Seesaw or ClassDojo) and brief monthly newsletters, making sure families receive specific examples of their child's growth in social-emotional and academic domains.
Testing four-year-olds with worksheets wastes everyone's time. Authentic assessment—central to developmentally appropriate practice—means watching kids build block towers to see spatial reasoning or listening to them negotiate at the dramatic play center to document language growth. We capture what children actually know, not what they can prove sitting still at a table.
Using Authentic Assessment Through Observation
Authentic assessment means watching a child stack blocks to document one-to-one correspondence, not pulling them from centers to fill out worksheets. It is the foundation of play-based learning and pedagogical approaches in early childhood education. We observe natural play to find evidence of learning standards.
Last October I tried documenting my entire 4s class during morning centers. I missed everything. Now I use the focused observation technique. I set a timer for five minutes, watch one child, and write verbatim exactly what they say and do. "The blue block goes here because it is the garage," gets scribbled word for word. Later I align those actions with objectives. I document two to three children weekly, cycling through the full class every six to eight weeks.
Tool | Format | Cost | Best For |
|---|---|---|---|
Teaching Strategies GOLD | Online | $500-1500/year | Comprehensive digital tracking |
Work Sampling System | Paper-based | $200 | Narrative documentation |
DIY Anecdotal Notes | Clipboard | Free | Budget-conscious small classes |
Selection is simple. Classes under twelve can use paper systems like Work Sampling or DIY methods. Over fifteen students, you need the speed of GOLD. Budget under $300 eliminates the comprehensive online option. I use the clipboard carry method regardless: 5x7 sticky notes labeled with names, jot the date, exact quote, and standard code during play, then stick it straight into file folders. No lost memories later.
Documenting Learning Without Disrupting Play
The focused observation technique works because it happens during play, not instead of it. I keep a tablet with the camera app open in my apron pocket for quick capture. Seesaw costs $120 yearly but shares photos instantly; a digital camera works if you batch upload later. The voice capture trick takes thirty seconds: I record a child explaining their block structure to document complex language and STEM thinking simultaneously.
Documentation panels make learning visible for digital assessment tracking tools that support teaching pre k without interrupting flow. I mount three photos, a direct child quote, and the aligned state standard on a 24x36 foam board at child eye-level, updating monthly for $15. Physical portfolios store handwriting progression and artwork. ClassDojo tracks behavior for free. Digital documentation takes five minutes daily; paper portfolios take twenty.
Building Consistent Communication Channels With Families
Consistency builds trust. I post two to three photos with captions on Seesaw weekly, send a monthly newsletter with curriculum overviews, and share quarterly formal assessment summaries. Twice a year we meet for fifteen minutes. I always follow the bright spot protocol: lead every message with a specific strength before mentioning any concern.
Platform choice depends on your goal. ClassDojo gets ninety percent parent signup and tracks behavior beautifully; Seesaw offers translation has and portfolio focus; Remind handles quick text alerts. I make two positive phone calls weekly, spending ten minutes telling specific stories like how Johnny helped a friend tie shoes. Before conferences, I send home a glow and grow form three days prior—one strength, one goal—and gather three work samples showing progression.
Avoid three common failures. Stopping play to test disrupts learning; fix this by observing during natural play. Assessing only academics misses half the child; document social-emotional learning with the same rigor. Surprising parents at conferences destroys trust; fix this with weekly updates so nothing is new. Building comprehensive family engagement plans means never blindsiding families. For parent communication strategies for modern teachers, frequency beats length every time.
Getting Started with Teaching Pre K
Pick one step. Master it. Then add the next. I spent my first year teaching pre k trying to rebuild everything at once and nearly burned out by October. When I focused solely on the classroom environment in September, then layered in intentional teaching strategies by November, the pieces actually stuck. Developmentally appropriate practice isn't a checklist you finish in August. It evolves with your specific group of four-year-olds.
Trust the play-based learning. Trust that relationships matter more than perfect bulletin boards. The emergent curriculum will surface once you stop forcing the theme of the week and start watching what actually captivates your kids during free choice. Social-emotional learning happens in those tiny moments—helping a child share a truck or name their frustration—not just during your scheduled circle time.
Audit your centers this week. Remove three items that require teacher direction.
Write one observation per child by Friday. Look for patterns in their play.
Call two families before Monday. Share something specific their child did well.
Pick one new strategy from Step 2. Try it tomorrow.

Step 1 — How Do You Design a Classroom Environment That Supports Independent Learning?
Design classroom environments with 4-6 defined learning centers (100 sq ft per center), clear visual boundaries using shelving, and open-ended materials like unit blocks and loose parts. Include visual schedules at child eye-level (24-36 inches) and ensure 40% of space allows for gross motor movement. This setup reduces dependency on teacher direction.
I learned this the hard way in my first year of preschool teaching. I arranged desks in rows facing a whiteboard. Chaos. Kids needed me for every decision. Now I design spaces where 4-year-olds know exactly where to go and what to do without asking.
Arranging Learning Centers for Self-Directed Exploration
Arrange your block center with 100 square feet of open floor and shelving borders that define the space without blocking sight lines. Place the art center on tile flooring with a 36-inch clearance radius for messy play and easy water access. Position the quiet library on carpet with bookshelves acting as acoustic buffers against noisier centers. The science discovery table needs natural light from a window. Dramatic play belongs adjacent to blocks so buildings can become houses or shops.
Diagram traffic flow to eliminate runways. Arrange centers in pods, not linear rows. This prevents the running loops that happen when kids race down long corridors of tables. Position your small-group teaching table with your back to the wall. This gives you a 180-degree visual scan of all centers during effective classroom design and learning zones. Never place centers in straight lines that create bowling alley effects where children gain speed. Use a neutral color palette with defined display zones to reduce visual clutter.
Your teaching methods for nursery class succeed or fail based on spatial planning, not lesson plans. Manage center capacity using a necklace or clothespin system. Each center accommodates four to six children max. When all clips are taken, the center is full. Follow NAEYC standards: provide 50 square feet per child indoors for gross motor movement, with 40 percent of your room dedicated to active learning centers, not whole-group gathering spaces.
This ratio prevents overcrowding that leads to conflict and dependency on teacher intervention. The necklace system teaches self-regulation as children learn to read visual cues about space availability. Provide flexible seating options, not rigid chairs.
Creating Visual Schedules That Reduce Anxiety
Mount visual schedules at 24 to 36 inches from the floor, with the bottom of the schedule no lower than 24 inches. Choose your format based on age: horizontal pocket charts work for ages two to three ($25), vertical magnetic strips suit ages three to four ($35), and individual mini-schedule binders help ages four to five or children with ASD ($40). Mount them near cubbies for easy reference.
Progress from object schedules (real items in bags) for two-year-olds, to photo schedules using actual classroom pictures for three-year-olds, to symbolic icon schedules for four-year-olds. Place a red dot checkpoint at transition points. Children pause at the dot to check their schedule before moving to the next activity. This visual cue supports developmentally appropriate practice by meeting children at their current cognitive level and reducing transition meltdowns.
Use a Time Timer visual countdown clock ($30) or sand timers at each center. Give a three-minute warning, then a one-minute warning, followed by your transition signal. This predictable routine reduces anxiety and supports social-emotional learning through clear expectations. The visual countdown helps children develop time concepts without relying solely on adult reminders. These teaching methods for pre primary classes build executive function skills naturally.
Selecting Open-Ended Materials That Grow With Development
Stock your shelves with open-ended materials that support emergent curriculum and scaffolding. Closed-ended materials like workbooks and electronic toys have one correct answer. Open-ended materials like unit blocks and playdough allow for multiple solutions. Build your starter set for under $100: 68-piece standard unit blocks, loose parts collections including pine cones and fabric scraps, and art provocations like clay and wire. These materials grow with the child from simple stacking to complex construction.
Buy the Loose Parts Ten kit for $50: corks, fabric samples, PVC pipes, stones, shells, buttons, ribbons, cardboard tubes, clothespins, and wooden spools. These support play-based learning and authentic assessment opportunities. Avoid single-use plastics and battery-operated toys that limit creativity. Children return to these materials weekly because the possibilities expand as their skills grow.
Store materials in clear labeled bins with photo and word labels at child height (12 to 18 inches). Rotate 50 percent of materials monthly to maintain novelty while making sure a three-week familiarity period for mastery. This organization creates learning stations that support self-directed exploration. When children can access and return materials independently, you spend less time managing supplies and more time observing learning. This system supports methods of teaching for preschool and pre primary teaching methods that emphasize child autonomy.
Step 2 — Which Intentional Teaching Strategies Work Best for Pre K?
Effective intentional teaching in pre-k combines planned interactions with child-led exploration. Use the 'I do, We do, You do' modelling sequence for new skills, scaffold play by adjusting materials or asking extending questions like 'What would happen if...?', and maintain a 1:4 ratio of teacher-directed to child-choice activities throughout the day.
Intentional teaching is not worksheets at tables. It is watching four-year-olds in the block corner and knowing exactly when to slide in that heavier block.
The HighScope plan-do-review cycle structures this balance. Plan runs ten minutes in small groups where children sketch intentions. Do lasts forty-five to sixty minutes of active learning where you shift roles—stage manager setting up, observer documenting with your clipboard, mediator for conflicts, and planner connecting curriculum. Review takes fifteen minutes recalling what happened. I used this with my morning pre-k class last year; the consistency calmed the room. intentional play and learning strategies help here.
Choose your teaching style based on the objective. Direct instruction works for explicit letter sounds. Guided discovery fits teacher-facilitated science experiments. Free play allows child-led exploration with you observing. I use direct instruction for safety procedures, guided discovery for sensory bins, and free play for the house center.
Modelling and Demonstration Techniques
The 'I do, We do, You do' progression builds muscle memory. I demonstrate with a think-aloud for three minutes—'I notice this block wobbling, so I will try a wider base.' We do guided practice for five minutes using a puppet or peer model. You do gives ten minutes for independent attempts with a self-check visual. Mastery takes three to five days of repetition.
Think-alouds make thinking visible. For scissor grip, I chant 'thumb up' while cutting. For hand-washing, I narrate the twenty-second soap sequence. For parallel play entry, I model standing near and matching activity. I demonstrate at fifty percent speed, face-to-face at eye level, using real scissors not miniatures.
Mirror neurons fire when children watch slow, clear demonstrations. For shy children, I use a puppet model. The puppet attempts the skill first, making mistakes the child can correct. This lowers the stakes.
Scaffolding Play to Meet Specific Learning Objectives
Scaffolding means keeping tasks in the zone of proximal development—things children can do with help but not alone. When a four-year-old's tower collapses, I follow the decision flowchart. First, adapt materials: offer heavier blocks. Second, try peer collaboration: pair with a stable builder. Third, offer a verbal cue: 'What do you notice about the base?' Fourth, provide direct demonstration. I wait ten seconds before intervening again.
I track scaffolds on a gradual release sheet. I note whether I used physical, verbal, material, or peer support, then mark the date I removed the scaffold. Removal indicates mastery. Teaching pre k requires this documentation to avoid hovering.
Using Open-Ended Questions to Extend Critical Thinking
Open-ended questions extend thinking; closed questions kill it. Use these strategies for extending critical thinking to avoid single-word answers.
Do ask 'What do you notice about...?' Don't ask 'What color is this?' Do ask 'How else could you...?' Don't ask 'Is this a triangle?' Do ask 'Why do you think that happened?' Don't ask 'Did you like that?' Do ask 'Tell me more about...' Don't ask 'Is this hard?' Do ask 'How did you figure that out?' Don't ask 'Are you done?' Do ask 'What would happen if...?' Don't ask 'Can you count these?' Do ask 'How could you make that stronger?' Don't ask 'What letter is this?'
Print these ten open-ended questions for your apron pocket:
What would happen if...?
How could you make that stronger?
Tell me about your plan.
What do you notice about...?
How else could you...?
Why do you think that happened?
What is your plan for...?
Tell me more about...
How did you figure that out?
What reminds you of...?
After asking, use the question pause. Count to ten silently. Research shows children need five to seven seconds of processing time. I breathe slowly and wait. Someone always speaks before I finish counting.
Step 3 — How Do You Build Relationships and Manage Classroom Behavior?
Build relationships through consistent morning greeting rituals (eye contact, name use, choice of handshake/hug/wave) and predictable transitions using auditory cues like chimes or songs. Use positive behavior guidance by describing desired behaviors specifically ('Walking feet in the hallway') and offering choices rather than commands, reserving time-outs only for safety-related behaviors.
Teaching pre k means managing tiny humans who are still learning to regulate their emotions. The relationships you build in September determine how smoothly your January runs. Here is what actually works when the crayons hit the floor.
Establishing Morning Connection Rituals
I kneel at the classroom door every morning. My eyes are level with theirs—about 36 inches off the ground. I hold a small choice board showing three options: handshake, hug, or wave. They pick. I use their name twice during our ten-second exchange. "Good morning, Marcus. I see you chose the handshake, Marcus." This isn't wasted time. It is the deposit in their emotional bank account that prevents overdrafts later.
Inside the classroom, we run a Responsive Classroom morning meeting. Greeting takes three minutes. Sharing with a talking stick takes five. A quick group game takes five more. News and announcements—really just reviewing the visual schedule—take three. Total time is fifteen to twenty minutes, max. That aligns with a four-year-old's attention span. Stretch it longer and you lose them.
We track moods on a four-color chart. Blue means tired. Green means calm. Yellow means excited. Red means upset. Each child has a photo token they place on their color. I scan the board while they do this. Three reds means I need to adjust my plans before we start the math lesson. One year, I had a little girl who landed on red every Monday morning for six weeks. Turns out, her parents worked late Sunday nights and she was sleeping in the car. The mood meter showed me what she couldn't say.
Jobs rotate weekly. We have five: weather reporter, door holder, line leader, gardener, and messenger. Each job has a photo cue card showing exactly what success looks like. Every child gets each job twice per semester. The power trip of being line leader is universal. Deny it to a four-year-old and you have created an enemy.
Managing Transitions Between Activities Smoothly
The 20-5-2 protocol saves my sanity. Twenty minutes before cleanup, I announce it casually. At five minutes, I start the Time Timer so they see the red wedge disappearing. At two minutes, I tap each child on the shoulder individually. Then comes the signal. I use a $12 Sanity Saver Wireless Doorbell. One chime means freeze. Two chimes means line up. The sound cuts through the chaos better than my voice ever could.
My transition toolkit has three categories. Auditory includes the doorbell, chime bars, a rainstick for gentle warnings, and cleanup songs like the Barney Clean Up song or Raffi. Visual includes dimming the lights to fifty percent or raising my hand. Tactile includes the vibration plate we stand on for brain breaks or a steady drum beat they can feel in their chests. Transitions should never exceed three minutes in pre-k. After that, you are managing chaos, not children.
Cleanup used to be a nightmare until I implemented zones. Colored tape on the floor divides the room into permanent clean-up territories. The red zone kid always knows they own the block area. I provide child-sized tools: a broom, a dustpan, and spray bottles filled with water only. We use a 5-4-3-2-1 countdown with large visual number cards. The specificity of classroom rules and procedures that transform behavior matters more than the rules themselves.
Implementing Positive Behavior Guidance Techniques
I follow positive behavior support for classroom success at the tier one level. This means universal strategies that work for everyone, not just the problem kids. I reserve time-outs—removal from the group—for safety issues only. Hitting gets a break. Refusing to share does not.
There are three situations where time-outs backfire completely. When a child is emotionally dysregulated, removing them escalates the crisis. When they are overwhelmed by sensory input, isolation feels like punishment for their neurology. When they make a first-time mistake, they need teaching, not exile. In these cases, I use the Cozy Cube.
The Cozy Cube is a 30-by-30-inch space in the corner with a bean bag, a liquid motion timer, a Hoberman sphere breathing ball, and an emotion chart. Use is voluntary. The sand timer limits stays to three minutes. Before returning to the group, the child checks in with me. "Are you ready to be safe with your body?" If they say no, they stay until the next flip of the timer. It is a tool, not a punishment.
I distinguish between three interventions. Redirection swaps an activity when a child seeks attention—you can't throw blocks, but you can throw these beanbags into the basket. Re-teaching happens after the storm passes, calmly reviewing the skill we missed. Logical consequences connect the action to the cleanup—a spilled milk means helping me wipe it. Each serves a different developmental purpose.
Specific praise beats generic compliments. I use the formula: "I noticed you [specific action] which helped [result]." Not "good job," but "I noticed you zipped your coat by yourself which helped you get outside faster." This is behavior-specific praise. It tells them exactly what worked.
I have made five relationship mistakes repeatedly. Rushing morning greetings—now I force three seconds of eye contact. Correcting behavior publicly—now I use private whispers at the child's eye level. Inconsistent boundaries—now we have posted visual rules I actually enforce. Labeling children—now I describe the behavior, not the character. Insufficient wait time—now I count five seconds silently after asking a question. Developmentally appropriate practice means matching my speed to their processing, not the other way around.
Step 4 — How Do You Assess Learning and Partner With Families?
Assess pre-k learning through authentic observation using tools like anecdotal running records or Teaching Strategies GOLD, documenting developmental progress during natural play, not formal testing. Share learning via weekly digital portfolios (Seesaw or ClassDojo) and brief monthly newsletters, making sure families receive specific examples of their child's growth in social-emotional and academic domains.
Testing four-year-olds with worksheets wastes everyone's time. Authentic assessment—central to developmentally appropriate practice—means watching kids build block towers to see spatial reasoning or listening to them negotiate at the dramatic play center to document language growth. We capture what children actually know, not what they can prove sitting still at a table.
Using Authentic Assessment Through Observation
Authentic assessment means watching a child stack blocks to document one-to-one correspondence, not pulling them from centers to fill out worksheets. It is the foundation of play-based learning and pedagogical approaches in early childhood education. We observe natural play to find evidence of learning standards.
Last October I tried documenting my entire 4s class during morning centers. I missed everything. Now I use the focused observation technique. I set a timer for five minutes, watch one child, and write verbatim exactly what they say and do. "The blue block goes here because it is the garage," gets scribbled word for word. Later I align those actions with objectives. I document two to three children weekly, cycling through the full class every six to eight weeks.
Tool | Format | Cost | Best For |
|---|---|---|---|
Teaching Strategies GOLD | Online | $500-1500/year | Comprehensive digital tracking |
Work Sampling System | Paper-based | $200 | Narrative documentation |
DIY Anecdotal Notes | Clipboard | Free | Budget-conscious small classes |
Selection is simple. Classes under twelve can use paper systems like Work Sampling or DIY methods. Over fifteen students, you need the speed of GOLD. Budget under $300 eliminates the comprehensive online option. I use the clipboard carry method regardless: 5x7 sticky notes labeled with names, jot the date, exact quote, and standard code during play, then stick it straight into file folders. No lost memories later.
Documenting Learning Without Disrupting Play
The focused observation technique works because it happens during play, not instead of it. I keep a tablet with the camera app open in my apron pocket for quick capture. Seesaw costs $120 yearly but shares photos instantly; a digital camera works if you batch upload later. The voice capture trick takes thirty seconds: I record a child explaining their block structure to document complex language and STEM thinking simultaneously.
Documentation panels make learning visible for digital assessment tracking tools that support teaching pre k without interrupting flow. I mount three photos, a direct child quote, and the aligned state standard on a 24x36 foam board at child eye-level, updating monthly for $15. Physical portfolios store handwriting progression and artwork. ClassDojo tracks behavior for free. Digital documentation takes five minutes daily; paper portfolios take twenty.
Building Consistent Communication Channels With Families
Consistency builds trust. I post two to three photos with captions on Seesaw weekly, send a monthly newsletter with curriculum overviews, and share quarterly formal assessment summaries. Twice a year we meet for fifteen minutes. I always follow the bright spot protocol: lead every message with a specific strength before mentioning any concern.
Platform choice depends on your goal. ClassDojo gets ninety percent parent signup and tracks behavior beautifully; Seesaw offers translation has and portfolio focus; Remind handles quick text alerts. I make two positive phone calls weekly, spending ten minutes telling specific stories like how Johnny helped a friend tie shoes. Before conferences, I send home a glow and grow form three days prior—one strength, one goal—and gather three work samples showing progression.
Avoid three common failures. Stopping play to test disrupts learning; fix this by observing during natural play. Assessing only academics misses half the child; document social-emotional learning with the same rigor. Surprising parents at conferences destroys trust; fix this with weekly updates so nothing is new. Building comprehensive family engagement plans means never blindsiding families. For parent communication strategies for modern teachers, frequency beats length every time.
Getting Started with Teaching Pre K
Pick one step. Master it. Then add the next. I spent my first year teaching pre k trying to rebuild everything at once and nearly burned out by October. When I focused solely on the classroom environment in September, then layered in intentional teaching strategies by November, the pieces actually stuck. Developmentally appropriate practice isn't a checklist you finish in August. It evolves with your specific group of four-year-olds.
Trust the play-based learning. Trust that relationships matter more than perfect bulletin boards. The emergent curriculum will surface once you stop forcing the theme of the week and start watching what actually captivates your kids during free choice. Social-emotional learning happens in those tiny moments—helping a child share a truck or name their frustration—not just during your scheduled circle time.
Audit your centers this week. Remove three items that require teacher direction.
Write one observation per child by Friday. Look for patterns in their play.
Call two families before Monday. Share something specific their child did well.
Pick one new strategy from Step 2. Try it tomorrow.
Still grading everything by hand?
EMStudio is a free teaching management app — manage your classes, students, lessons, and more!
Learn More
Still grading everything by hand?
EMStudio is a free teaching management app — manage your classes, students, lessons, and more!
Learn More


Notion4Teachers
Notion templates to simplify administrative tasks and enhance your teaching experience.


2026 Notion4Teachers. All Rights Reserved.
Notion4Teachers
Notion templates to simplify administrative tasks and enhance your teaching experience.
2026 Notion4Teachers. All Rights Reserved.
Notion4Teachers
Notion templates to simplify administrative tasks and enhance your teaching experience.
2026 Notion4Teachers. All Rights Reserved.