How Teachers Can Digitize Learning Materials More Efficiently
How Teachers Can Digitize Learning Materials More Efficiently

Article by
Milo
ESL Content Coordinator & Educator
ESL Content Coordinator & Educator
All Posts
We all know that teachers are often juggling numerous responsibilities at once, from planning lessons to grading assignments and managing classrooms. In the middle of these tasks, handling a huge amount of printed learning materials can become overwhelming.
This is where digitization becomes important for teachers. It is the process of converting physical and printed educational content into editable text files. The digitization of learning materials can prove beneficial in numerous ways.
For instance, it makes the learning material more accessible and also eases the overall management workload.
Now, how exactly can teachers digitize printed educational content effectively? Well, there is no need to look around. In this blog post, we are going to discuss a step-by-step procedure along with pictorial demonstrations.
Still grading everything by hand?
EMStudio is a free teaching management app — manage your classes, students, lessons, and more!
Learn More

Still grading everything by hand?
EMStudio is a free teaching management app — manage your classes, students, lessons, and more!
Learn More
Table of Contents
Steps Teachers Can Take to Digitize Learning Materials Quickly
Here are the steps that teachers should follow for digitizing learning materials more efficiently.
Capture the Photo of Learning Material
First of all, teachers need to take photos of the learning material. These pictures can then be converted into editable text using online tools. However, while taking photos, they need to ensure multiple things:
The image should be of high quality in terms of resolution. A blurry or low-resolution image will make it difficult for online tools to efficiently recognize and extract information from it, increasing the overall chances of inaccurate results.
Similarly, make sure the image contains the complete text and is taken from the right angle to ensure proper text alignment.
Find a Photo to Text Converter
Once you have photos of the learning material, it is time to look for an online photo-to-text converter, which utilizes OCR technology to scan and extract text from images, scanned documents, or even handwritten notes. This allows teachers to easily edit, update, share, and save the extracted information with minimal effort.
Such tools are easily available on the internet, but you should go with a reliable one.
Try to find a tool that is capable of processing multiple images at once, as this can improve efficiency and save time.
Another feature that you should look for is multilingual support. The photo to text converter should efficiently extract text from images in different languages. This is essential because teachers often work with educational content in different languages.
Also, check if your selected tool accepts images as input in diverse formats such as:
JPG
PNG
JPEG
TIFF
If yes, then it is more likely to be a good option for the digitization of learning materials.
Considering all these factors will help you find and use a reliable photo to text converter.
Upload Photos and Start Digitization
Now, insert the photo of the learning material into the tool. Usually, image to text converters offer multiple upload options. These include manually selecting the image from the local storage, drag-and-drop functionality, and simply pasting the copied photo.
For pictorial illustration, we also selected a photo to text converter by considering the aforementioned points and inserted the following image.
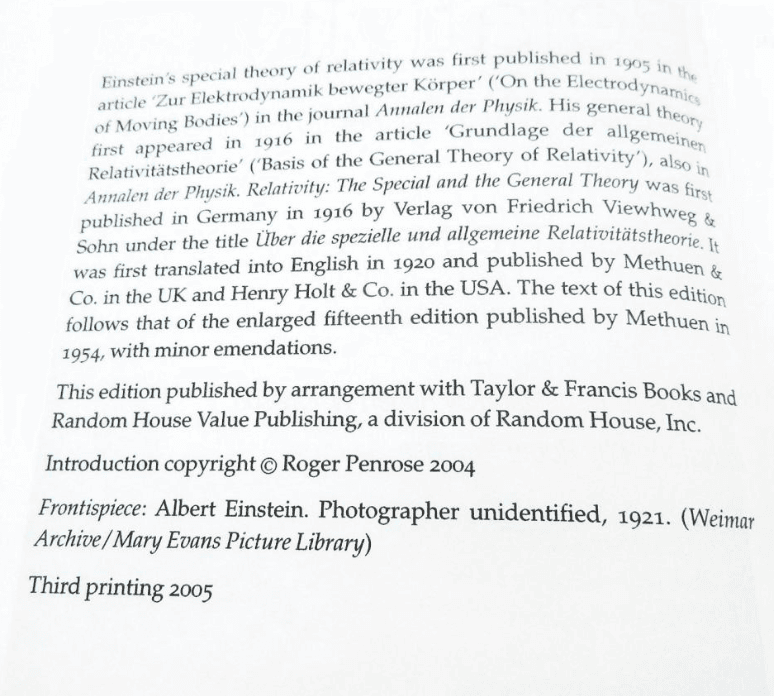
After uploading, this is how the tool’s interface now looks.
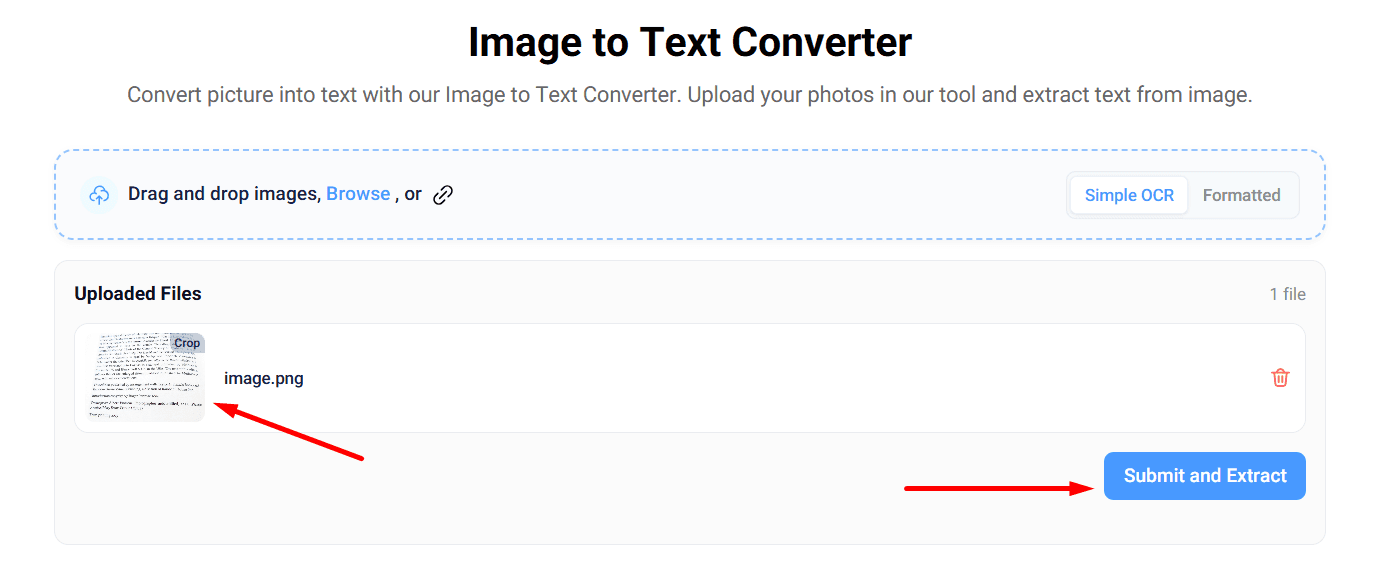
Now, click on the “Submit and Convert” button to start the digitization process.
Review the Output Results
Within a few seconds, the tool will extract the text from the given image into an editable format. This allows teachers to easily edit, copy, and share the information with students, ensuring maximum accessibility.
The extracted text we got for the input image can be seen in the attachment below.

Users can also download the extracted information in a text file.
That’s the process that teachers can follow to digitize learning materials more efficiently.
Wrapping It Up
Digitizing learning materials is something teachers often find necessary. This will not only ease the workload but also make it easier for them to share information with students for a better learning experience. Fortunately, the digitization of educational content is not a difficult or time-consuming task.
Teachers can use photo to text converters, which effectively scan and extract text from images into an editable format. This blog post has explained how teachers can utilize such tools with a step-by-step procedure.
Frequently Asked Questions
What type of learning materials can teachers digitize?
Teachers can consider digitizing lessons, assignments, handwritten notes, presentations, quizzes, and even classroom handouts.
What are the benefits of digitizing educational content for students?
Well, there are a range of benefits. For example, it offers students easier access to learning materials. They can also access information from different devices anytime and anywhere.
Do teachers need technical skills to perform digitization?
No! Online photo-to-text converters are very simple to use. All they need to do is upload the image of educational material and get all the information it contains in an editable format with a single click.
Steps Teachers Can Take to Digitize Learning Materials Quickly
Here are the steps that teachers should follow for digitizing learning materials more efficiently.
Capture the Photo of Learning Material
First of all, teachers need to take photos of the learning material. These pictures can then be converted into editable text using online tools. However, while taking photos, they need to ensure multiple things:
The image should be of high quality in terms of resolution. A blurry or low-resolution image will make it difficult for online tools to efficiently recognize and extract information from it, increasing the overall chances of inaccurate results.
Similarly, make sure the image contains the complete text and is taken from the right angle to ensure proper text alignment.
Find a Photo to Text Converter
Once you have photos of the learning material, it is time to look for an online photo-to-text converter, which utilizes OCR technology to scan and extract text from images, scanned documents, or even handwritten notes. This allows teachers to easily edit, update, share, and save the extracted information with minimal effort.
Such tools are easily available on the internet, but you should go with a reliable one.
Try to find a tool that is capable of processing multiple images at once, as this can improve efficiency and save time.
Another feature that you should look for is multilingual support. The photo to text converter should efficiently extract text from images in different languages. This is essential because teachers often work with educational content in different languages.
Also, check if your selected tool accepts images as input in diverse formats such as:
JPG
PNG
JPEG
TIFF
If yes, then it is more likely to be a good option for the digitization of learning materials.
Considering all these factors will help you find and use a reliable photo to text converter.
Upload Photos and Start Digitization
Now, insert the photo of the learning material into the tool. Usually, image to text converters offer multiple upload options. These include manually selecting the image from the local storage, drag-and-drop functionality, and simply pasting the copied photo.
For pictorial illustration, we also selected a photo to text converter by considering the aforementioned points and inserted the following image.
After uploading, this is how the tool’s interface now looks.
Now, click on the “Submit and Convert” button to start the digitization process.
Review the Output Results
Within a few seconds, the tool will extract the text from the given image into an editable format. This allows teachers to easily edit, copy, and share the information with students, ensuring maximum accessibility.
The extracted text we got for the input image can be seen in the attachment below.
Users can also download the extracted information in a text file.
That’s the process that teachers can follow to digitize learning materials more efficiently.
Wrapping It Up
Digitizing learning materials is something teachers often find necessary. This will not only ease the workload but also make it easier for them to share information with students for a better learning experience. Fortunately, the digitization of educational content is not a difficult or time-consuming task.
Teachers can use photo to text converters, which effectively scan and extract text from images into an editable format. This blog post has explained how teachers can utilize such tools with a step-by-step procedure.
Frequently Asked Questions
What type of learning materials can teachers digitize?
Teachers can consider digitizing lessons, assignments, handwritten notes, presentations, quizzes, and even classroom handouts.
What are the benefits of digitizing educational content for students?
Well, there are a range of benefits. For example, it offers students easier access to learning materials. They can also access information from different devices anytime and anywhere.
Do teachers need technical skills to perform digitization?
No! Online photo-to-text converters are very simple to use. All they need to do is upload the image of educational material and get all the information it contains in an editable format with a single click.
Still grading everything by hand?
EMStudio is a free teaching management app — manage your classes, students, lessons, and more!
Learn More
Still grading everything by hand?
EMStudio is a free teaching management app — manage your classes, students, lessons, and more!
Learn More


Notion4Teachers
Notion templates to simplify administrative tasks and enhance your teaching experience.


2026 Notion4Teachers. All Rights Reserved.
Notion4Teachers
Notion templates to simplify administrative tasks and enhance your teaching experience.
2026 Notion4Teachers. All Rights Reserved.
Notion4Teachers
Notion templates to simplify administrative tasks and enhance your teaching experience.
2026 Notion4Teachers. All Rights Reserved.